Easy Paper Crafts for Kids: Fold-Only and Printable Ideas
Easy paper crafts are the ones a child can finish in one sitting with paper, scissors and a glue stick: a paper chain, an accordion fan, a fortune teller, a seven-piece tangram or a bookmark cut from a printed sheet. The right pick depends less on the craft than on who’s making it. A three-year-old needs straight cuts and big pieces, a seven-year-old can handle folds that stack four layers deep, and a careful ten-year-old can follow a shaped outline all the way around.
Below are 13 ideas grouped by age and by the kind of work involved, each with what to set out, how long it usually takes and the step where it tends to go wrong. Ages and times are our planning estimates, so adjust them to the child in front of you.
| If you have | Try | Time |
|---|---|---|
| A preschooler and 15 minutes | Cutting strips, a cut-and-paste picture | 10 to 20 min |
| No printer, just scrap paper | Paper chain, accordion fan, paper airplane | 10 to 30 min |
| Two kids who want to play afterward | Fortune teller, tangram | 20 to 40 min |
| A quiet hour with an older child | Owl silhouette, shaped bookmarks | 30 to 60 min |
| A window or wall to decorate | Snowflakes, paper doll chain, pinwheel | 20 to 40 min |
Paper crafts for preschoolers: cutting and gluing first
Preschool paper crafts work when the cutting itself is the activity, not a chore before the fun part. Use child-safe scissors with rounded tips and a glue stick rather than liquid glue, which soaks through printer paper and makes it curl.
Keep an adult at the table for the first few sessions.
1. Cutting strips along a dotted line
A sheet of paper with lines drawn across it is a complete craft for a three- or four-year-old. Draw thick straight lines about an inch apart with a marker, then let the child snip the strips off one by one. Ten minutes is plenty.
The strips can go straight into the paper chain below, so nothing’s wasted.
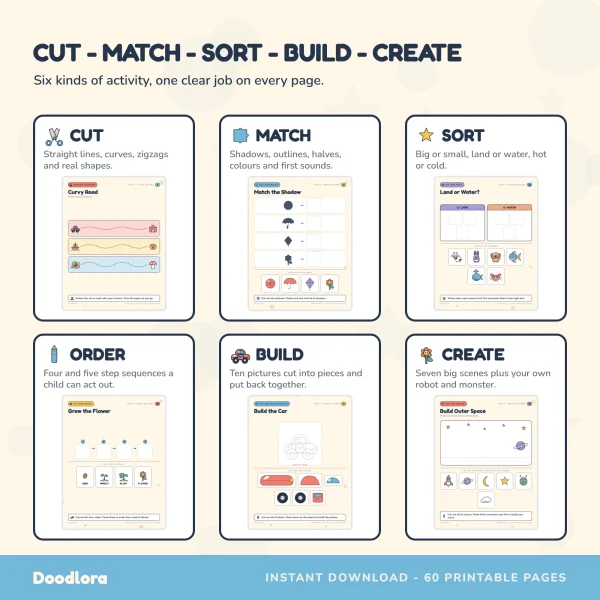
Once straight lines are easy, move on to gentle curves and then zigzags. Curves are harder than they look, because the child has to turn the paper instead of the scissors. That coordination takes practice, and it’s normal for the first curve to wander off the line.
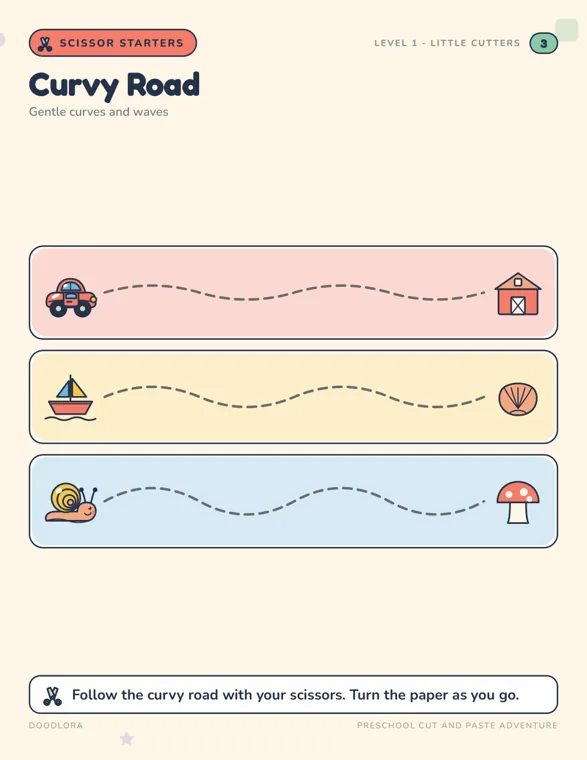
The preschool cut and paste worksheets start with pages like this one. Page 2 is straight and slanted lines, page 3 is the curvy road above and page 4 is a zigzag mountain, so a child steps up one skill at a time.
2. A build-a-picture puzzle
A cut-and-paste puzzle gives a preschooler a clear finish: cut out three or four pieces, then glue them onto an outline to build an apple, a fish or a car. Plan on 15 to 20 minutes for one page.
Cut all the pieces out first and lay them on the outline before any glue comes out. Gluing as you go often sticks the first piece in the wrong place, and there’s no peeling it off again.
In the same book, Build the Apple on page 9 has three pieces and Build the Fish on page 10 has four. Print at 100% or Actual Size. With Fit to Page turned on, the pieces shrink and won’t fill their spaces on the board.
3. A paper chain
A paper chain is the easiest way to turn those cut strips into something a child can hang up. Cut strips about 1 inch wide, loop the first one into a ring and close it, then thread each new strip through the last ring before closing it. One child can make an arm’s length in about 20 minutes.
Glue stick links tend to pop open before they dry, so use tape or a stapler for younger kids.
In December the chain doubles as a countdown: write one small plan inside each link and tear one off each night.
4. Torn-paper collage
Tearing is good practice before scissors, and a torn-paper collage doesn’t need any cutting at all. Give the child a sheet of colored paper to tear into pieces, a glue stick and a simple outline to fill, such as a sun, a tree or a fish. A page takes 15 to 30 minutes.
Rub the glue stick over the background rather than each tiny scrap, then press the pieces down. For more themes and older-kid versions, our collage ideas guide groups them by material.
Fold-only paper crafts for ages 6 and up
These four need only a sheet of printer paper and sometimes scissors, which makes them good for a restaurant table or a waiting room. They all start with a sharp crease.
Run a thumbnail along every fold. A soft crease is why a fan won’t open evenly and a fortune teller won’t move.
5. Accordion fan
An accordion fan takes about 5 minutes and suits kids from about 5 up. Fold a sheet back and forth along the short side in strips about an inch wide, like a folded map, until the whole sheet is pleated. Pinch one end together and wrap a strip of tape around it to make the handle, then spread the other end open.
Decorate the paper before folding, not after. Stripes drawn across the sheet turn into a zigzag pattern once the fan opens.
6. Paper fortune teller
A fortune teller, also called a cootie catcher, is a folded square with eight hidden messages under the flaps. Start with a square, fold the four corners into the center, turn it over and fold the four corners in again. Then fold it in half, slide your fingers into the four pockets and push the points together.
Folding takes about 10 minutes for a child of 6 or 7 with a little help, and the game needs two players. Write the colors on the outside and the messages under the inside flaps before the last fold, while the paper’s still flat. Our screen-free activities for kids page explains how to play it once it’s folded.
7. Paper airplane
A classic dart takes one sheet of letter paper and about 5 minutes. Fold the sheet in half lengthwise and open it again. Fold the two top corners to the center crease, then fold the new slanted edges to the center crease once more. Fold the plane in half along the first crease and turn each side down to make the wings.
Does it dive, or climb straight up and stall? Check that both wings are the same size and sit level, then throw it gently and straight rather than hard. A hallway competition for the longest flight turns one plane into half an hour of play.
8. Paper snowflakes
Paper snowflakes take about 20 minutes and need only paper and scissors. Fold a square into a triangle, fold it in half twice more, then cut notches and curves along the edges and unfold. Three folds make the paper eight layers thick, which is hard work for small hands.
Younger kids can stop after two folds and cut through four layers.
Leave the point where all the folds meet mostly uncut, or the middle falls out. A giant 3D version for older kids is in the Christmas activities for kids list, along with the full folding steps.
Printable paper crafts: the template does the drawing
A printed template takes away the part many kids find hardest, which is drawing a shape they’re happy with. What’s left is careful cutting, so these suit ages 7 and up, or a younger child working with an adult. For every printable here, print at 100% or Actual Size with Fit to Page turned off.
Our guide on how to print coloring pages covers printer settings and which paper holds up best.
9. Cut-out tangram
A tangram is a square cut into seven pieces: two large triangles, a medium triangle, two small triangles, a square and a parallelogram. The puzzle is to use all seven to build an outline without overlapping them. Cutting the set takes 10 minutes; solving can fill an afternoon, and two kids can race each other on the same picture.
Print the template on card stock rather than printer paper. Thin pieces slide around and curl at the corners, and a slightly crooked cut leaves visible gaps in the finished shape.
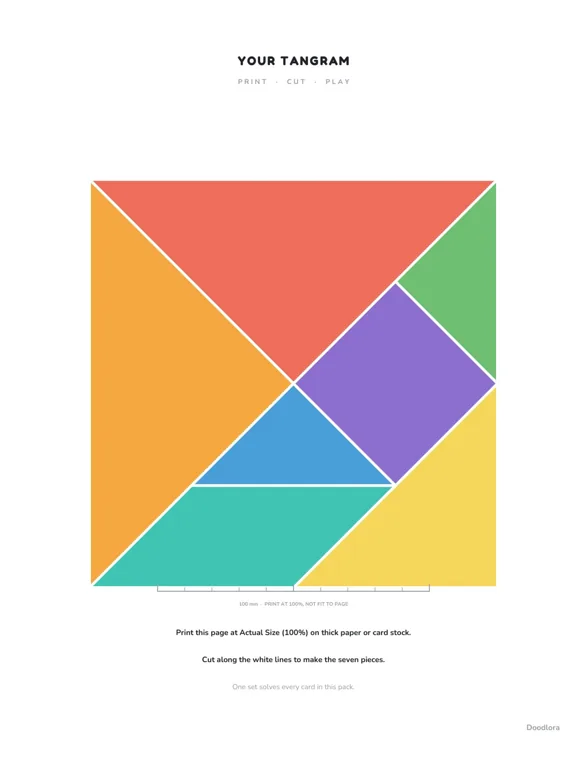
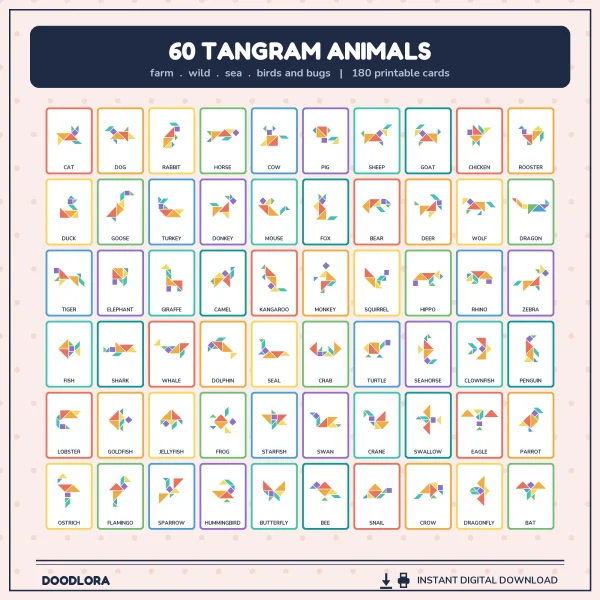
The animal tangram puzzle cards have this cutting page on page 2 and a smaller card-size set on page 3, which lies directly on top of the printed animals. Each of the 60 animals comes on three cards, from a color guide to a solid black outline. Start with the color card, then hand over the solid one. If you’ve never solved one, tangram puzzles for beginners explains which pieces to place first.
10. Owl silhouette cutouts
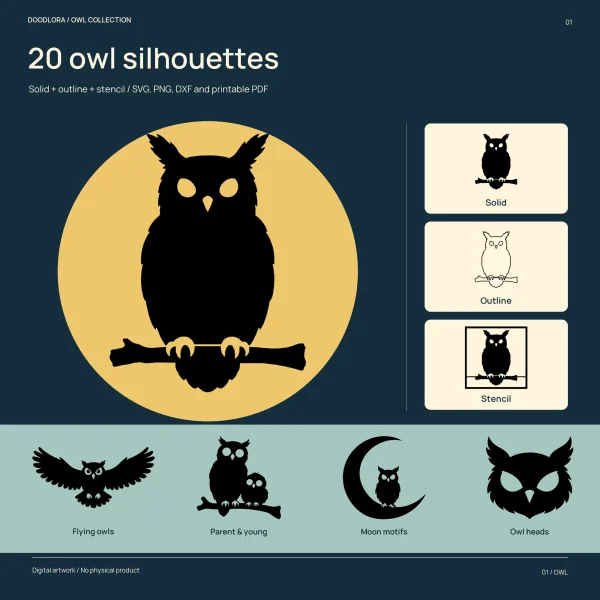
A silhouette is a solid shape cut from one piece of paper, and an owl is a good first one because its outline is mostly smooth curves. Print a solid black owl, cut around the outside and glue it onto colored paper or tape it to a window. With scissors, one owl takes 15 to 20 minutes for a careful 8-year-old.
The framed stencil version is a different job. You keep the black owl and its frame and cut away the white spaces, including the eyes, and some of those spaces are too small for scissors. That one needs a craft knife on a cutting mat, so an adult does the cutting.
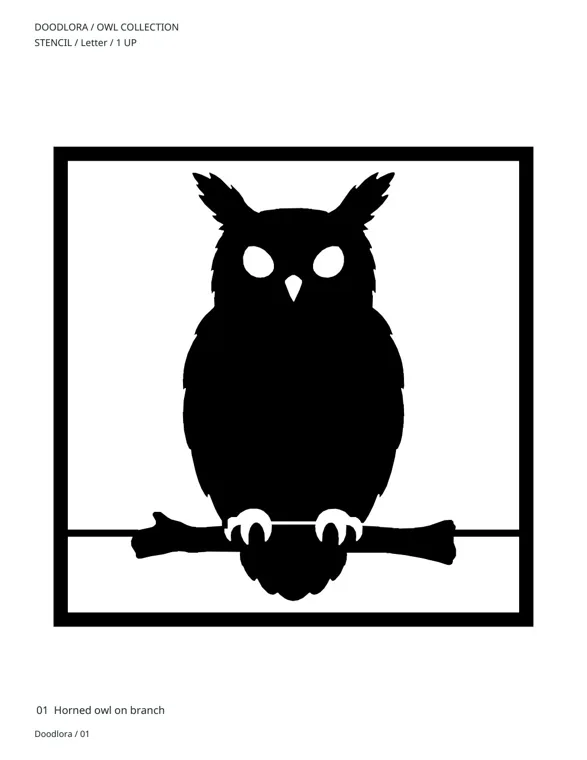
The owl silhouettes come as 20 designs, each as a solid shape, an outline and a framed stencil. The solid four-per-page sheets are the scissors-friendly choice for kids. The SVG and DXF files suit a cutting machine such as a Cricut, but these files carry a personal license: make owls for yourself or to give away, not to sell.
11. Shaped bookmarks
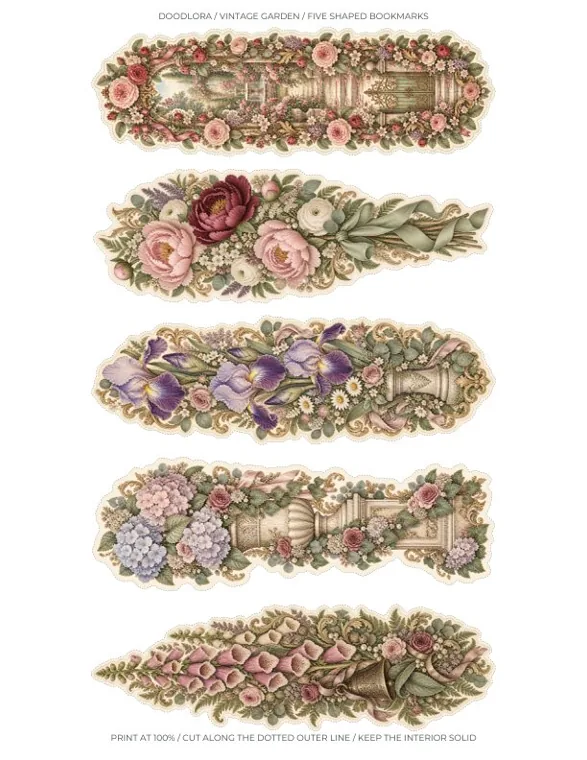
A shaped bookmark follows the outline of its picture instead of being a plain rectangle, and it’s one of the most useful things a child can cut out. Print on card stock, let the ink dry, then cut slowly. One sheet of five takes an older child 30 to 45 minutes of steady concentration.
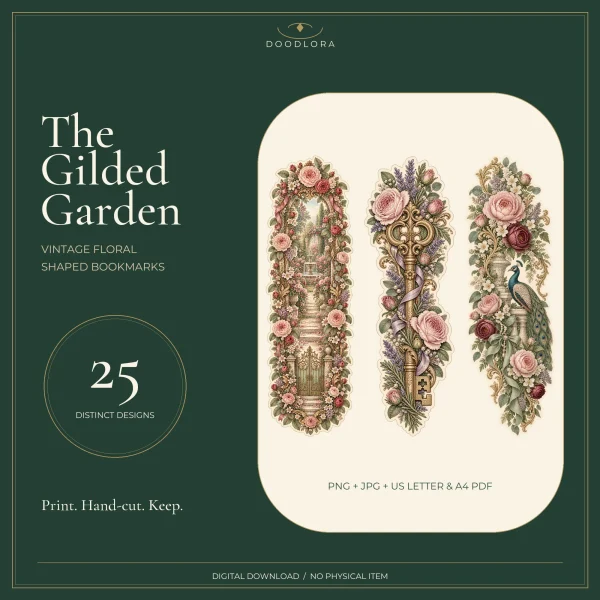
Pick the set by how much help the cutter needs. The vintage garden flower bookmarks print five to a sheet with a dotted line around each one, and every bookmark fits within 2 by 6 inches. The narrow gaps between petals are already filled in, so there aren’t any little windows to cut out.
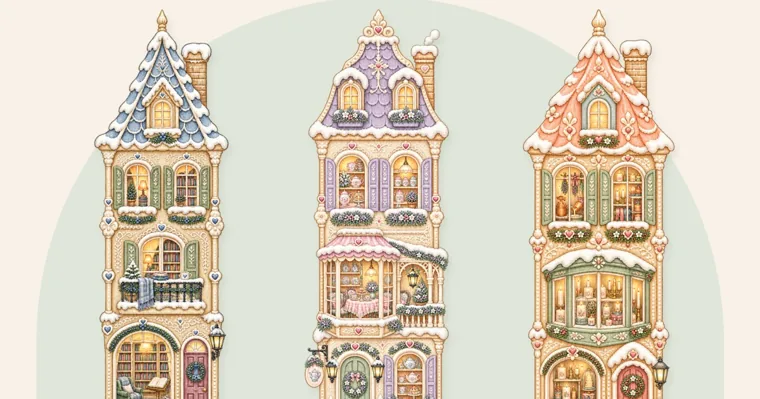
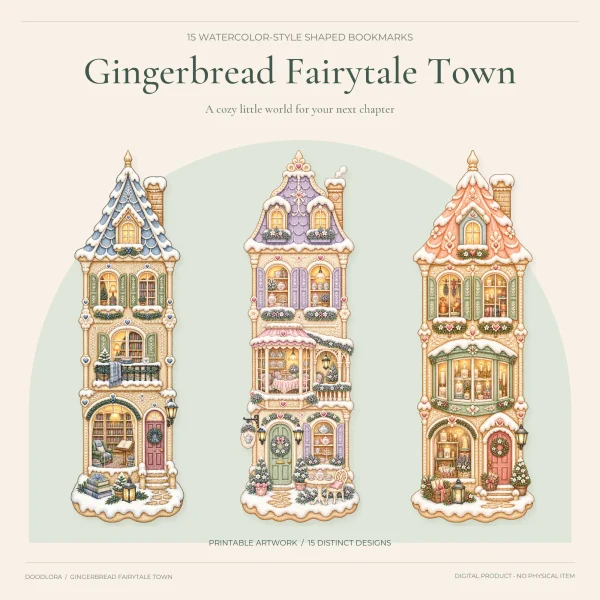
The gingerbread house bookmarks are harder. Each building is 6 inches tall, three to a page, and you cut along the edge of the picture itself, not a printed guide line. Leave a narrow white margin, and save the roof ornaments and windmill sails for an adult, since those thin points tear easily.
Check the 1-inch calibration line on the first sheet with a ruler before printing the rest.
Paper crafts for a window or a wall
These last two make something to put on display, so they suit a classroom or a family afternoon with several kids. Each child can make one piece, and the whole group’s work goes up together as one set of decorations.
12. Paper doll chain
A paper doll chain is a row of figures holding hands, cut in one go from a folded strip. Fold a long strip of paper accordion-style into panels about 2 to 3 inches wide. Draw half a figure on the top panel, with the hand running right off the folded edge. Cut through all the layers, but don’t cut along the folds where the hands meet, then open it out.
Cut through the hands and the chain falls apart into single figures, which is the most common frustration with this one. Mark the hands with a pencil before cutting.
Swap the figure for a star, a tree or a gingerbread man for a holiday window. Kids from about 7 can cut four layers; younger ones do better with two.
13. Paper pinwheel
A pinwheel is a square of paper cut and folded into curled blades, pinned to a stick so it spins in the wind. Cut from each corner of a square toward the center, stopping about an inch short. Bring every other point to the center, overlapping them, and push a pin through all four points and the middle into a pencil eraser.
The pin is the adult’s job.
Leave a little slack between the paper and the eraser so the wheel can turn. Kids from about 6 can do the cutting and folding in 15 minutes, and two-sided scrapbook paper makes the blades look different on each side.
Getting easy paper crafts right: paper, scissors and printing
Most failed paper crafts come down to the wrong paper. Printer paper is right for anything folded several times, like fans, fortune tellers and snowflakes, because card stock cracks along a fold. Card stock is better for anything that gets handled afterward, like tangram pieces and bookmarks. Construction paper tears easily, which suits a torn-paper collage but not fine cutting.
Set up before the child sits down. Lay out scissors, a glue stick, tape, a pencil and a scrap bowl for trimmings, and cut squares in advance if the craft starts from one. For a group, pick one craft and make a sample so kids can see where they’re heading. That bit of preparation saves a lot of waiting and frustration once everyone’s seated.
When a project runs out of steam, let the child stop at a natural point: one owl instead of three, half a chain or a single bookmark. Finishing something small builds more confidence than abandoning something big.
For younger siblings who want to join in, the table projects in activities for 3-year-olds work alongside. More printables to cut, color and play with are on the Doodlora Studio front page.
Printables from this article
Related articles
Printable Bookmarks
Bookmark Ideas: 14 DIY Bookmarks for Kids, Teens and Adults
Fourteen DIY bookmarks sorted by who's making them, from crayon coloring strips for preschoolers to fine-line adult designs, with supplies, time, steps and the usual mistake.
Printable Bookmarks
Homemade Gift Ideas: 15 Easy DIY Gifts by Budget and Time
Fifteen homemade gifts grouped by who you're giving to and how much time you have, each with materials, time, how to wrap it and the mistake to avoid.
Printable Bookmarks
Party Favor Ideas: 20 Party Favors for Kids and Adults
Twenty party favors for toddlers, school-age kids, class parties and adults, each with a cost band, prep time, how to pack it and the mistake to avoid.