Bookmark Ideas: 14 DIY Bookmarks for Kids, Teens and Adults
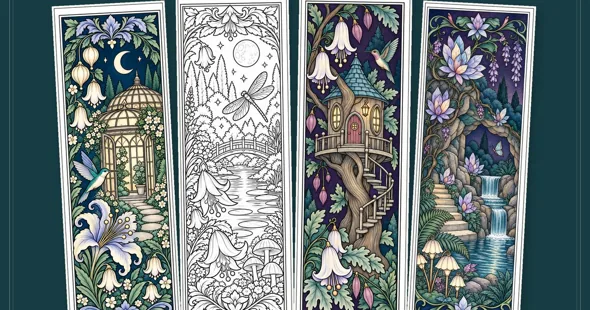
The best bookmark idea depends on who’s holding the scissors. A four-year-old can color a printed animal strip in 15 minutes while an adult does the cutting. A ten-year-old can fold a corner bookmark from one square of paper with no glue at all. An adult with a free evening can spend an hour coloring one fine-line garden scene.
So start with the maker’s age and the time you have, then pick from the table below. The ages and times are our planning estimates, not tested results; slow cutters and careful colorers will take longer, and that’s fine. Most of these need only cardstock, scissors and something to color with.
Pick a bookmark idea by age and time
| Bookmark | Best for | Time | Supplies | Watch out for |
|---|---|---|---|---|
| Coloring bookmark | Ages 3–8, with an adult cutting | 15–20 min | Printout, crayons | Printer shrinking the page |
| Draw-your-own blank strip | Ages 4 and up | 15–30 min | Cardstock, markers | Drawing too close to the edge |
| Sticker and washi tape strip | Ages 3–6 | 10 min | Cardstock, stickers, tape | Stickers peeling off the edge |
| Corner bookmark | Ages 7 and up | 10 min | One square of paper | Using paper that isn’t square |
| Yarn tassel bookmark | Ages 7 and up | 20 min | Cardstock, yarn, hole punch | Hole too close to the top |
| Craft stick bookmark | Ages 6 and up | 30 min plus drying | Jumbo craft stick, paint | Thick decorations that crack the book spine |
| Paper clip bookmark | Ages 6 and up | 15 min | Paper clip, paper shape, glue | Clip pressing a dent into thin pages |
| Adult coloring bookmark | Teens, adults | 1–2 hours | Printout, colored pencils | Crayons in tiny spaces |
| Watercolor strip | Teens, adults | 45 min plus drying | Watercolor paper, painter’s tape | Paper curling while wet |
| Pressed flower bookmark | Ages 8 to adult | 20 min, after the flowers dry | Dried flowers, contact paper | Flowers that aren’t fully dry |
| Shaped floral bookmark | Ages 10 to adult | 30–45 min per sheet | Printout, small scissors | Cutting inside the outline |
| Writable note bookmark | Any age that writes | 10 min | Printout, pen | Laminating before writing |
| Photo bookmark | Gift makers | 20 min | Photo print, cardstock | Faces cut off at the trim line |
| Reading reward bookmark | Teachers, parents | 5 min each | Printout | Running out of one message |
Bookmark ideas for young kids (ages 3 to 6)
At this age the child decorates and an adult cuts. Plan on one bookmark per sitting. A child who finishes fast can start a second one, but few preschoolers want to color three in a row.
1. Coloring bookmarks
A printed outline gives a young child a clear picture to fill, and the finished strip is something to use right away. You need a printer, cardstock or heavy paper, crayons or colored pencils, and scissors for the adult.
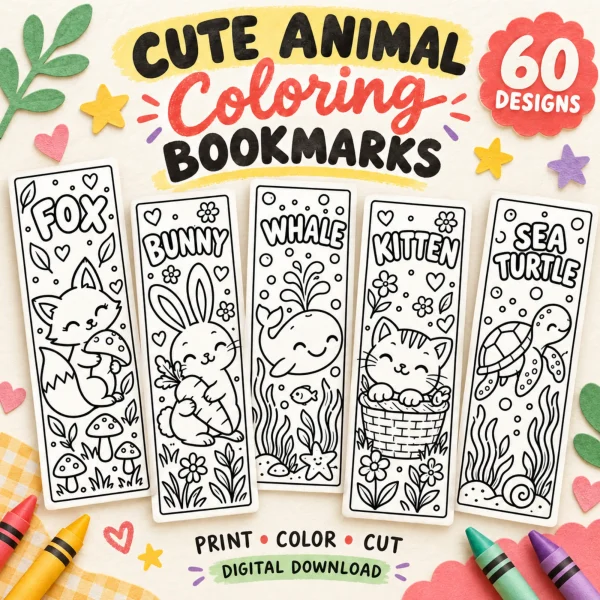
Our Cute Animal Coloring Bookmarks file is a 58-page US Letter PDF with 60 animal bookmarks, two to a page, each 2 x 6 inches with the animal’s name in bubble letters at the top. The cover suggests ages 3 to 8 with adult help. The animals come in six groups of ten (farm, woodland, ocean, jungle, fantasy and tiny animals), so a child can choose a favorite group and keep going for a week.
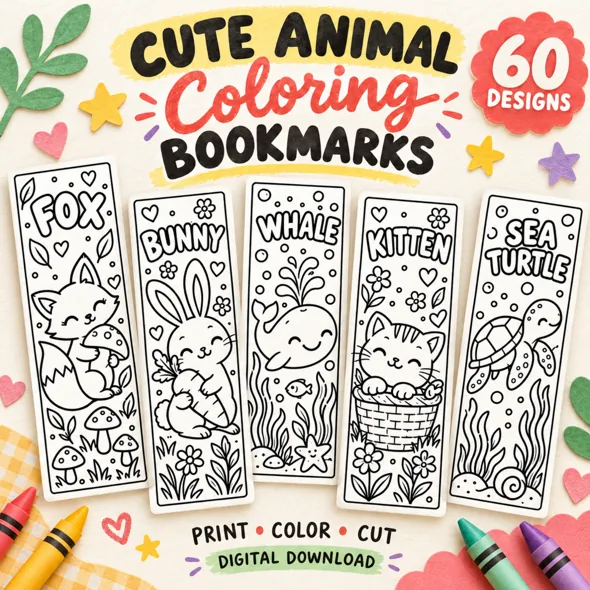
How to run it: print one page, let the child pick one of the two animals, color it, and then cut along the outer solid rectangle for them. Page 2 of the file suggests cardstock around 65 to 80 lb if your printer can feed it. It ends when the bookmark goes into a book the child is reading.
The catch: if the printer is set to “Fit to page,” every bookmark comes out a little smaller than 2 x 6 inches. Print at 100% (Actual Size) and measure the 1-inch test line on page 2 before printing the rest.
2. A draw-your-own bookmark
A blank strip lets a child invent the picture. Cut cardstock into 2 x 6 inch strips, or print the five “Design your own” pages (pages 33 to 37) from the animal set above, which have two empty bookmark outlines each under labels like My Animal and Magic Friend.
Give the child markers or crayons and one rule: keep the drawing inside the line. Write the child’s name on the back for them if they can’t yet. It takes 15 to 30 minutes depending on how much detail they add.
The catch: young kids draw right up to the edge, and the cut then slices through the picture. Draw a light pencil border about a quarter inch in from the edge as a “stop line.”
3. A sticker and washi tape bookmark
This is the fastest one, and it suits children who don’t like to color yet. Cut a 2 x 6 inch strip of cardstock. Let the child cover it with stickers, then wrap washi tape across the top and bottom ends.
It takes about 10 minutes. Stickers that hang over the edge will catch on pages and peel, so trim anything sticking out with scissors once the child is done.
DIY bookmark ideas for older kids (ages 7 to 12)
Kids this age can cut and fold on their own, so these ideas give them a real construction step. Most take 10 to 30 minutes and use things already in a craft drawer.
4. A corner bookmark
A corner bookmark is a folded paper pocket that slips over the corner of a page. It needs one square of paper, about 6 x 6 inches, and no glue.
- Fold the square in half diagonally to make a triangle, with the long fold at the bottom.
- Fold the left and right bottom corners up to meet the top point. You now have a small square (a diamond shape).
- Unfold those two corners so you’re back to the triangle.
- Fold only the top layer of the top point down to the middle of the bottom edge.
- Fold the left and right corners up again, and tuck each one inside the pocket you just made.
The pocket opening sits on the long edge and slides over a page corner. Kids often turn it into a monster: glue on paper eyes and cut a row of triangle teeth along the opening. It takes about 10 minutes.
The catch: the folds only line up if the paper is truly square. Cut a sheet of printer paper down to a square first, and check by folding it corner to corner; the edges should meet exactly.
5. A yarn tassel bookmark
A tassel turns a plain strip into something that looks finished. You need a cardstock bookmark (plain, drawn or printed), a hole punch, yarn and a piece of cardboard about 3 inches long.
Wrap yarn around the cardboard 15 to 20 times. Slide a short piece of yarn under the loops at one end and tie it tight, then cut the loops at the other end. Wrap another piece of yarn around the bundle a little below the knot and tie it off. Punch a hole centered at the top of the bookmark, thread the tie yarn through and knot it.
It takes about 20 minutes, most of it on the tassel. The catch: a hole punched too close to the top edge tears out. Keep it about half an inch down from the top.
6. A craft stick bookmark
A jumbo craft stick makes a stiff bookmark that stands up out of the book. Paint the stick with acrylic paint and let it dry. Then glue a small paper character, a pom-pom or a felt shape to the top end.
It takes about 30 minutes of work plus drying time. The catch: anything glued to the part that sits inside the book will press into the pages and strain the spine. Keep all decoration on the inch or so that sticks out above the pages.
7. A paper clip bookmark
A paper clip bookmark clips onto a page and shows a little picture above the top edge. Cut a small shape from cardstock (a heart, a star, a cat face) about 1 to 1.5 inches across. Glue it to the top loop of a large paper clip, or sandwich the clip between two matching shapes glued together.
It takes about 15 minutes. The catch: a tight clip can press a dent into thin pages, so use it on paperbacks with sturdier paper, not on old or delicate books.
Bookmark ideas for teens and adults
Older makers usually want something to keep or give, and they’ll put in more time for it. These ideas reward patience more than speed.
8. Adult coloring bookmarks
A bookmark-size coloring page is a small project you can finish in one evening, unlike a full coloring book page. Plan on one to two hours for a detailed design.
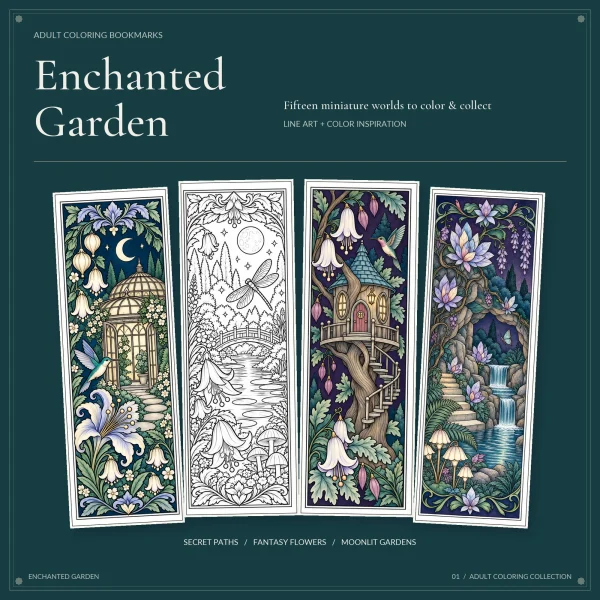
Our Enchanted Garden Coloring Bookmarks for Adults set has 15 night-garden scenes, three to a sheet, each 2 x 6 inches. Each Letter or A4 PDF has 8 pages: a cover, a guide page, five sheets of designs and a terms page. A second PDF shows every design colored, so you can follow its navy and plum palette or ignore it.
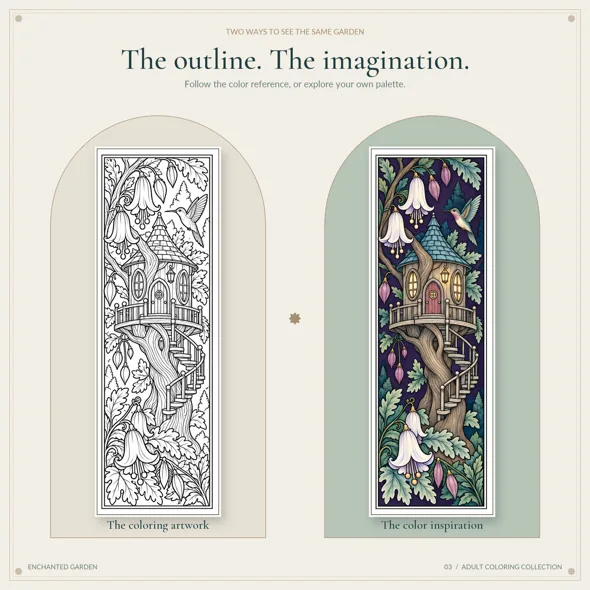
The guide page recommends colored pencils or fine-tip pens for the small details and testing your tools on a spare print first. Cut on the outer rectangle so the illustrated frame stays on as a border.
The catch: crayons and broad markers can’t get into spaces this small, and markers may bleed through thin paper. Sharpen your pencils before you start, and test a marker on a scrap of the same cardstock. Our coloring tips cover blending and layering if you want to go further.
9. A watercolor strip bookmark
Watercolor paper is heavy enough to work as a bookmark on its own. Tape off 2 x 6 inch rectangles on a sheet of watercolor paper with painter’s tape, paint each one (a wash of two colors, a simple botanical, a night sky), then peel the tape when the paint is dry. The tape leaves a clean white border.
It takes about 45 minutes plus drying. The catch: wet paper curls. Tape the whole sheet to a board or the table on all four sides before painting, and don’t peel the tape until the paper is completely dry.
10. A pressed flower bookmark
Small, flat flowers and leaves work best, such as pansies, violets, ferns or single petals. Press them between sheets of plain paper inside a heavy book, add weight on top, and leave them until they feel papery and dry, which usually takes at least a week.
Arrange the dried flowers on a cardstock strip and fix each one with a dot of glue. Seal the front with clear self-adhesive contact paper, or ask an adult to run it through a laminator. The making part takes about 20 minutes once the flowers are ready.
The catch: flowers with any moisture left in them turn brown under the seal. If a petal still feels cool or soft, give it a few more days in the book.
11. A shaped floral bookmark
A bookmark cut to the outline of its picture looks more like a gift than a plain rectangle. It suits patient older kids and adults with small, sharp scissors.
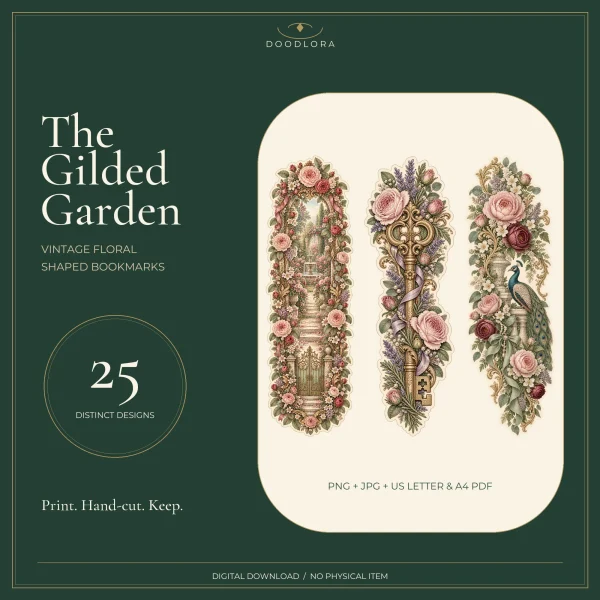
Our Vintage Garden Shaped Bookmarks set has 25 designs, five to a sheet, each fitting within 2 x 6 inches, with a dotted cut line around each one on the PDF sheets. The narrow gaps between petals are already filled in with cream paper, so you cut one outer line and never cut out little windows.
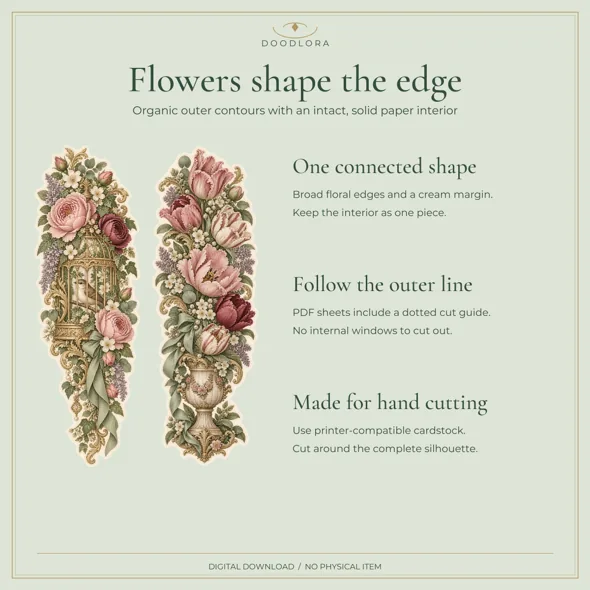
Print on cardstock at 100%, let the ink dry, then cut slowly, turning the paper rather than the scissors around the curves. Plan on 30 to 45 minutes for a sheet of five. These come with no machine cut files, so they’re for hand cutting.
The catch: these shapes have no room for a tassel hole. A punch at the top cuts into the flowers, so leave them plain or pair them with a ribbon tied around the book instead.
Bookmarks to make for a class, a book club or a gift
These ideas are about making more than one, or making one for a particular person. The time per bookmark is short, so the planning is mostly about printing the right number.
12. A writable note bookmark
A bookmark with room to write can carry a name, a reading list for a book club, or a short note tucked into a borrowed book. You need a printout and a pen.
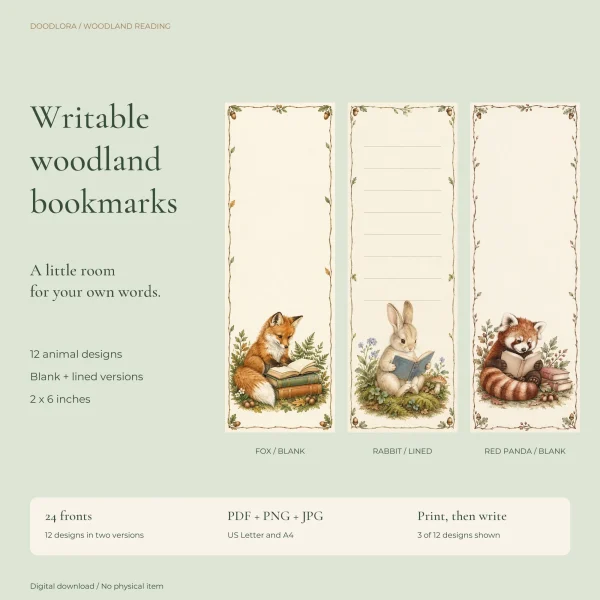
Our Woodland Animal Writable Bookmarks set has 12 animals, each reading a book at the bottom of a 2 x 6 inch card, in a blank and a lined version. The US Letter files come as six one-page sheets, three blank and three lined; the first two sheets of each hold five bookmarks and the last holds two.
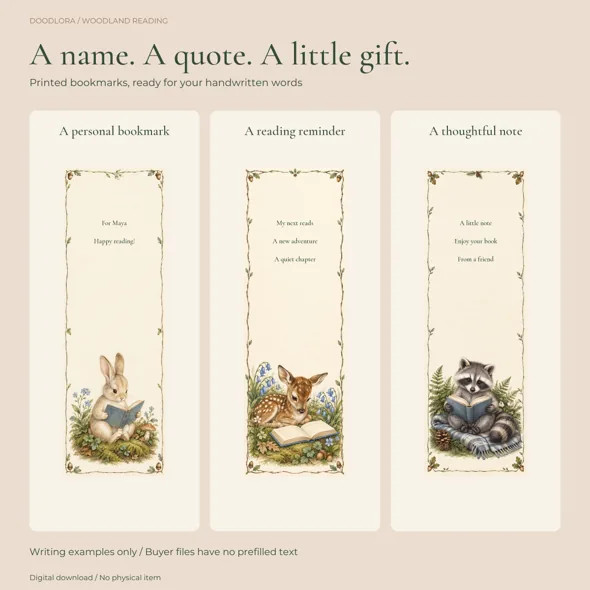
For a book club, print one lined sheet per five members and have everyone write the next three titles on the list. Ten minutes covers printing, cutting and writing for a small group.
The catch: lamination stops ordinary pens and pencils from writing. Write first, and laminate afterward only if the bookmark won’t need any more notes.
13. A photo bookmark
A photo bookmark is a good gift for a grandparent. Pick a tall photo, or crop one to a 1:3 shape, and print it 2 inches wide and 6 inches tall on photo paper or cardstock. Glue it to a cardstock strip for stiffness, then laminate it or cover it with contact paper.
It takes about 20 minutes. The catch: faces near the edge get trimmed off. Leave a little space around the people when you crop, and print one test copy on plain paper first.
14. Reading reward bookmarks for a class
A small reward bookmark gives a teacher or parent something to hand out when a child finishes a book. The animal coloring set above includes ten reward pages (pages 48 to 57), two bookmarks per page, each page with one message such as “Great Reader!”, “Keep Reading!” or “One More Chapter!” and a short “My reading celebration” line.
Print the reward pages ahead of time and keep the cut bookmarks in an envelope, sorted by message, so you can pick the right one on the spot. Each page gives two bookmarks with the same message, so print more copies of the messages you use most.
The catch: a class of 25 runs through one message fast. Count your readers before you print, and keep a few blank “design your own” bookmarks as backups.
Paper, size and finishing: getting bookmarks to last
Size. All four of our sets in this article are built on 2 x 6 inches; the shaped floral ones fit inside that size. It fits most paperbacks and hardcovers without sticking out the sides. For a homemade strip, cut 2 x 6 inches too, or 1.5 x 5 inches for small paperbacks.
Paper. Plain printer paper bends and tears within a few days of use. Cardstock lasts much longer; the animal set’s instructions suggest 65 to 80 lb, as long as your printer can take it. Check your printer’s paper limits before loading a stack.
Printing. Print at 100% or Actual Size with scaling turned off, and measure a test line or one printed bookmark with a ruler before printing the whole set. Our guide to printing coloring pages walks through the print dialog settings.
Laminating. Laminate after the coloring and cutting are done, never before. Leave a writable bookmark unlaminated if anyone still needs to write on it. Laminators get hot, so an adult should run the machine.
Tassels and ribbons. Punch the hole about half an inch below the top edge, centered, after the bookmark is decorated. Skip the hole on shaped bookmarks.
Selling them. Our bookmark files are for personal use. The animal coloring set covers one household or one classroom, and its printed bookmarks go to the children there. The writable, floral and adult garden sets let you give printed bookmarks as personal gifts. None of them allows selling printed copies at a craft fair or online. For a craft sale, make bookmarks from your own drawings, photos or pressed flowers instead.
Printables from this article
Related articles
Printable Bookmarks
Easy Paper Crafts for Kids: Fold-Only and Printable Ideas
Thirteen paper crafts that need little more than paper, scissors and a glue stick, sorted by age and by how much time you have, with the step where each one usually goes wrong.
Printable Bookmarks
Homemade Gift Ideas: 15 Easy DIY Gifts by Budget and Time
Fifteen homemade gifts grouped by who you're giving to and how much time you have, each with materials, time, how to wrap it and the mistake to avoid.
Printable Bookmarks
Party Favor Ideas: 20 Party Favors for Kids and Adults
Twenty party favors for toddlers, school-age kids, class parties and adults, each with a cost band, prep time, how to pack it and the mistake to avoid.