How to Draw Waves: A Curling Wave, Foam and an Ocean View
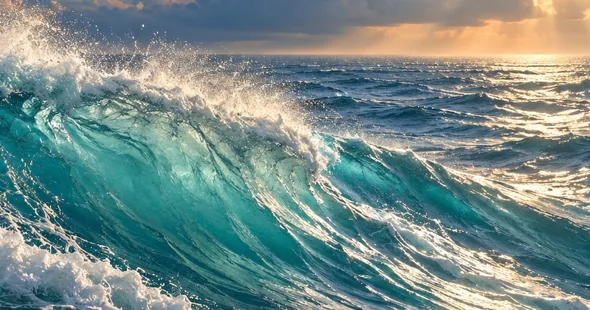
To draw waves, draw the shape of the water first and the foam last. A curling wave is a long back slope rising to a peak, a lip that curls forward and drops, and a hollow face underneath, with white foam where the lip lands. Bright foam can’t be added at the end. It has to be paper you never colored, so you mark where it goes before any blue touches the page. Plan the white first and a single curling wave, sketched and colored, comes together in roughly 20 minutes by our estimate.
The guide moves from the quick curl symbol to a full curling wave, then to shading, color, broken waves near the shore and a whole ocean that fades toward the horizon. After that come easier versions for kids and the mistakes that make waves look stiff.
Pencils, three or four blues and the white you have to save
A pencil, a kneaded or soft eraser and plain printer paper cover every wave on this page. An HB pencil is light enough for the sketch lines that you’ll erase later. A softer 2B helps for the darkest shadow inside a curl.
For color, colored pencils work better than markers, because water needs soft blends and markers leave streaks. Our guide on how to blend colored pencils compares the two and shows the light layering every wave below relies on. Pick four or five pencils:
- a dark blue such as navy, indigo or Prussian blue, for the deepest shadow
- a medium blue for the lower part of the wave
- a turquoise or teal for the thin water near the top
- a pale blue-green for the first light layer
- a gray or soft purple for shadows inside the foam
Leave the white pencil for blending only. Foam drawn in white pencil on top of blue looks chalky and pale gray, never bright white. The bright foam in a good wave drawing is the paper itself, so every wave below starts with light pencil lines that mark where the color must stop.
The quick wave symbol: two minutes, no shading
Before the full wave, learn the symbol. Kids use it for borders, maps and the sea under a boat, and it teaches the curl you’ll need later.
- Draw a gentle hill. Start at the left and pull a curve up and to the right, like the left half of a rainbow.
- Hook the top. At the top of the hill, curl the line forward and down into a small spiral, about one and a half turns. Stop in the middle of the spiral.
- Add the tail. From the bottom of the hill, run a low, flat line to the right, under where the next symbol will go.
- Repeat in a row. Start the next hill where the last tail ends. Keep the hills a little uneven in height, or the row looks like wallpaper trim.
For a second row below, slide the symbols half a step to the right, the way bricks sit in a wall. Two or three offset rows already read as a choppy sea.
How a wave breaks, and the parts you’re drawing
A real curling wave is easier to draw once you know why it curls. Wind makes most ocean waves, according to NOAA. As a wave moves into shallow water near shore, friction with the sea floor makes it steeper. Waves that become too steep and unstable break.
A plunging wave, the curling kind, forms where the bottom is steep or changes depth quickly, such as over a reef or sandbar. Its crest becomes vertical, curls over and drops onto the trough in front of it. The Wikipedia entry on breaking waves describes that falling front edge as the lip, and the open hollow under it is the tube surfers talk about.
That sequence gives you every part of the drawing:
| Part | Where it is | How to draw it |
|---|---|---|
| Back | The long slope behind the peak | A shallow curve with a few foam streaks |
| Crest and lip | The top, curling forward | A thin band that bends over and narrows to a point |
| Face | The front wall under the lip | A concave curve, darker toward the bottom |
| Tube | The hollow between lip and face | An open oval, the darkest spot in the drawing |
| Whitewater | Where the lip lands | Bumpy cloud shapes with no hard outline |
| Spray | Above the lip | Small dots and dashes, left as white paper |
How to draw a curling wave in 8 steps
The steps below make a wave that travels to the right, so its back is on the left and the lip throws to the right. Flip everything if you’d rather have it break the other way. Every line before the last step is a sketch line you may erase, so press gently.
-
Draw the horizon and the water line. Draw a straight horizontal line about a third of the way down the page; use a ruler, because a tilted horizon makes the whole sea look like it’s sliding off the page. Then mark a low, slightly wavy line near the bottom for the water in front of the wave.
-
Draw the back of the wave. Start near the left edge, a little below the horizon, and draw one long curve rising up and to the right. Stop about two thirds of the way across the page, well above the horizon. That point is the peak.
-
Throw the lip forward. From the peak, keep the line going right, then bend it down, like the top of a question mark. End it in a point that hangs in the air, about level with the middle of the wave. Draw a second line just inside the first to give the lip some thickness, a thin band, not a thick tube.
-
Draw the face. Go back to just under the peak and draw a curve that sweeps down and slightly back to the left, then flattens out at the water line. That concave curve is the face. The open space between the face and the hanging lip is the tube, so leave it as a clear oval.
-
Mark where the lip lands. Below the point of the lip, at the water line, draw a cluster of bumpy, rounded shapes like a low cloud. The falling water splashes up here into whitewater. Let the cloud spill a little to the right along the water.
-
Add foam on the lip. Along the top edge of the lip, replace the smooth line with a bumpy one, and let a few ragged fingers of foam reach forward off the point. Scatter a few small dots above it for spray.
-
Draw flow lines on the face. Draw a few long, curved lines that start low on the face and sweep up into the lip, following the curve of the wall. Space them unevenly and keep them thin. On the back of the wave, add two or three short streaks of foam that trail down the slope.
-
Clean up and commit. Erase the parts of the horizon that run behind the wave, then go over the lip, the face and the water line with firmer pressure. Leave the foam shapes outlined only lightly, or erase their outlines almost away, so they read as soft white.
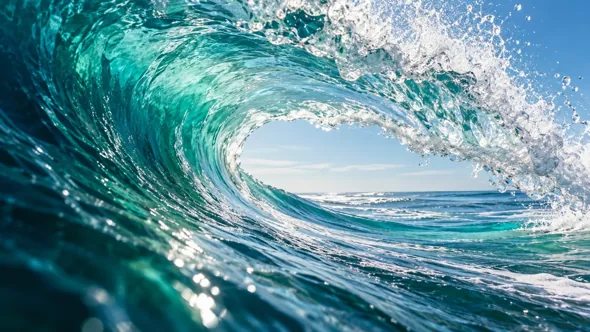
The picture above shows the proportions to aim for. The lip is much thinner than the wall it falls from, and the face glows lighter near the top, where the water is thin, and turns deep blue near the bottom.
Shading a wave in pencil
Shading turns the outline into water, and it follows the same logic as the color later. The darkest value goes inside the tube, right under the lip. The next darkest is the base of the face, where the water is deepest. The upper face just below the lip stays light.
Shade in strokes that follow your flow lines, curving up the face, instead of scribbling back and forth. Strokes that run with the water make the wall look like it’s moving upward.
Two small touches add depth. Put a thin shadow under each clump of whitewater, on the side away from the light, because foam sits on top of the water. Then leave a narrow strip of untouched paper along the inside edge of the lip, where light comes through the falling water.
Coloring a wave with colored pencils
Water looks blue because it absorbs the red part of sunlight, according to NOAA, and floating particles can tint it green. So a mix of blues and blue-greens is accurate, and a turquoise band near the top of a wave isn’t just artistic license.
Color in this order, lightest first:
- Protect the foam. Check that every foam shape and spray dot has a light pencil outline. Color stops at those lines.
- Lay a pale base. Cover all the water with light pressure in pale blue-green. Skip only the foam.
- Add turquoise to the upper face. Layer it from just under the lip down to about the middle of the wave.
- Add medium blue to the lower face and the back. Overlap the turquoise a little so the two blend.
- Put the dark blue in last. Press harder inside the tube, at the very base of the face and in the trough in front of the wave.
- Shadow the foam lightly. A touch of gray or soft purple along the bottom edge of each foam clump makes the white look rounded.
Blend where two blues meet with the lighter color, using small circles. If a spray dot gets colored over, a white gel pen dot on top works far better than white pencil. Saving white space and grading from light to dark work the same way on any page, and our coloring tips show both on printed coloring pages.
Broken waves and foam near the shore
Not every wave curls. On a gently sloping beach, a wave usually becomes a spilling breaker: the crest gets unstable and whitewater tumbles down the front of the wave instead of throwing a lip. Spilling waves break for longer and look gentler, according to the Wikipedia entry on breaking waves.
To draw a spilling wave, draw a low, rounded hump instead of a tall wall. Put a band of bumpy foam along its top and let the foam run down the front in ragged drips. There’s no tube, so the darkest blue goes just under the foam band.
Closer to shore, the broken waves become rows of whitewater rolling in. Draw them as long, low bands of bumpy foam, each one flatter and wider than a curling wave, with a strip of darker water between rows.
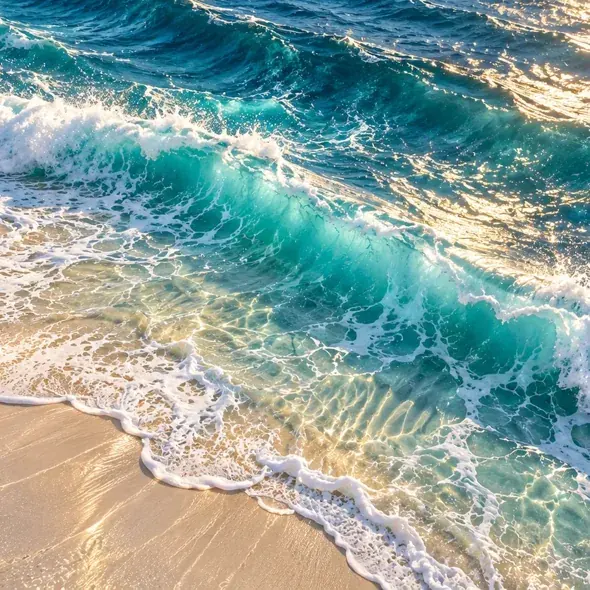
The last bit of a wave on the sand is lace. Draw a thin, wiggly line of foam along the shore, then a loose net of small, uneven holes behind it. Color the sand right behind the foam a shade darker than the dry sand, because it’s wet.
How to draw an ocean that fades into the distance
An open ocean is mostly about distance. The same rules apply as with a road or a row of trees: things get smaller and closer together as they get farther away. Draw the sea in three bands.
- Far band, just under the horizon: short, flat horizontal dashes packed close together. No curls and no foam, apart from a tiny white flick here and there.
- Middle band: small humps with soft shadows on one side and an occasional white tip, spaced wider than the dashes.
- Near band: the big shapes, either one curling wave or a few large swells with real shading and foam.
Color follows distance too. Keep the strongest, darkest blues in the near band, and make the far band paler and a little grayer, almost as light as the sky at the horizon.
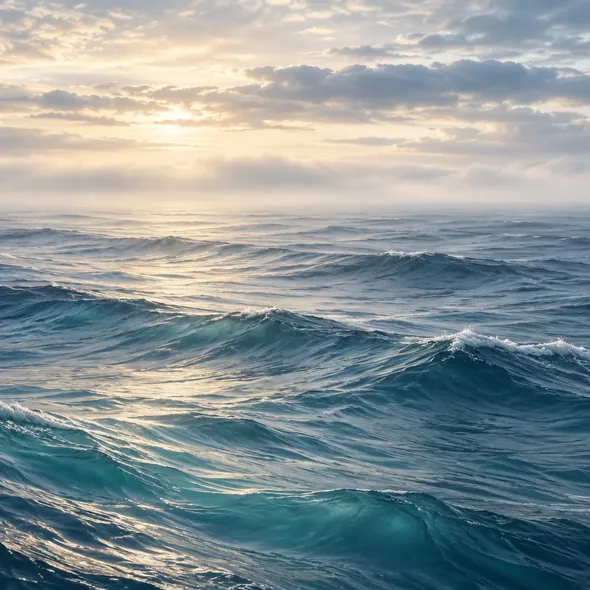
If there’s a sun or moon in your sky, break its reflection on the water into short horizontal dashes of light under it. A solid stripe looks like a road.
Where the beach, palm trees and sky fit around this sea is a full lesson in composition. This guide sticks to the water.
Easier waves for kids, by age
Waves suit almost any age, because a wobbly line still looks like water. The times below are our planning estimates, not timed tests.
- Ages 3 to 5, about 10 minutes. Draw bumpy lines across the page with crayons, one row in each blue or green, from top to bottom. Add a sun or a boat. For a magic version, an adult draws foam squiggles in white crayon first, and the child paints over the page with watery blue paint. The wax pushes the paint away and the foam appears. Our list of art activities for kids explains this crayon resist trick step by step.
- Ages 6 to 8, 15 to 20 minutes. Do the curl symbol in three offset rows, then try one big curl: a hill, a hook at the top and a cloud of foam where the hook ends. Color the water and leave the foam white.
- Ages 9 and up, 20 to 30 minutes. The full 8 steps, with shading in pencil or colored pencil.
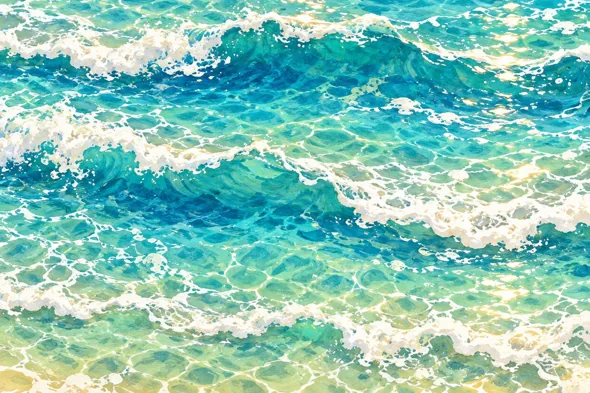
A class or a group of siblings can make a long ocean together. Tape several sheets side by side, give each child one sheet, and have everyone draw their waves at the same height so the rows line up across the joins. Fish, boats and sea creatures can be cut out and glued on top. Our ocean crafts have plenty to add, and the sea turtle seen from above in our turtle drawing guide fits right into the middle band.
Wave drawing mistakes and how to fix them
- Every wave the same. A row of matching bumps looks like a pie crust edge. Vary the height and spacing, and let a few waves overlap.
- A snail-shell curl. A lip that spirals around twice looks like a scroll. A real lip falls onto the water in front of the wave, so let it bend once and end in a point aimed down, with the tube left open.
- A lip as thick as the wall. A fat lip looks like a rolled-up rug. Keep it a thin band, thinnest at its tip.
- Coloring the foam. White pencil can’t cover blue. If the foam got colored, erase as much as you can, or switch to a white gel pen or a dab of white paint.
- A hard dark outline around foam. Outlined foam looks like cotton balls stuck on the page. Shadow its underside instead.
- Straight stripes on the face. Flat, horizontal lines make the wave look like a striped awning. Curve every line up the wall toward the lip.
- Big waves at the horizon. Distant waves drawn as large as near ones flatten the whole picture. Shrink them into dashes.
- One blue everywhere. A single color looks like a cutout. Use at least a light, a middle and a dark.
Using our ocean backgrounds as color references
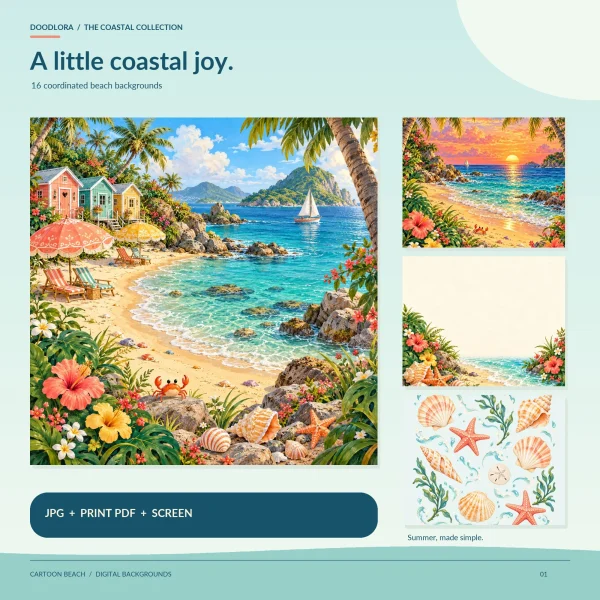
A reference picture helps most with color, because it’s hard to guess where a wave turns from turquoise to navy. Our ocean wallpapers and cartoon beach backgrounds are full-color digital artwork, not line drawings, so they’re for studying color and shape, not for tracing.
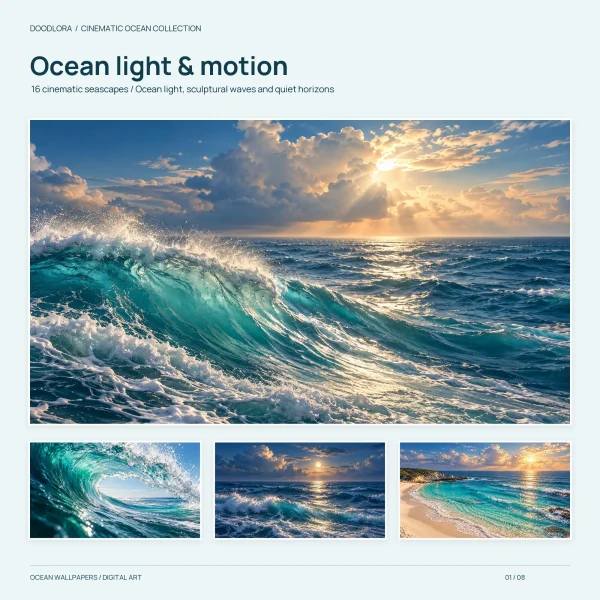
Our ocean wallpapers are 16 seascapes. The Read-Me file calls them AI-assisted artwork and says they aren’t photographs of a real place, so use them as a color study rather than a record of how a particular wave behaved. Five scenes are especially useful for drawing waves:
- Sunlit Overture (01) and After the Rain (07): big breaking waves with spray blowing off the crest, for where the turquoise glow sits on the face
- Glass Curl (02): the inside of a curl, for lip thickness and the open tube
- Tidal Silk (04): foam lace on sand, for the shore
- Horizon Veil (06): rows of swells fading toward the horizon, for an ocean view
Looking at the files on a tablet next to your paper costs no ink. If you do print, the US Letter PDF prints each design as an 8-inch square at actual size, and the Read-Me warns that the deep blues use a lot of ink, so try one page first.
Our cartoon beach backgrounds are in a bright storybook style, closer to what kids draw. Designs 09, Tidal Ribbons, and 10, Wave Rhythm, are only rows of breaking waves, with no shore or sky, and they show how to simplify foam into bumpy white bands. The cove scenes also work as a backdrop: print one, then cut out a wave or a boat your child drew and glue it on top. Each PDF page holds one design centered with white margins, so set the printer to actual size.
Both sets come with our personal license, which covers home use, a teacher printing copies for their own students, and printing inside one school. Making copies to sell isn’t covered.
Wave drawing questions
Which wave should a beginner start with?
Draw the curl symbol: a small hill whose top hooks forward into a spiral, followed by a flat tail. Repeat it in a row, then add a second row offset like bricks. It takes about two minutes and works at any age.
What colors do you use to draw ocean waves?
Use a pale blue-green for the base, turquoise for the thin water near the top of a wave, a medium blue for the lower part and a dark navy or indigo for the shadow under the lip. Leave the foam as white paper.
How do you draw sea foam and spray?
Outline the foam lightly as bumpy, cloud-like shapes and never color inside them. Shade a little gray or purple along their undersides. For spray, leave tiny dots of white paper above the lip, or add them at the end with a white gel pen.
Why do waves curl over?
As a wave reaches shallow water near shore, the sea floor slows the water and the wave gets steeper. NOAA says waves that become too steep and unstable break. Where the bottom is steep, the crest goes vertical and curls over before it falls.
How do I draw a wave like The Great Wave?
The Great Wave off Kanagawa is a woodblock print by Hokusai, and Wikipedia notes its use of Prussian blue. Its foam is drawn as rows of claw-like fingers along the lip. To try that style, use flat areas of color, outline everything in dark blue, and break the lip’s edge into small curled claws.
Start with three rows of curl symbols, then one big wave with the white saved. Once the foam stays white without thinking about it, an ocean view is mostly a matter of shrinking the waves as they go back.
Printables from this article
Related articles
Backgrounds & Digital Paper
New Year Traditions: Eve, Day and Around the World
Twenty New Year's Eve and New Year's Day traditions, from the Times Square ball drop and Spain's twelve grapes to Japan's 108 bell strikes and Greece's coin cake, each with where it comes from, what people do and a small way to try it at home.
Backgrounds & Digital Paper
Christmas Scrapbook Ideas: 16 Layouts with Printable Paper
Pick a Christmas scrapbook page by how many photos you have and what you want to keep, print one background paper at Actual Size, then cut it into mats, pockets and tags so the photos and keepsakes stay the main thing.
Backgrounds & Digital Paper
How to Draw a Snowman: Easy, Cute Steps for Kids
Stack three snowballs that shrink from bottom to top, sink each one a little into the ball below, and stand the whole snowman on a ground line. Then add the hat, face, scarf and twig arms, and shade the white with pale blue instead of coloring it.