Winter Crafts: 14 Ideas for Preschoolers, Kids and Adults
The best winter crafts match the time you have and the hands doing the work. A 4-year-old with 15 minutes needs a cotton-ball snowman. A 9-year-old on a snow day can fold a paper cabin village. A teen or adult with a free evening can bead a snowman or cut a set of winter bookmarks.
Below are 14 winter crafts in three age groups. Each one lists the supplies, a rough time, how it ends and the step where it usually goes wrong. The times are our planning estimates, not measured sessions, so add extra minutes for younger kids and big groups. None of these depend on snow outside, and none are tied to Christmas, so they work from December through February.
Pick a winter craft by age and time
Start with the row that fits your group, then jump to that craft. If the kids need to run around more than sit, our winter activities for kids has snow-day games and indoor movement ideas.
| Craft | Best ages | Rough time | Main supplies | Mess |
|---|---|---|---|---|
| Cotton-ball snowman | 3–5 | 15–20 min | Blue paper, cotton balls, glue | Low |
| Cotton-swab snowflakes | 3–6 | 15–20 min | Cotton swabs, dark paper, glue | Low |
| Matching paper mittens | 3–6 | 20 min | Paper, crayons, stickers | Low |
| Fingerprint snowy tree | 3–6 | 15 min, plus drying | White paint, brown and blue paper | Medium |
| Six-point paper snowflakes | 6 and up | 15–20 min each | Copy paper, scissors | Low |
| Paper-bag penguin puppet | 5–8 | 25 min | Lunch bag, black, white and orange paper | Low |
| Snowy pinecones | 5 and up | 20 min, plus drying | Pinecones, white paint | Medium |
| Paper cabin village | 7–11 | 45–60 min | Cardstock, tape, cotton | Medium |
| Ice suncatchers | 4 and up | 15 min, plus a freezing night | Pie tin, water, string | Wet |
| Fuse bead snowman | 8 and up with an adult ironing | Long sitting or two | Beads, pegboards, iron | Medium |
| Winter forest bookmarks | 8 and up | 20–30 min | Cardstock, scissors, hole punch | Low |
| Colored snowman card | 10 to adult | 45 min and up | Colored pencils, cardstock | Low |
| Frosted jar lantern | 10 to adult | 30 min, plus drying | Glass jar, glue, Epsom salt, LED tea light | Medium |
| Yarn pom-pom garland | 9 to adult | 40 min and up | Yarn, fork or cardboard, string | Low |
Winter crafts for preschoolers (ages 3 to 5)
Preschool winter crafts work best with big shapes, one kind of glue and a clear finish line. Do the cutting yourself ahead of time, and let the child do the gluing, sticking and dotting. Keep loose cotton balls and pom-poms away from younger siblings who still put things in their mouths. For more ideas at this age, see our activities for 3-year-olds.
1. Cotton-ball snowman
This is the classic first winter craft, and it suits 1 to 6 kids at a table. Cut three white paper circles in three sizes, plus a small orange triangle for the nose. Each child glues the circles in a stack on blue paper, then presses cotton balls over them. Finish with marker eyes, buttons and stick arms drawn in brown crayon.
The snowman is done when the cotton covers all three circles. The usual trouble is liquid glue: cotton soaks it up and slides around, so the snowman ends up lopsided. A glue stick on the paper circle first, then a small dot of liquid glue under each cotton ball, holds much better.
2. Cotton-swab snowflakes
Real snow crystals tend to grow six arms, because ice forms in a hexagonal crystal structure. That makes a nice counting job for a preschooler. Give each child six cotton swabs, a sheet of dark blue or black paper and a puddle of glue on a paper plate.
Show them how to lay three swabs so they all cross at the middle, spaced evenly like the spokes of a wheel. That makes six arms. Snip the other three swabs in half and glue the six short pieces as little branches, one near the end of each arm. The snowflake is finished when the child counts six arms out loud. Cutting a swab with kid scissors is hard, so cut the halves yourself before you start.
3. Matching paper mittens
Mittens are a good matching game and a craft at once. Trace one mitten shape twice on paper, cut out both, and give a child one pair. Their job is to make the two mittens match: the same stripes, the same dots, the same stickers in the same spots.
For a group, mix every finished mitten into one pile and let the kids find the pairs. Then clip each pair onto a string with a clothespin. The round is done when every mitten has its partner. Three-year-olds rarely manage a true match on stripes, so give them a simple pattern like one sticker in the middle.
4. Fingerprint snowy tree
Draw or tape a bare brown tree trunk with a few branches on light blue paper. The child dips one finger in white paint and dots snow along the branches and on the ground. Dots look like snowfall, so there’s no wrong place to press.
Plan about 15 minutes of painting and a drying spot for each sheet. Wet paint smears when the sheets are stacked, so lay them flat on a counter or a tray. A baby wipe at each seat keeps white fingerprints off the table and walls.
Winter crafts for kids ages 6 to 10
School-age kids can handle scissors, folding and a project that takes more than one step. These crafts work for a family afternoon or a classroom table group of 4 to 6. Most end with something that hangs or stands up, which helps kids see when they’re done.
5. Six-point paper snowflakes
Paper snowflakes need only copy paper and scissors, and one takes about 15 to 20 minutes. Our Christmas activities for kids covers the quick fold, which halves the triangle again and again and opens into an eight-point flake. For a winter lesson, try the six-point version instead, since that’s the shape real snow crystals take.
Fold a square into a triangle, then in half once more. Now fold that smaller triangle into thirds, like a fan, so the edges line up, and trim off the uneven tips. Cut notches and curves along both folded sides, then open it up to find six arms. Kids 8 and up can line up the thirds on their own; younger kids usually need an adult to hold the fold while they crease it. Leave a strip along each fold uncut, or the flake falls apart.
6. Paper-bag penguin puppet
A brown lunch bag turns into a penguin in about 25 minutes. Glue black paper over the front of the bag, then a white oval in the middle for the belly. The bottom flap of the bag becomes the head: add a white face patch, two eyes and an orange triangle beak. Two black paper wings glue to the sides, and two orange feet stick out from the bottom.
Kids are finished when the puppet can “talk” by moving the flap. A quick puppet show at the end gives the craft a clear stopping point. The fiddly part is the beak: if it’s glued to the bag body instead of the flap, it won’t move when the puppet talks.
7. Snowy pinecones
Pinecones from a walk make a free winter craft. Let them dry indoors for a day or two first, since damp cones close up. Then the kids brush white paint just on the tips of the scales, so they look dusted with snow.
A dry, stiff brush works better than a soft one, because it catches the edges without filling the gaps. For a bit of sparkle, sprinkle a pinch of fine salt on the wet paint. Set the cones on wax paper to dry. Each one is done when the tips are white all the way around. Three or four cones in a bowl make a table centerpiece.
8. Paper cabin village
This is the longest craft in the kids’ group, roughly 45 to 60 minutes. It works well as a snow-day project for siblings. Each child folds a cabin from cardstock or a cereal box panel: a box shape with a folded roof taped on top. Then they draw windows, a door and logs on the walls.
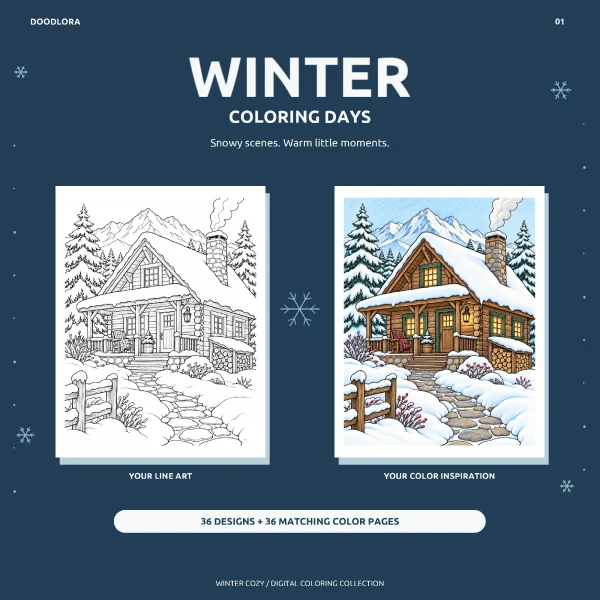
For a reference, a log cabin coloring page shows what to draw: lit windows, a stone chimney with smoke, a porch and a stone path to the door. Page 13 of the Winter Cozy coloring pages is a snowy log cabin like that.
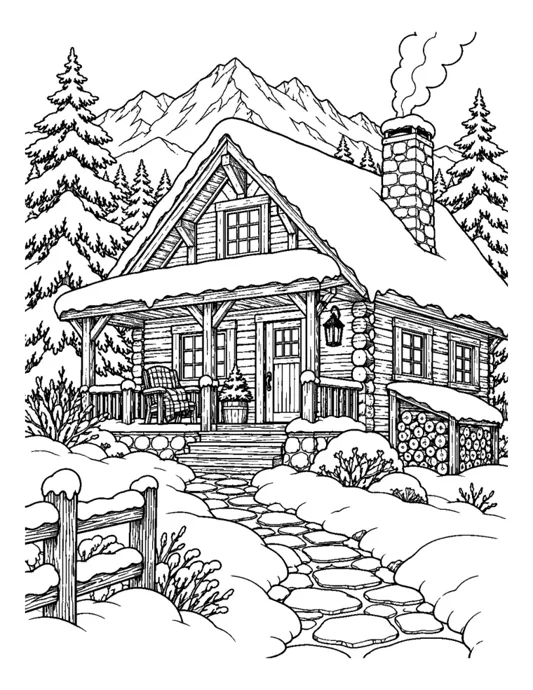
Glue stretched-out cotton on each roof for snow, and set the cabins on a sheet of white paper with paper trees between them. The village is done when every child’s cabin has a spot in the row. The weak point is the roof: tape alone tends to pop off. A strip of glue along both roof edges, held for a minute, keeps it on.
9. Ice suncatchers
Ice suncatchers need a freezing night, either outside or in the freezer. Kids arrange berries, leaves and pine sprigs in a pie tin of water with a loop of string. Once frozen, they hang from a branch. The winter activities guide linked at the top covers the setup and the timing.
Winter crafts for older kids, teens and adults
Older kids, teens and adults can stay with one project for an evening. These crafts have more detail, and the finished piece is something people keep: a decoration, a bookmark, a card or a garland. Many people search for winter crafts for adults alone, and any of these work at a grown-up table too.
10. Fuse bead snowman (and other winter accessories)
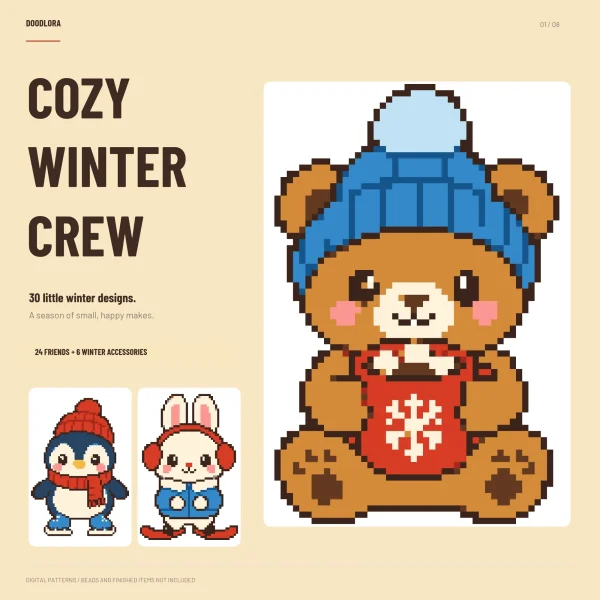
A fuse bead snowman is a good first pattern for a beader of 8 or older, with an adult doing the ironing. Our Winter Fuse Bead Patterns set has 30 designs, and the last six are winter things rather than animals: hot cocoa, a mitten, a pompom beanie, the snowman, a snow globe and a fir tree.
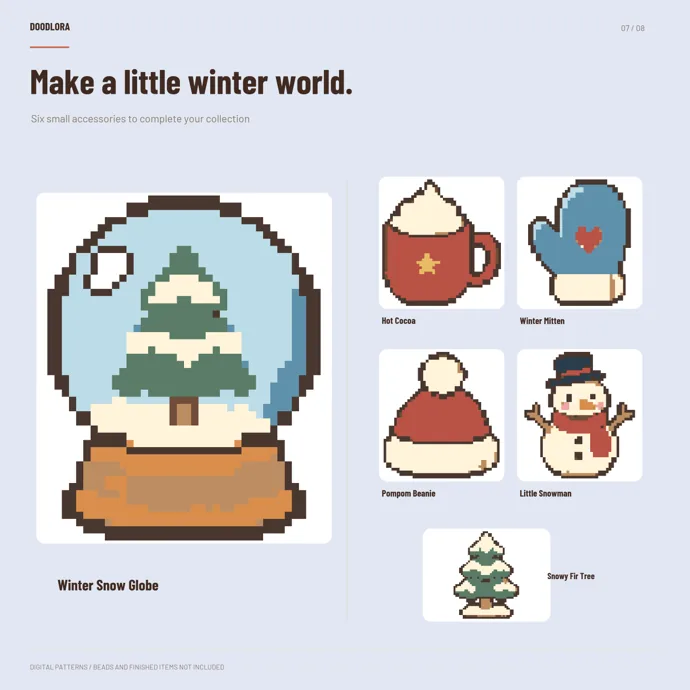
Size is the first thing to check. The snowman is 42 beads wide and 48 tall, 1,192 beads in all. With standard 0.2-inch (5 mm) beads it comes out about 8.3 by 9.4 inches, closer to a wall piece than a tree ornament. With 0.1-inch (2.6 mm) mini beads it shrinks to about 4.3 by 4.9 inches. The fir tree is the smallest of the six at 1,123 beads, and the snow globe is the biggest at 1,483.
Here’s how a session runs:
- Print the actual-size sheet for your bead size at 100%, and measure the 1.969-inch (50 mm) calibration line before you start.
- With standard beads, the snowman is split over four sheets with no shared rows. Line them up by the row and column numbers, and lay beads on linked pegboards.
- With mini beads, the whole snowman fits on one page.
- Lay the beads, then hand the board to an adult for ironing. Our guide on how to iron fuse beads covers settings and large pieces.
Don’t lay beads on the reading chart. That page is enlarged to fit the sheet, so the beads won’t line up. Its grid also says 48 x 54 cells because it includes an empty border around the 42 x 48 snowman. If you want to hang the finished piece, plan the hole before you iron; our fuse bead keychain guide shows how. Loose beads are small parts, so keep them away from children under 3.
11. Winter forest bookmarks
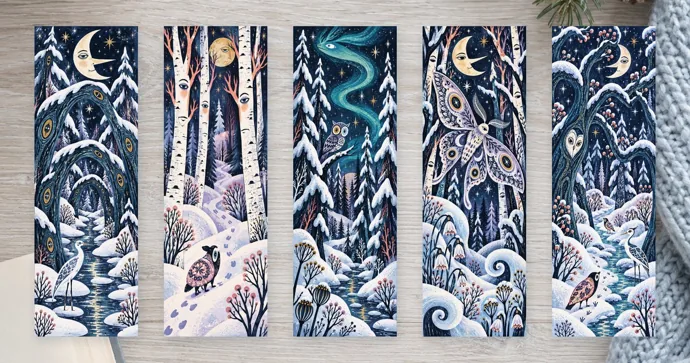
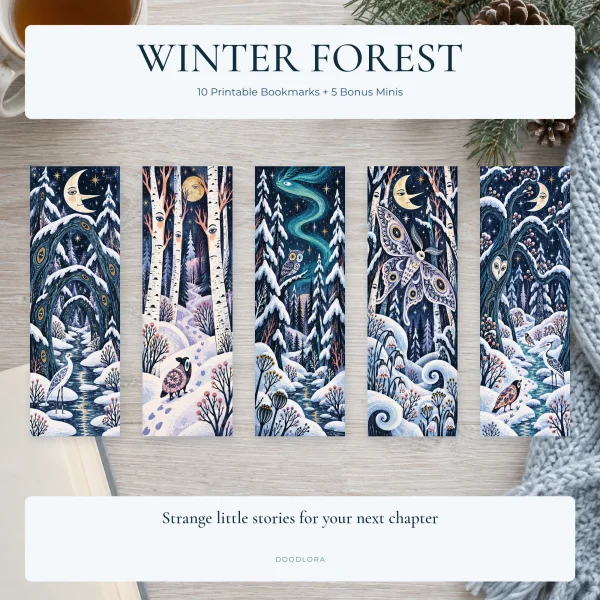
Printed bookmarks are a quick craft that ends in a small gift. Our winter forest bookmarks have 10 main designs at 2 by 6 inches and 5 minis at 1.5 by 5 inches. Five bookmarks fit on each sheet, in US Letter or A4.
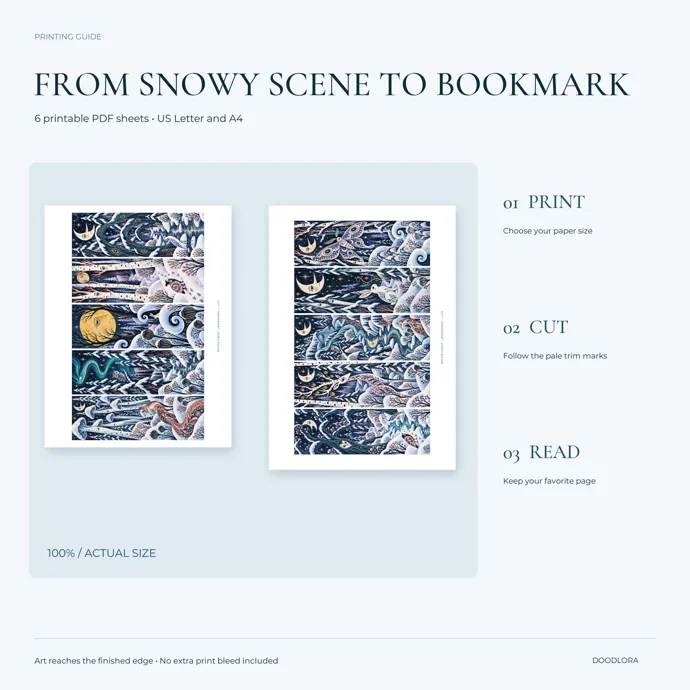
Print on cardstock at 100% with automatic scaling turned off, and run one test sheet first. Then cut along the trim marks with scissors or a paper trimmer. To finish, punch a hole near the top and loop a short tassel of yarn through it.
The tricky step is the cutting. The art runs right to the finished edge, and the sheets have no extra bleed, so a cut that wanders past the trim mark leaves a thin white line. A paper trimmer gives straighter edges than scissors.
The bookmarks are single-sided with no tassel included. For a nicer gift, glue two back to back, or let a child write their name and a favorite book on the blank side. The files are for personal use, so printed copies can go to friends as gifts but not to a craft fair table.
12. Colored snowman card
Teens and adults who like slow, detailed coloring can turn a page into a winter card. The snowman page in the Winter Cozy set has a knit hat, a long striped scarf, stick arms and a cottage behind him, with a small bird on the fence.
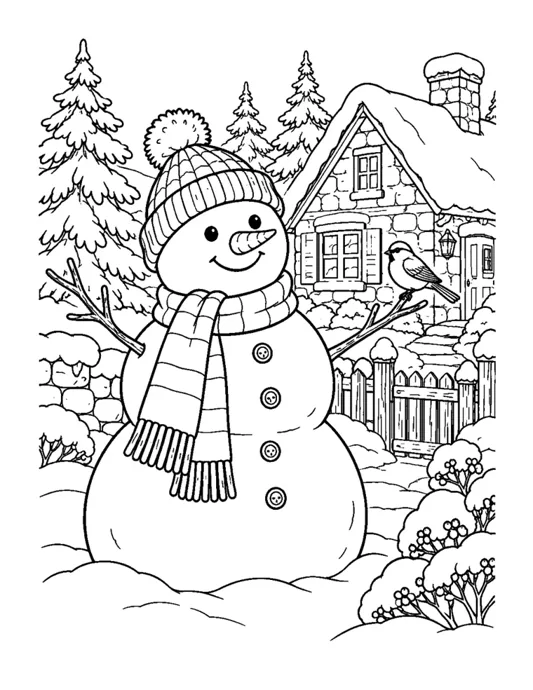
Print the page at Actual Size with Fit to Page turned off. Color the snowman and scarf first, since that’s the part that will show on the card. Then cut around the snowman, or cut the whole scene down to fit the front of a folded piece of cardstock, and glue it in place. A message inside finishes it.
Plan 45 minutes or more, because the textures on the hat, scarf and stone wall take time. If you use markers, put a scrap sheet underneath, since ink can soak through. Kids under 10 often find these lines frustrating. For them, the cotton-ball snowman above is a better match.
13. Frosted jar lantern
A clean glass jar looks frosted with a coat of glue and Epsom salt. Brush a thin layer of white craft glue or decoupage glue over the outside of the jar. Roll it in a tray of Epsom salt, then let it dry overnight. A ribbon around the neck finishes it.
Put a battery tea light inside, not a candle. The glue and the salt sit on the outside of the glass, and a flame inside a crafted jar is easy to forget on a windowsill. The usual flaw is a thick glue coat: it drips and leaves bare streaks. Two thin coats, with salt after each, give a more even frost.
14. Yarn pom-pom garland
Pom-poms look like the top of a winter beanie, and a string of them makes a soft garland. Wrap yarn around the tines of a fork 40 or 50 times for a small pom-pom. For a bigger one, wrap it around two cardboard rings. Tie a tight knot through the middle, cut the loops and trim the ball round.
Each pom-pom takes 5 to 10 minutes once you have the rhythm. A garland of eight or so is an evening of work, which suits a group chatting around a table. Thread the finished pom-poms onto a long piece of yarn with a large needle. The weak point is the middle knot. If it’s loose, the pom-pom falls apart when you trim it, so pull it as tight as the yarn allows and tie it twice.
Setting up a winter craft session at home or school
A little setup keeps a winter craft afternoon calm. For a classroom of 20 or more, run two or three crafts as stations with 5 or 6 kids each, and rotate every 15 to 20 minutes. Pre-cut the shapes the night before. Cutting paper circles for 25 snowmen during class eats the whole period.
Cover the table with newspaper or a cheap plastic cloth for the paint and glue crafts. Set up a drying spot before you start: a counter, a tray, or a clothesline with clips. Write each child’s name on the back of their paper first, since 20 cotton-ball snowmen look alike once they dry.
For printables, check the printer settings before you print a full stack. Our guide on how to print coloring pages covers scaling and paper choice.
When a winter craft goes wrong
Most winter craft problems come from the same few steps. Here’s what to do when something doesn’t work.
- The paper snowflake fell apart. A cut went all the way across a fold. Fold a new square and leave a strip along each folded edge.
- Cotton balls keep sliding off. Too much liquid glue. Let it dry for a few minutes until tacky, or switch to a glue stick on the paper first.
- The paper wrinkled under the glue. Thin copy paper buckles under wet glue and paint. Use construction paper or cardstock for anything wet.
- The fuse bead snowman is too big for the tree. With standard beads it’s about 8 by 9 inches. Use mini beads, or hang it on a door instead.
- The bookmark has a white edge. The cut went outside the trim mark. Trim a sliver off that side so the art reaches the edge again.
- A child loses interest halfway. Stop at a natural point: one finished snowman, one pom-pom, one cabin wall. Most of these crafts can wait until tomorrow.
Printables from this article
Related articles
Fuse Bead Patterns
Pony Bead Animals: Keychain Ideas and How to Lace Them
How pony bead animal keychains are laced on one folded cord: what beads and cord to buy, how to start on a keychain ring, read a row recipe, widen and narrow rows with clear support beads, tie off the last row, and run it with kids at a party or in a classroom.
Fuse Bead Patterns
How to Make Kandi Bracelets: Singles, Cuffs and Trading
What kandi is and where PLUR and the trading handshake come from, what beads and cord to buy, how to string and knot a single, how to build a flat peyote cuff and a multi-stitch cuff, and how to read a row-by-row kandi pattern.
Fuse Bead Patterns
Crafts for Kids 6-12: Ideas for 8 and 10 Year Olds
Sixteen crafts for school-age kids, split into one-sitting projects for younger kids and longer builds for 9 to 12, with supplies, time, stopping points and common mistakes.