Crafts for Kids 6-12: Ideas for 8 and 10 Year Olds
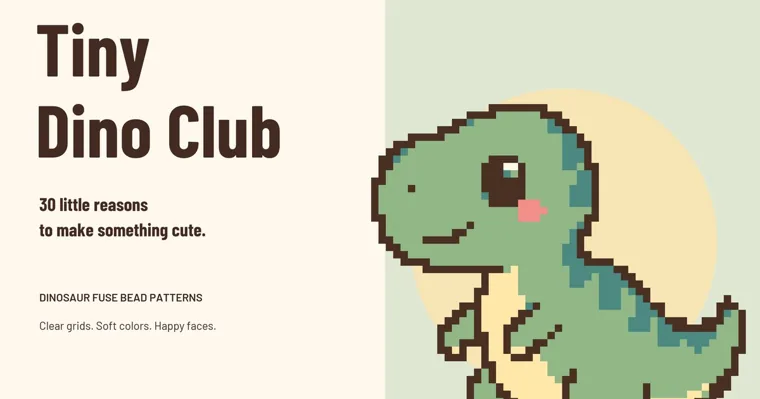
The best crafts for kids 6-12 change a lot across those six years. Younger kids, roughly 6 to 8, do well with a project that ends in one sitting and shows progress every few minutes: a strip of finger knitting, a string of paper beads, a small fuse bead piece. Older kids, roughly 9 to 12, are ready for crafts that stretch over several sessions and ask for counting, chart reading or the same knot tied a few hundred times. Friendship bracelets, cross-stitch and multi-board fuse bead pictures all belong in that second group.
Each craft below lists a rough time, what to set out and how you’ll know it’s finished. The times are planning estimates, not measurements, so stretch them for a child who likes to work slowly. Each one also names the step where kids most often get stuck, because that’s usually the moment a half-done craft ends up in a drawer.
Pick a craft by age, time and patience
| Craft | Group | Time | What it asks of the child |
|---|---|---|---|
| One-sheet fuse bead piece | Younger | An hour or so | Steady fingers, following colors |
| Finger knitting | Younger | Half an hour | Repeating one move |
| Paper bead necklace | Younger | Under an hour, plus drying | Rolling tightly, waiting for glue |
| Yarn pom-pom animals | Younger | Half an hour each | Wrapping until it looks “too full” |
| Paper plate weaving | Younger | Under an hour | Over-under without skipping |
| Salt dough fossils | Younger | Half an hour, plus drying | Waiting a day or two to paint |
| Reading-streak bookmarks | Younger | A few minutes each | Coloring inside a narrow space |
| Felt pouch | Younger to middle | About an hour | Even running stitches |
| Multi-sheet fuse bead dinosaur | Older | Two to four sessions | Reading a coded chart |
| Fuse bead paw print, pad by pad | Oldest | Several weekends | Long-term concentration |
| Friendship bracelet | Older | One to two hours | Hundreds of identical knots |
| Small cross-stitch | Older | Two or three sessions | Counting squares |
| One-page zine | Older | About an hour | Planning eight pages ahead |
| Papier-mâché bowl or planet | Older | Three or four days | Layering and drying |
| Air-dry clay miniatures | Older | An afternoon, plus drying | Fine detail |
| String art | Oldest | Two sessions | Hammering a straight line of nails |
Crafts for 6- to 8-year-olds: one sitting, one finished thing
Most kids in this range can concentrate on a craft for half an hour or so before they need a break. Pick projects with a natural stopping point, and keep anything involving heat, a sharp blade or a hot glue gun on your side of the table. That’s less about rules than about frustration: a child who burns a finger on the iron won’t be excited about the next project.
1. A first fuse bead piece that fits on one sheet
Time: 45 to 90 minutes of placing beads, plus ironing by an adult · You need: standard-size fuse beads, a large pegboard or several linked square ones, a printed pattern, an iron and ironing paper.
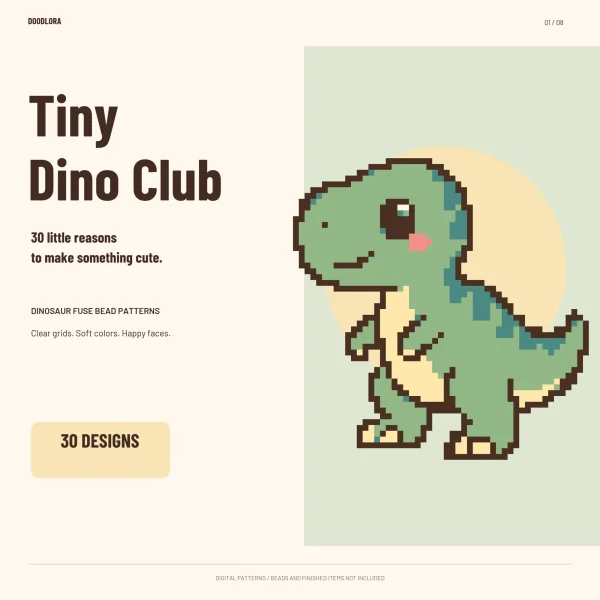
Start small. In our dinosaur fuse bead set, the three-toed footprint uses 781 beads in two colors, and the spotted egg uses 952 beads in three. Each of them prints on a single Letter sheet in the actual-size book for standard beads. Slide the printed sheet under a clear pegboard, place one color at a time, then hand the board to an adult for ironing. Our guide to ironing fuse beads covers the iron setting and how to keep a piece flat.
It’s done when the piece is ironed and has cooled completely flat.
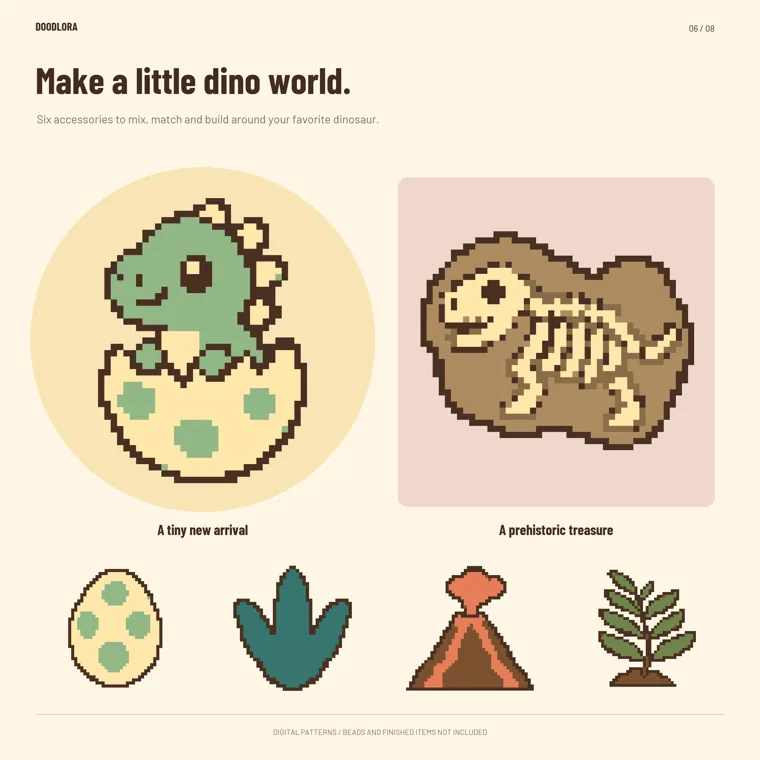
Where it goes wrong: one sheet doesn’t mean one small pegboard. The footprint grid is 42 by 44 cells, about 7 inches across, so it spills past a single 29 × 29 square board. Link four boards before the child starts, because moving a half-filled board scatters beads everywhere. Fuse beads are small parts that don’t belong near children under 3, which matters if a younger sibling shares the table.
2. Finger knitting
Time: 20 to 40 minutes for a long cord · You need: one ball of chunky yarn and nothing else.
Hold the yarn tail between the thumb and pointer finger, then weave the yarn over and under the four fingers and back again so each finger has a loop. Weave a second row the same way. Lift the bottom loop on each finger over the top loop and off the finger, then weave another row and repeat. The cord grows down the back of the hand. To finish, cut the yarn, thread the tail through the four loops and pull tight.
It’s done when the cord is long enough for what the child has in mind, whether that’s a headband, a bag strap or a scarf for a stuffed animal.
Where it goes wrong: kids pull the loops too tight and can’t lift them off. Keep the hand relaxed and the fingers slightly spread. Don’t worry about uneven first rows, since they even out as the cord gets longer.
3. Paper bead necklace
Time: about 40 minutes for a necklace’s worth of beads, plus drying · You need: magazine pages or old wrapping paper, a ruler, scissors, a glue stick, a toothpick or thin skewer, and string.
Cut long, thin triangles from the paper, about an inch wide at the base and as long as the page. Starting at the wide end, roll each triangle tightly around the toothpick, and glue the last few inches so the point sticks down flat. Slide the bead off and set it aside. When a whole row has dried, thread the beads on string, with a knot between each one if the child wants spacing.
It’s done when the necklace slips over the child’s head with room to spare, so nobody has to tie a fiddly clasp.
Where it goes wrong: loose rolling makes a soft bead that unrolls later. An adult can cut the first batch of triangles while the child rolls, and older kids can brush a thin coat of white glue over the finished beads for extra strength.
4. Yarn pom-pom animals
Time: about half an hour per pom-pom · You need: yarn, cardboard, scissors, felt scraps and white glue.
Cut two matching cardboard rings, like flat donuts, and hold them together. Wrap yarn around the ring until the center hole is almost closed. Slide scissors between the two cardboard layers and cut around the outside edge, then tie a strong piece of yarn tightly between the layers and pull the cardboard off. Trim the ball round and glue on felt ears, eyes and a beak to make a chick, an owl or a bunny.
It’s done when the trimmed ball holds its shape when you squeeze it and the felt face stays put after the glue dries.
Where it goes wrong: a pom-pom wrapped too thinly falls apart when the cardboard comes off. Keep wrapping well past the point where it looks like enough. The tie in the middle needs real pulling strength, and that’s the knot an adult should handle.
5. Paper plate weaving
Time: under an hour · You need: a sturdy paper plate, scissors, a pencil, yarn in two or three colors, and a plastic yarn needle or a strip of tape wrapped around the yarn end.
Cut an odd number of small notches around the rim of the plate (13 or 15 works). Wind yarn across the plate from notch to notch so the strands cross in the middle like spokes, and tape the end on the back. Starting at the center, weave a second yarn over one spoke and under the next, going around and around. With an odd number of spokes, each round automatically lands on the opposite side from the round before. Change colors by knotting a new yarn to the old end.
It’s done when the weaving reaches about an inch from the rim and the last end is tucked under a few strands on the back.
Where it goes wrong: with an even number of notches, every round repeats the round before and the weaving falls apart. Count the notches together before winding anything.
6. Salt dough fossils
Time: half an hour to make, then a day or two to dry · You need: flour, salt, water, a bowl, leaves, shells or a toy dinosaur, and paint.
Mix about two parts flour to one part salt and add water slowly until the dough feels like play dough. Roll it into thick discs about the size of a cookie. Press a leaf, a shell or a toy dinosaur’s foot firmly into each disc, then lift it out cleanly. Let the fossils dry on a rack, turning them once, or have an adult dry them in a low oven. Paint them brown, then wipe some paint away so the print stands out.
It’s done when the fossils feel hard all the way through and the paint has dried.
Where it goes wrong: thin discs crack while drying, so keep them at least as thick as a finger. The project pairs well with the fossil stone and footprint patterns in the dinosaur fuse bead set if the child wants a whole “dig site” on a shelf.
7. Reading-streak bookmarks
Time: a few minutes per bookmark · You need: a printed bookmark page, crayons or colored pencils, scissors, and cardstock if your printer takes it.
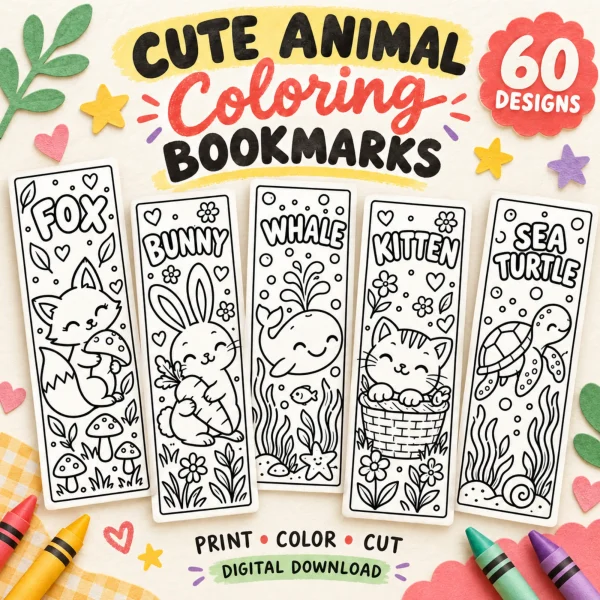
Turn coloring into a slow, ongoing project with one bookmark per finished book. Our Cute Animal Coloring Bookmarks print two 2 x 6 inch bookmarks per page, with 60 animals in six groups of ten, so a child can collect a whole set over a school year. Ten reading reward pages carry messages such as “Great Reader!” and “Keep Reading!” for milestones. The file’s cover says ages 3 to 8 with adult help. For a 9- or 10-year-old, the five design-your-own pages are the better fit, since each has two blank outlines for drawing and naming a brand-new character.
It’s done when the bookmark is cut along its outer solid line and tucked into the book the child is reading.
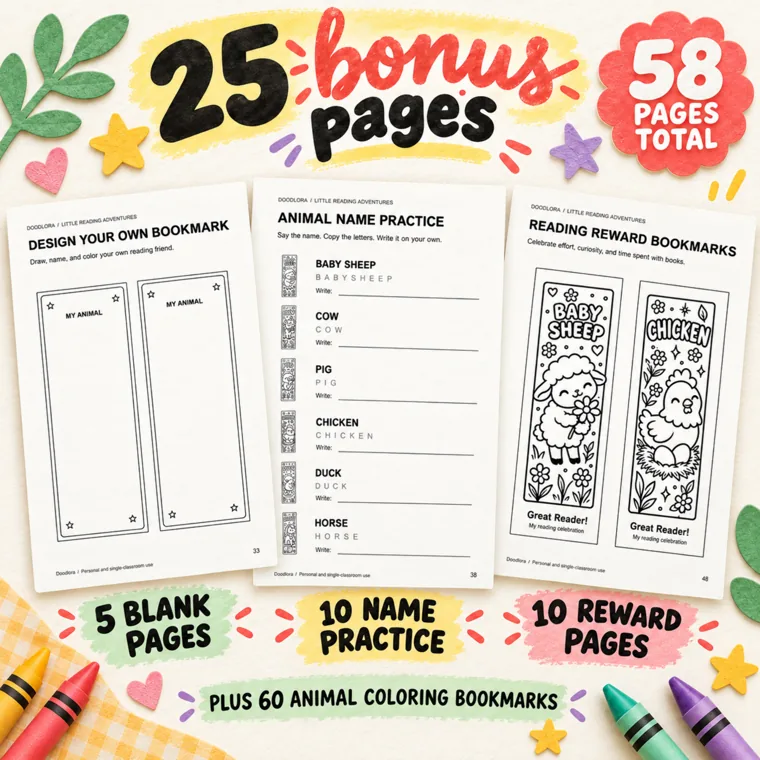
Where it goes wrong: a bookmark printed on plain paper goes floppy quickly. The printing page in the file suggests cardstock around 65 to 80 lb and asks for an adult’s help with cutting. For crisp coloring in a narrow space, see our coloring tips.
8. A sewn felt pouch
Ages: 7 to 9 · Time: about an hour · You need: two felt rectangles the same size, embroidery floss, a large-eye blunt needle, a button or a strip of Velcro, and pins.
Pin the two felt pieces together. Thread the needle, knot the end, and sew a running stitch (up, down, up, down) around three sides about a quarter inch from the edge, leaving the top open. Tie off on the inside. Sew on a button or a small Velcro patch to close it, or leave it open as a pencil pocket.
It’s done when the pouch holds a pencil or a few coins without anything slipping through the seams.
Where it goes wrong: embroidery floss tangles when the thread is long. Cut it about as long as the child’s arm and re-thread when it runs out. A stitch line drawn first in washable marker keeps the stitches straight, and it’s the cheapest confidence boost in this whole list.
Crafts for 9- to 12-year-olds: projects that take several sessions
Older kids can hold a goal across several days, and that’s where real concentration starts to show. The trick is to pick crafts with a clear stopping point at the end of each session: a finished row, a finished tile, a layer that needs to dry. Store each project in its own zip bag or shoebox so the next session starts in a minute instead of a search.
9. A multi-sheet fuse bead dinosaur
Time: two to four sessions, plus ironing by an adult · You need: standard fuse beads in five to seven colors, linked pegboards, the printed actual-size chart and a bead tray for sorting.
Reading a coded chart, instead of just following colors, is the new skill at this age. In our dinosaur set, the darker group is the easier step up: the forest green tyrannosaurus uses 798 beads and prints on two sheets. The 16 pastel dinosaurs are longer builds at 1,408 to 2,019 beads, and most of them take four sheets. Print the actual-size book at 100%, measure the calibration line on the first page before printing the rest, and trim the sheets so they meet edge to edge.
It’s done when every sheet is filled, an adult has ironed the joined boards, and the dinosaur lifts off in one piece.
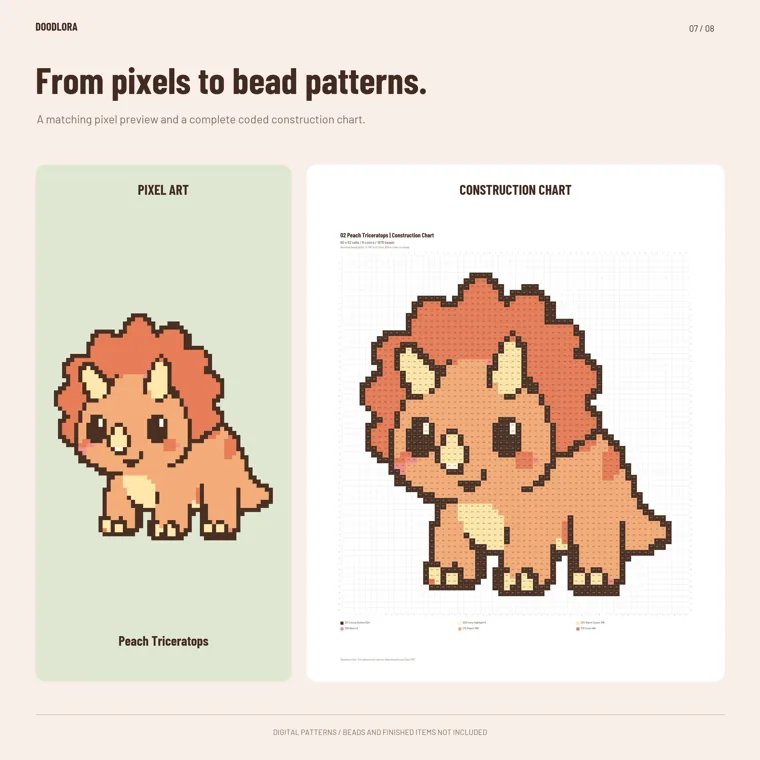
Where it goes wrong: the codes in this set (Z01 to Z32) are the set’s own color names, not a bead brand’s numbers, so sort your beads into matching cups before starting. White beads always carry a code, and an empty cell means no bead at all. The 63-page reading chart book is for counting at a comfortable size, not for laying beads on. If a smaller piece is going to become a keychain, plan the hole first with our fuse bead keychain guide.
10. A big fuse bead paw print, one pad at a time
Ages: 10 to 12, or a parent and child together · Time: several weekends · You need: standard beads in five colors, enough linked pegboards for one pad at a time, and the actual-size or enlarged code chart.
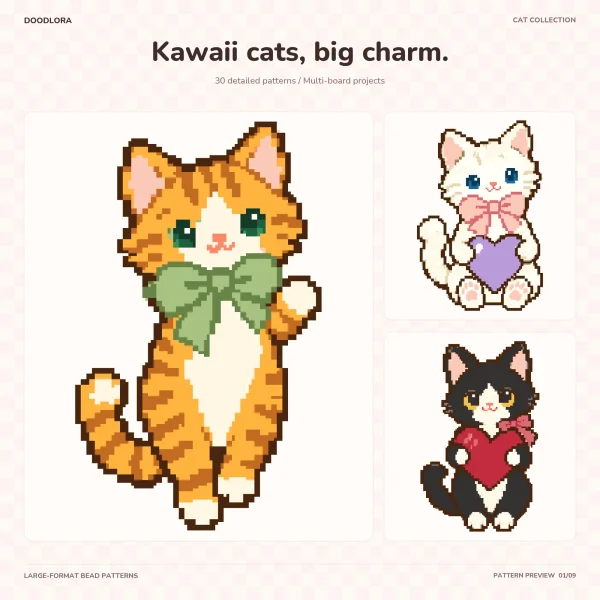
Our kitten pattern set is built for large wall pieces, and its paw prints are the most manageable way in. The blue paw print uses 5,498 beads and spans four by four board sections of 29 × 29 pegs, about 19.5 by 17.3 inches overall. It’s made of five separate pads, four toes and the main pad, and the file says to fuse each one on its own and arrange them afterward. That turns one huge project into five builds, each with its own finish line.
It’s done when all five pads are fused and laid out in the paw shape on a board or a wall.
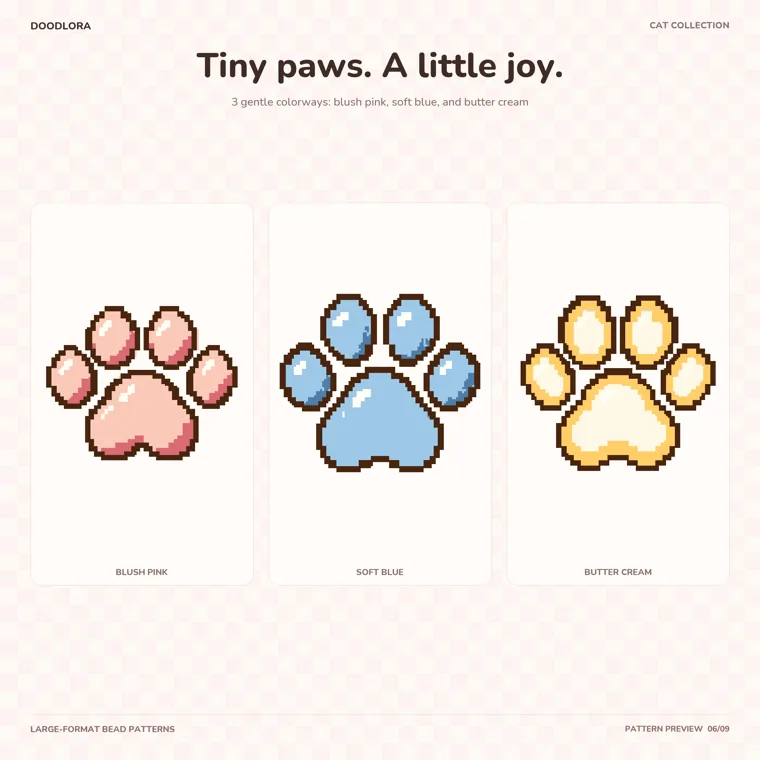
Where it goes wrong: the color letters A to L restart in every design, so letter C on the paw print isn’t letter C on a cat head. Use standard beads for kids rather than the mini-bead sheets, which are much fiddlier. The other 29 designs in the set run from 5,859 to 10,189 beads, which is family-project territory rather than a solo craft.
11. A candy stripe friendship bracelet
Time: one to two hours · You need: embroidery floss in four colors (two strands of each), tape or a clipboard, and scissors.
Cut eight strands, each about an arm’s length, knot them together at the top with a loop, and tape the knot to the table. Arrange the colors in mirrored pairs. Take the far-left strand and tie two forward knots over the strand next to it, then two more over the next one, until it reaches the right side. Do the same with the new far-left strand. Each pass adds one diagonal stripe.
It’s done when the bracelet wraps around the wrist with a little extra, and the loose ends are braided and tied through the starting loop.
Where it goes wrong: a forward knot only counts if the knotting strand ends up on the right. If colors start appearing in the wrong place, one knot was tied as a single instead of a double. Check each row before starting the next one, because undoing a dozen rows is the point where most kids quit.
12. A small cross-stitch from a grid chart
Time: two or three sessions · You need: 14-count Aida cloth, a small embroidery hoop, embroidery floss, a blunt needle with a large eye and a grid chart.
Cross-stitch uses the same skill as a fuse bead chart: one square on the chart, one stitch on the cloth. Find the center of the fabric and the center of the chart, and start there. Stitch each X with all the bottom legs leaning the same direction. A bead chart works for personal stitching too, and the footprint from the first craft is 42 cells across, which comes out about 3 inches wide on 14-count Aida.
It’s done when every square on the chart has its cross, and the hoop can stay on as the frame.
Where it goes wrong: crosses that point different ways make the finished piece look patchy. Teach the “all bottom stitches lean the same way” rule on the very first row. A child who loses their place can tick off finished squares on a photocopy of the chart.
13. A one-page zine
Time: about an hour · You need: a sheet of printer paper, scissors, and pens or markers.
Fold the sheet in half three times to make eight panels, then unfold it. Fold it in half the short way and cut along the middle crease from the folded edge to the center, through just two panels. Open it, fold it the long way, and push the two ends toward each other so the cut opens into a diamond and folds flat into an eight-page booklet. Plan the pages on scrap paper first: a cover, six pages of comic, facts or a story, and a back cover.
It’s done when the booklet folds flat and every page reads in order, cover to back.
Where it goes wrong: kids draw on the flat sheet and find half the pages upside down once it’s folded. Fold the zine first, number the pages lightly in pencil, then unfold and draw.
14. A papier-mâché bowl or planet
Time: three or four days, about half an hour a day · You need: a balloon or a plastic bowl covered in plastic wrap, newspaper torn into strips, white glue thinned with water or a flour-and-water paste, and paint.
Dip each strip in the paste, run it between two fingers to remove the extra, and lay it over the form with the edges overlapping. Cover the whole surface, then let it dry completely before adding the next layer. After three or four layers, pop the balloon or lift the bowl out, trim the edge, and paint. A balloon becomes a planet for a solar system mobile, and a bowl becomes a catch-all for desk supplies.
It’s done when the paint is dry and the shape doesn’t flex when you press it.
Where it goes wrong: layers added before the one underneath is dry turn soggy and can grow mold. One layer a day is the rhythm that works. Expect a mess, and cover the table before anyone opens the paste.
15. Air-dry clay miniatures
Time: an afternoon, then drying time from the package · You need: air-dry clay, a toothpick, a plastic knife, a damp cloth and acrylic paint.
Tiny food is a good first subject: a donut, a slice of pizza, a sushi roll, a bowl of fruit. Shape each item from a ball of clay, add texture with the toothpick, and smooth cracks with a damp finger. Set the pieces on wax paper, let them dry for the time printed on the package, then paint.
It’s done when the paint is dry and each piece can be picked up without leaving a fingerprint.
Where it goes wrong: thin parts like handles and tails snap off once dry. Keep them chunky, or press them firmly into the main piece while the clay is soft. Keep the open clay under the damp cloth so it doesn’t crust over while the child is working.
16. String art
Ages: 10 to 12, with an adult nearby · Time: two sessions · You need: a scrap board, small nails with heads, a hammer, a printed outline (a heart, a star or a first initial), embroidery floss and tape.
Tape the paper outline to the board and hammer nails along the line about half an inch apart, leaving them sticking up evenly. Tear the paper away. Tie the floss to one nail and wrap it back and forth across the shape, going around a different nail each time, until the inside is filled.
It’s done when the floss covers the shape and the end is knotted around a nail and trimmed.
Where it goes wrong: nails hammered at an angle make the outline wobble, and the floss slips off. Hold each nail with a clothespin instead of fingers for the first few taps, and keep the hammering session separate from the wrapping session.
Running a craft session with a group of 6- to 12-year-olds
Mixed ages are the usual situation at a family gathering, a class party or an after-school club. Pair one craft for each age band that uses the same supplies, so the table doesn’t need two setups:
- Yarn table: finger knitting and pom-poms for the younger kids, friendship bracelets for the older ones.
- Fuse bead table: the one-sheet egg or footprint for the younger group, a two-sheet dinosaur for the older group. One adult stays at the iron and nobody else touches it.
- Paper table: reading-streak bookmarks for the younger group and zines for the older group.
Set a clear end time, and give every child a labeled zip bag for anything unfinished. Older kids often like being the “helper” for one step, such as tying the pom-pom knot for a younger child, which keeps them involved while their own project rests. For more indoor ideas without a craft table, see our screen-free activities for kids.
Getting a long craft finished
Patience is the point of most crafts in the older list, and it grows best in small, finishable pieces. A few habits help:
- Decide the stopping point before starting. “Two rows of the bracelet” or “the top tile of the dinosaur” ends a session on a win.
- Leave work in place. Fuse beads on a pegboard and wet papier-mâché both stay put on a shelf or a tray, not on the dinner table.
- Prepare the boring part ahead. Sorting beads by color, cutting floss and tearing newspaper can happen the evening before, so the session starts with the fun part.
- Show the finished piece. A bracelet worn to school or a dinosaur on the bedroom door is what makes the next long project feel worth starting.
The satisfaction of finishing something that took three weekends is a different experience from finishing a coloring page, and that’s the real reason to hand a 10-year-old a project that’s a little bigger than they think they can manage.
Printables from this article
Related articles
Fuse Bead Patterns
Pony Bead Animals: Keychain Ideas and How to Lace Them
How pony bead animal keychains are laced on one folded cord: what beads and cord to buy, how to start on a keychain ring, read a row recipe, widen and narrow rows with clear support beads, tie off the last row, and run it with kids at a party or in a classroom.
Fuse Bead Patterns
How to Make Kandi Bracelets: Singles, Cuffs and Trading
What kandi is and where PLUR and the trading handshake come from, what beads and cord to buy, how to string and knot a single, how to build a flat peyote cuff and a multi-stitch cuff, and how to read a row-by-row kandi pattern.
Fuse Bead Patterns
Ocean Crafts for Kids: Jellyfish, Whales and Fuse Beads
Fourteen ocean crafts for preschoolers, school-age kids, teens and adults, with what to prepare, how long each one takes and where each one usually goes wrong.