Pony Bead Animals: Keychain Ideas and How to Lace Them
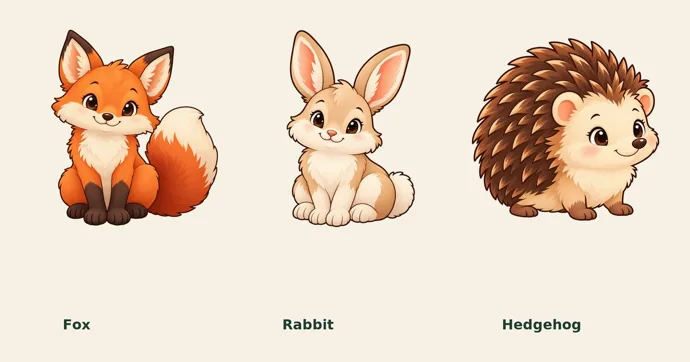
A pony bead animal keychain is a flat charm made by lacing pony beads row by row onto one cord folded in half. The fold hangs from a keychain ring, and both cord ends travel through every bead, one from each side.
Rows get wider for a head or body and narrower for a chin or tail, so the beads build a small, blocky picture underneath the ring. Nothing gets ironed, and there’s no pegboard.
If you’ve never made one, start with a shape that has no gaps in it, like a tent, a bee or a mushroom. All three are solid triangles or ovals of 12 to 13 rows. Animals with ears, wings or fins come next, because they need transparent “support” beads to hold the gaps.
| If you are… | Start with | Why |
|---|---|---|
| Making your first one | A solid shape: tent, bee, mushroom | No clear beads, 132 to 161 beads |
| Ready for a real animal | Ladybug, frog, bear or owl | Only 8 or 9 clear beads |
| Comfortable with tension | Fox, raccoon, rabbit | 315 to 346 beads, longer cords |
| Looking for a challenge | Fish, turtle, hummingbird | Wide rows and sudden changes can flex |
| Working with children | A solid shape on mini beads | Shortest cord, smallest charm |
Flat bead keychains made on a pegboard and melted with an iron are a completely different craft with different beads. For those, our fuse bead keychain guide walks through the pegboard and ironing steps.
What you need for pony bead animals
Pony beads in one size. Patterns are written in colors, not sizes, so the same recipe works for standard or mini beads. Standard barrel pony beads are about 0.35 x 0.24 in (9 x 6 mm), and mini ones about 0.24 x 0.16 in (6 x 4 mm).
Pick one size and stay with it throughout the charm. Mixing sizes makes rows uneven. Some “mini” beads also run 6.5 mm (0.26 in), which produces a slightly taller charm, so measure a few of yours before you start.
Clear beads, if the pattern uses them. A clear bead is a real bead in the finished charm. It fills the space between two ears or two wings so the row stays centered. Count them as carefully as any color.
Nonstretch braided beading cord. About 0.03 in (0.8 mm) for standard beads and 0.02 in (0.5 mm) for mini. The cord passes through each bead twice in a row, and at the end some beads take a third pass. Before you cut, push three strands through one of your beads. If it needs force, switch to thinner cord.
That’s where pony bead animals differ from kandi bracelets. A closed kandi bracelet has to stretch over your hand, so it’s strung on elastic. A keychain charm hangs from a ring and never stretches, and stretchy cord lets the rows sag out of shape.
A keychain ring or a lanyard clip, scissors, a bead tray or a few small cups, and a roll of removable tape to label the two cord ends.
Enough cord. People underestimate this measurement more than any other. The cord does every row twice, plus the turns at each edge.
A small tent on standard beads takes about 120 in (305 cm) of cord, which is 10 feet. A large lantern takes about 270 in (686 cm). On mini beads, the same tent takes about 90 in (229 cm). Cut the complete length before you fold it, and don’t count on adding cord halfway through.
Pony beads and young children
With several kids lacing at one table, a few hundred beads end up loose, and some always roll off the edge. Under the CPSC small-parts rule, a toy meant for children under 3 can’t have, or shed, a piece small enough to be a choking, aspiration or ingestion hazard, and one pony bead qualifies. A finished charm is still 132 or more of those beads held by a knot, so treat it as a decoration for a backpack or keys, not a toy to hand a baby or toddler. Keep the bead cups and long cut cords up high while kids work, and when they finish, count the leftovers back into a lidded box before anyone smaller comes near the table.
There’s no official age for lacing one of these. The practical question is whether a child can keep beads out of their mouth, count up to about 20 beads for a row, and remember which cord end is which.
A grown-up should stay nearby and handle the scissors. A 132-bead tent takes far more patience than a single bracelet. For a younger child, an adult can load each row while the child pulls it snug.
How to start a pony bead keychain
Everything starts at the keychain ring, and the first five minutes decide whether the cord lasts to the final row.
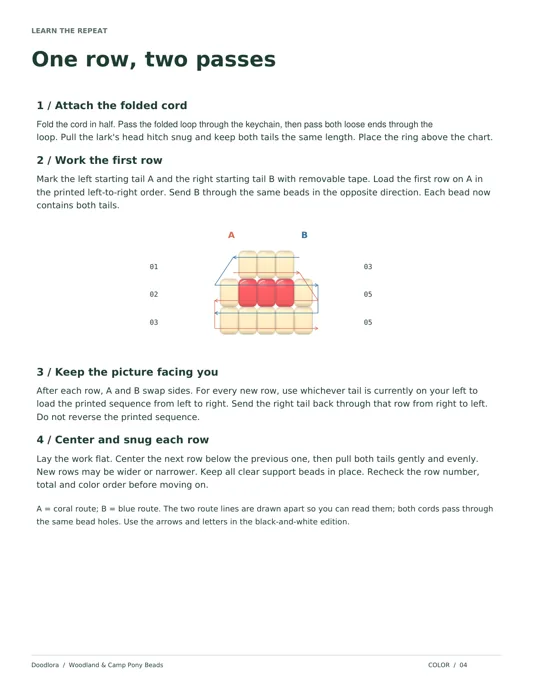
- Cut and fold. Cut the full length listed in your pattern and fold it exactly in half.
- Attach it to the ring with a lark’s head hitch. Push the folded loop through the keychain ring, pass both loose ends through that loop, and pull it snug against the ring. The two tails should come out even.
- Label the tails. Put a small flag of tape on the left tail and write A on it. Mark the right tail B. You’ll need to know which is which after a few rows.
- Set the ring above your pattern. Lay everything flat on the table with the ring at the top, so the charm grows toward you in the same direction as the chart.
The common mistake here is uneven tails. If one side is a foot shorter, it runs out first and the charm ends a few rows early. Check that the tails are even before row 1.
How to lace each row: two cord ends, one picture
Every row is the same two moves.
- Load the row on the left tail. Thread the beads for that row onto whichever tail is on your left, in the printed order, reading left to right.
- Send the right tail back through. Push the right tail through the same beads from right to left. Each bead now holds both cords.
- Center it and pull snug. Slide the row up underneath the one above, center it, and pull both tails gently and evenly at the same time.
- Check before the next row. Count the beads and compare the colors with the pattern.
After every row, the two tails swap sides. Tail A, which started on the left, is now on the right. That’s expected. For the next row, use whichever tail is on your left now, and keep reading the pattern left to right.
Don’t reverse the order to “match” the tail. If you do, the picture flips and the colors stop lining up. Pull both tails with the same force, too. If one gets pulled harder, the row tilts and the edges stop matching.
How to read a pony bead pattern
Most pony bead patterns come in two parts, and you’ll need both of them open.
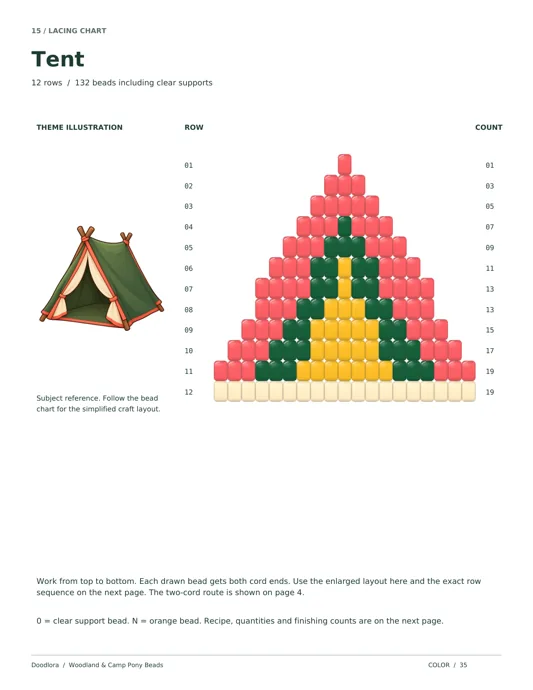
The chart is a picture made of beads, with a row number on one side and a bead count on the other. Use it to see the shape and check your progress.
The row recipe writes each row as a string of letters. Each letter is one bead. In our patterns, C is cream, R is coral, F is forest green, Y is golden yellow, N is orange, and 0 is a clear support bead.
The letter key changes from pattern to pattern, so check it on every recipe page. Read every row left to right while looking at the front of the charm.
Here’s the beginning of the tent, the easiest pattern in our set:
| Row | Beads | Recipe |
|---|---|---|
| 1 | 1 | R |
| 2 | 3 | RRR |
| 3 | 5 | RRRRR |
| 4 | 7 | RRRFRRR |
| 5 | 9 | RRRFFFRRR |
| 6 | 11 | RRRFFYFFRRR |
Row 1 is a single coral bead hanging underneath the ring. Row 4 puts one green bead in the middle, which becomes the top of the door. By row 11, the tent is 19 beads wide, and row 12 is a solid line of 19 cream beads for the ground.
The whole tent is 132 beads in 12 rows: 59 coral, 32 forest green, 22 golden yellow and 19 cream.
Count the letters in a long row twice. A sequence like RRRFFFYYYYYFFFRRR is easy to miscount by one, and a missing bead throws the whole row off center. Tick off each row in pencil on the printout as you finish it.
Widening and narrowing rows
A row can be longer or shorter than the one above it. You don’t have to do anything special to widen. Load more beads, center the new row under the old one, and pull snug. The doubled cord holds the extra beads out to each side. To narrow, load fewer beads and center them the same way.
The trouble comes when a row has a gap in it, like the space between two ears or the notch between a fish’s tail and its body. A real gap would leave beads floating with no cord between them.
Clear beads solve that. They sit in the gap, carry the cord across and keep both halves of the row centered. In the finished charm they show up as transparent beads, and that’s how these patterns are supposed to look. Don’t leave them out.
The number of clear beads tells you how complicated a design will be. In our set, the tent, bee and mushroom use none. The ladybug and frog use 8 each. The fox uses 62, and the hummingbird uses 104 of its 218 beads, almost half.
Pony bead animal patterns: which one first
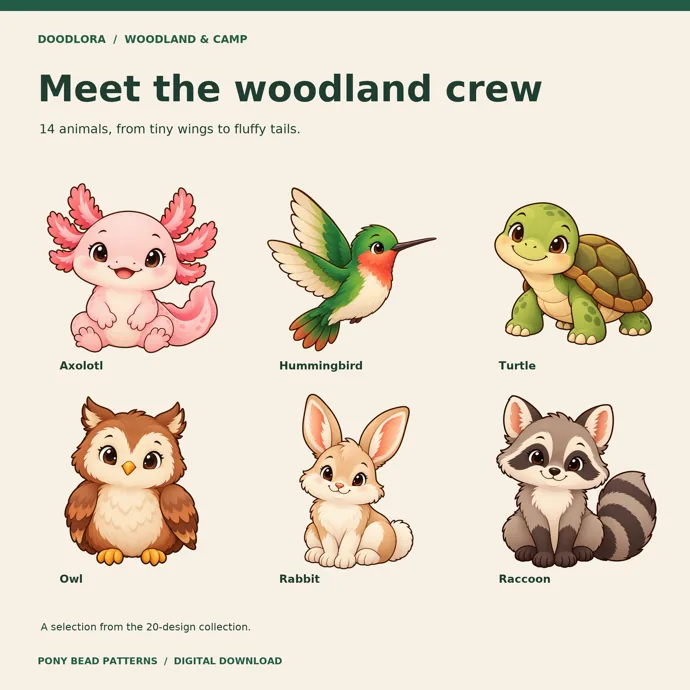
These are the 14 animals and three solid starter shapes from our set, with the numbers you need to plan supplies.
| Design | Rows | Beads | Clear beads | Cord, standard beads |
|---|---|---|---|---|
| Tent | 12 | 132 | 0 | 120 in (305 cm) |
| Bee | 12 | 158 | 0 | 138 in (351 cm) |
| Mushroom | 13 | 161 | 0 | 138 in (351 cm) |
| Ladybug | 15 | 179 | 8 | 150 in (381 cm) |
| Hedgehog | 11 | 185 | 19 | 150 in (381 cm) |
| Axolotl | 16 | 192 | 17 | 162 in (411 cm) |
| Fish | 13 | 193 | 41 | 162 in (411 cm) |
| Turtle | 16 | 194 | 12 | 162 in (411 cm) |
| Butterfly | 12 | 208 | 45 | 162 in (411 cm) |
| Hummingbird | 14 | 218 | 104 | 180 in (457 cm) |
| Bear | 15 | 235 | 9 | 186 in (472 cm) |
| Frog | 15 | 239 | 8 | 186 in (472 cm) |
| Owl | 16 | 260 | 9 | 198 in (503 cm) |
| Rabbit | 21 | 315 | 22 | 240 in (610 cm) |
| Raccoon | 17 | 327 | 52 | 240 in (610 cm) |
| Fox | 18 | 346 | 62 | 252 in (640 cm) |
Two things in this table catch people out. First, these charms are big. On standard beads they’re 4.5 to 5 inches wide, which makes them backpack charms rather than zipper pulls. Mini beads bring the same designs down to about 3 to 3.3 inches wide.
Second, the fish, turtle and hummingbird look simple but put wide rows next to narrow ones. Those are the patterns most likely to flex or leave long loops at the sides. Make one of those for yourself before you hand it to someone else.
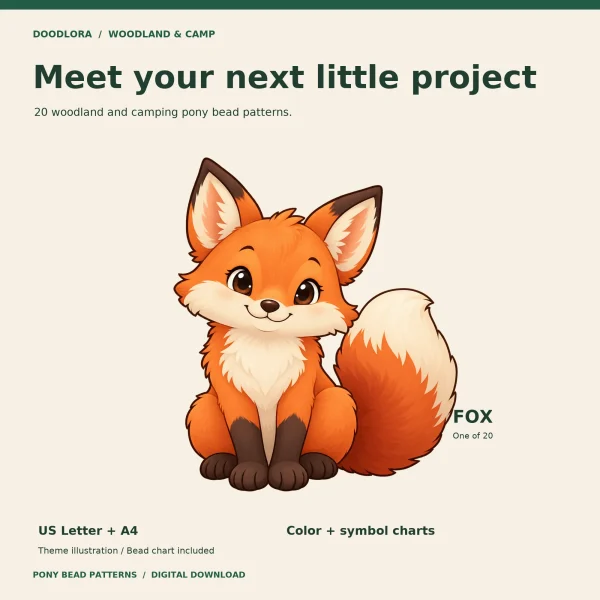
The animal pictures that come with a pattern show you what the animal is. Build from the chart and the recipe, not the illustration.
How to finish and tie off the last row
The last row decides whether the charm holds together or slides apart. The goal is to bring both tails to the same gap near the middle of the last row and knot them there.
- Find the center bead. A good pattern tells you which bead is the center and how many beads each tail goes back through. For the tent’s 19-bead last row, the left tail goes back through 9 beads and the right tail through 10, including bead 10.
- Rethread toward the middle. Pass the left tail back through the beads left of center. Pass the right tail back through the beads on the right, including the center bead. Both tails now come out of the same gap, just left of center.
- Tie the knot. Cross the left tail over the right and pass it through twice, then snug it gently. Cross the right tail over the left and pass it through once. Tighten both sides evenly. Add one overhand knot with both tails held together as a backup. If your cord’s manufacturer gives different knot instructions, follow theirs.
- Check before you trim. Leave at least 2 in (5 cm) on each tail at first. Tug gently at the ring, the side turns and the knot. If anything slips or a row buckles, loosen it and fix it now. Once it holds, trim the tails, but leave at least 0.5 in (1.3 cm). Don’t cut flush to the knot.
If the last row is a single bead, as with the axolotl and the turtle, the left tail is already in position. Push the right tail through that one bead from right to left and tie both tails on its left side.
Fixing a charm that curls, droops or twists
A row curls or droops. Stop and lay the work flat. Check that both tails went through every bead in that row and that you didn’t load it in reverse. Then adjust the tension gradually, not with one hard pull.
There are long cord loops at the sides. This happens where a wide row sits next to a much narrower one. Center the narrow row carefully and snug both tails evenly. If the loops stay, the design may be one of the flex-prone ones, so make it with your own cord and beads before you plan a batch.
The colors are in the wrong place. You probably read the recipe right to left after the tails swapped. Slide the row’s beads back off and reload them left to right.
You ran out of cord. The cord was cut short, or the tails were uneven at the start. There’s no clean fix partway down, which is why the full cut comes first.
Pony bead animals with kids, at a party or in a classroom
Pony bead animals work well as a sit-down activity. The preparation does most of the work.
Make one yourself first. Lace a complete charm with your own beads and cord before a group session. You’ll find out where your cord sticks, how tight your rows should be and how long one takes you, and that tells you how much time to plan.
Give beginners solid shapes. For a group, choose patterns with no clear beads, like the tent, bee or mushroom, and use mini beads so the cord is shorter.
Prepare each kit. Before guests or students arrive, cut each cord, fold it, attach it to a keychain ring and tape the A and B tails. Count each child’s beads into a cup by color from the recipe’s bead list.
For a tent, that’s 59 coral, 32 forest green, 22 golden yellow and 19 cream. A cup with exactly the right beads doubles as a check: leftover beads at the end mean a missed bead somewhere.
Print what you need. Print the pattern at 100% or “Actual Size.” A big chart is a reading guide, not a template to lay beads on. For a class, a black-and-white symbols version saves color ink if your pattern comes with one. Our personal license covers a teacher printing patterns for their own class.
Plan for the floor. Beads roll. Work over trays, keep a sealed container for spares, and do a floor sweep before younger siblings come back into the room.
Let kids finish with help. The last row is the hardest step. An adult can handle the rethreading and knot while the child holds the charm flat.
Pony bead keychain patterns to try next
Our Woodland and Camp set has 20 pony bead keychain patterns: the 14 animals in the table above and six camping designs, a tent, campfire, pine tree, lantern, backpack and mushroom.
The PDF opens with four how-to pages on materials and safety, the two-cord repeat, the finishing knot and reading the measurements. Each design then gets a lacing chart and a row recipe with bead quantities, plus cord lengths and finished sizes for both standard and mini beads. It comes in color and black-and-white symbols, in US Letter and A4, along with 20 PNG illustrations of the subjects. Beads, cord and keychain rings aren’t included.
Cord lengths and sizes in any pattern are estimates. Bead brands vary a little, and your tension changes the result, so measure your own beads and finish one charm before you buy supplies for a whole group.
Printables from this article
Related articles
Fuse Bead Patterns
How to Make Kandi Bracelets: Singles, Cuffs and Trading
What kandi is and where PLUR and the trading handshake come from, what beads and cord to buy, how to string and knot a single, how to build a flat peyote cuff and a multi-stitch cuff, and how to read a row-by-row kandi pattern.
Fuse Bead Patterns
Crafts for Kids 6-12: Ideas for 8 and 10 Year Olds
Sixteen crafts for school-age kids, split into one-sitting projects for younger kids and longer builds for 9 to 12, with supplies, time, stopping points and common mistakes.
Fuse Bead Patterns
Ocean Crafts for Kids: Jellyfish, Whales and Fuse Beads
Fourteen ocean crafts for preschoolers, school-age kids, teens and adults, with what to prepare, how long each one takes and where each one usually goes wrong.