How to Iron Fuse Beads: Iron Settings, Flat Melts and Big Pieces
To iron fuse beads, lay ironing paper over the design on its pegboard, set a household iron to medium and move it in circles for about 10 to 20 seconds. Let it cool, peel it off the board, flip it and iron the back the same way.
These steps come straight from Perler’s own instructions. Perler and Hama are both fuse bead brands, and the two manufacturers don’t agree on every detail.
Many Chinese beaders take the design off the pegboard first and melt it completely flat, until the bead holes close.
Below you’ll find the standard steps, that flat-melt routine in order, where the temperature settings differ, and what to do when a piece curls or falls apart.
How to iron fuse beads: Perler’s standard method in three steps
Perler numbers its standard method as three steps, and it opens with one rule: an adult should do the fusing.
Hama’s instructions say the same thing.
Step 1: Put the pegboard on a flat, heat-safe surface.
The design stays on the pegboard for the whole first side. A plastic cutting mat doesn’t count as heat-safe: one beader lists putting one underneath her piece as a beginner mistake (more in the problems section).
Step 2: Set the iron to medium, cover the design with ironing paper and iron in circles.
Perler says not to press down.
Beads need heat for about 10 to 20 seconds per side to fuse evenly, some colors fuse faster than others, and you can lift the paper now and then to see how they’re doing.
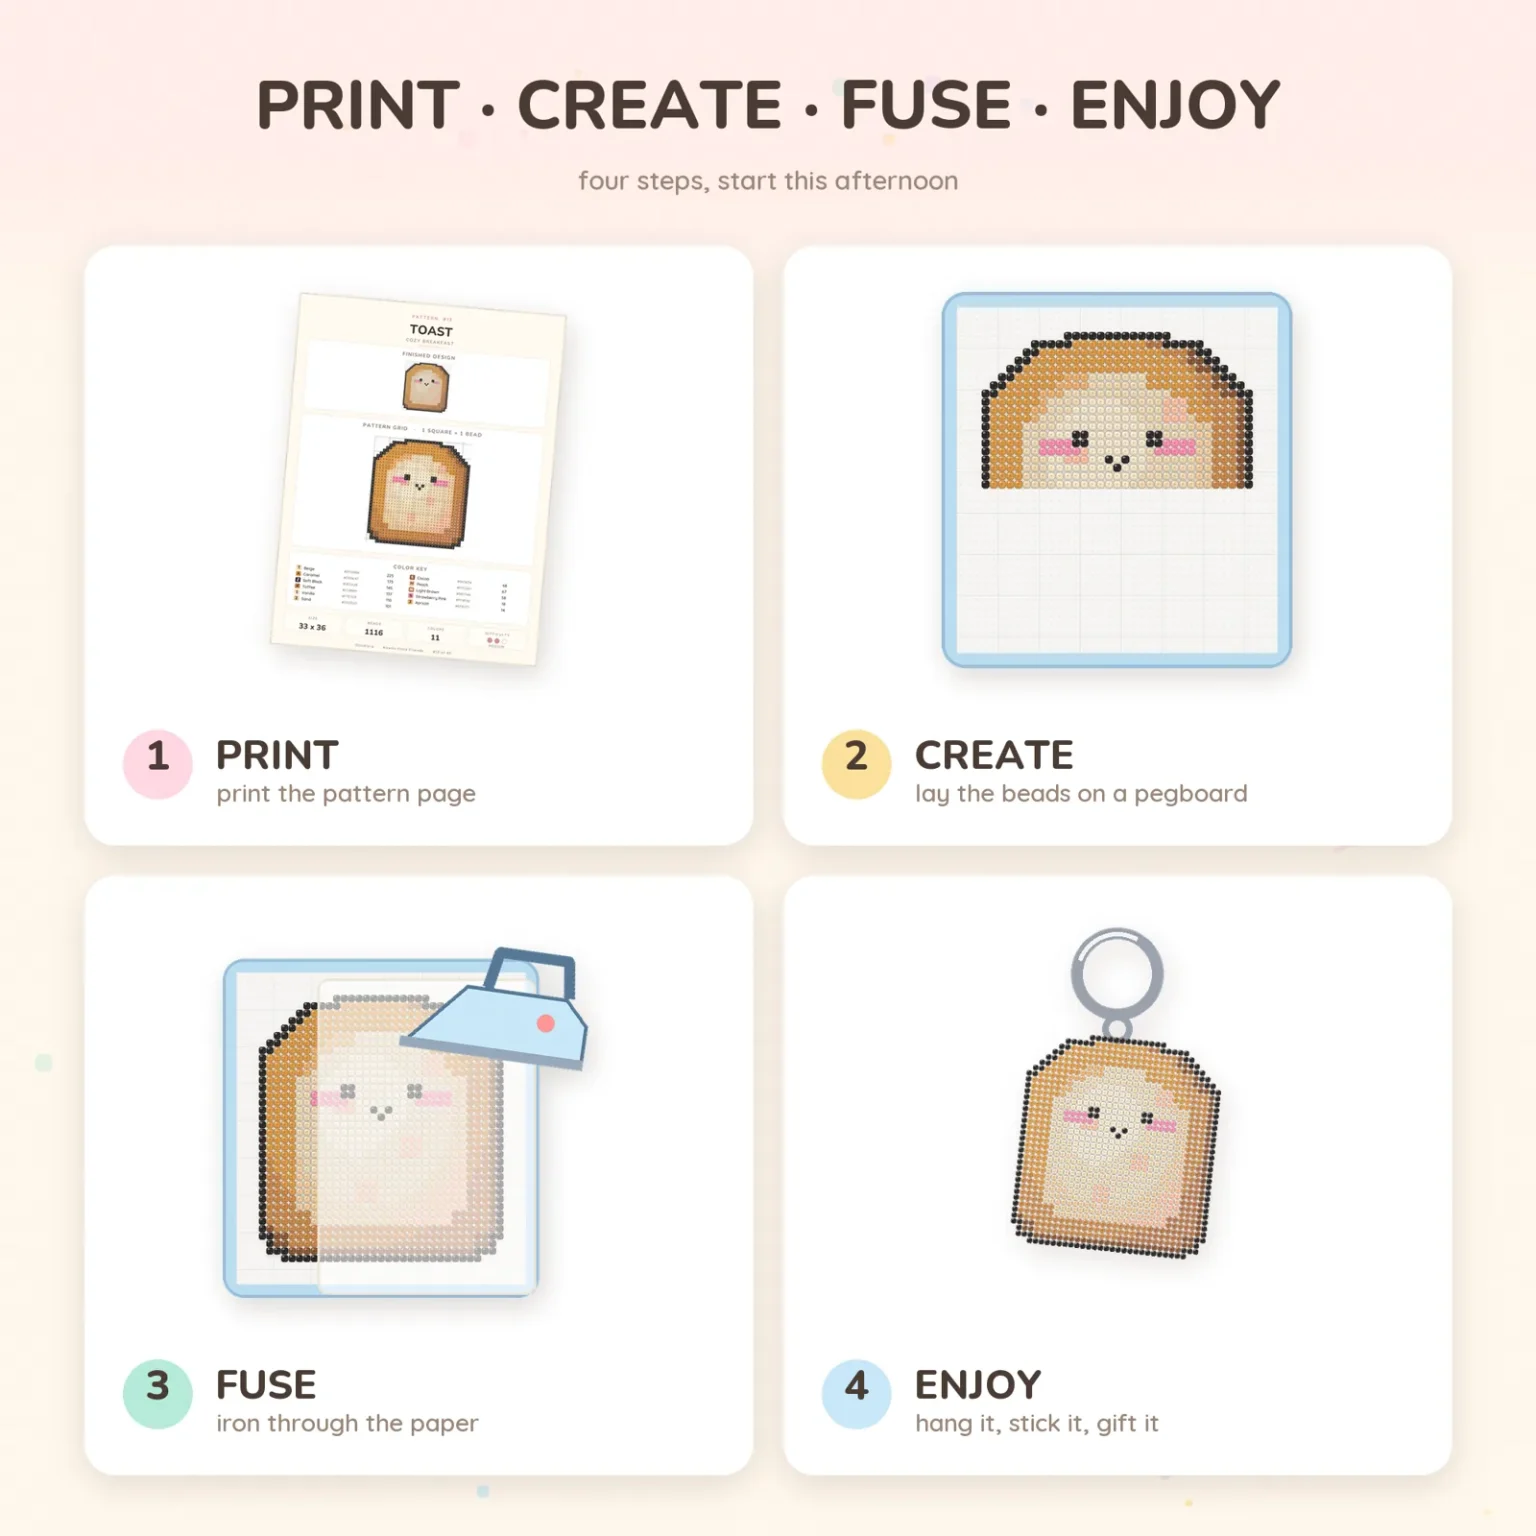
When the beads are ironed properly, each one still has an open center. Then let the design cool completely before you touch it.
Step 3: Take the paper and the design off the pegboard, flip it and iron the other side.
The unfused side goes face up and gets the same treatment as step 2. Then let it cool completely.
Perler points out that both the pegboard and the paper can be reused.
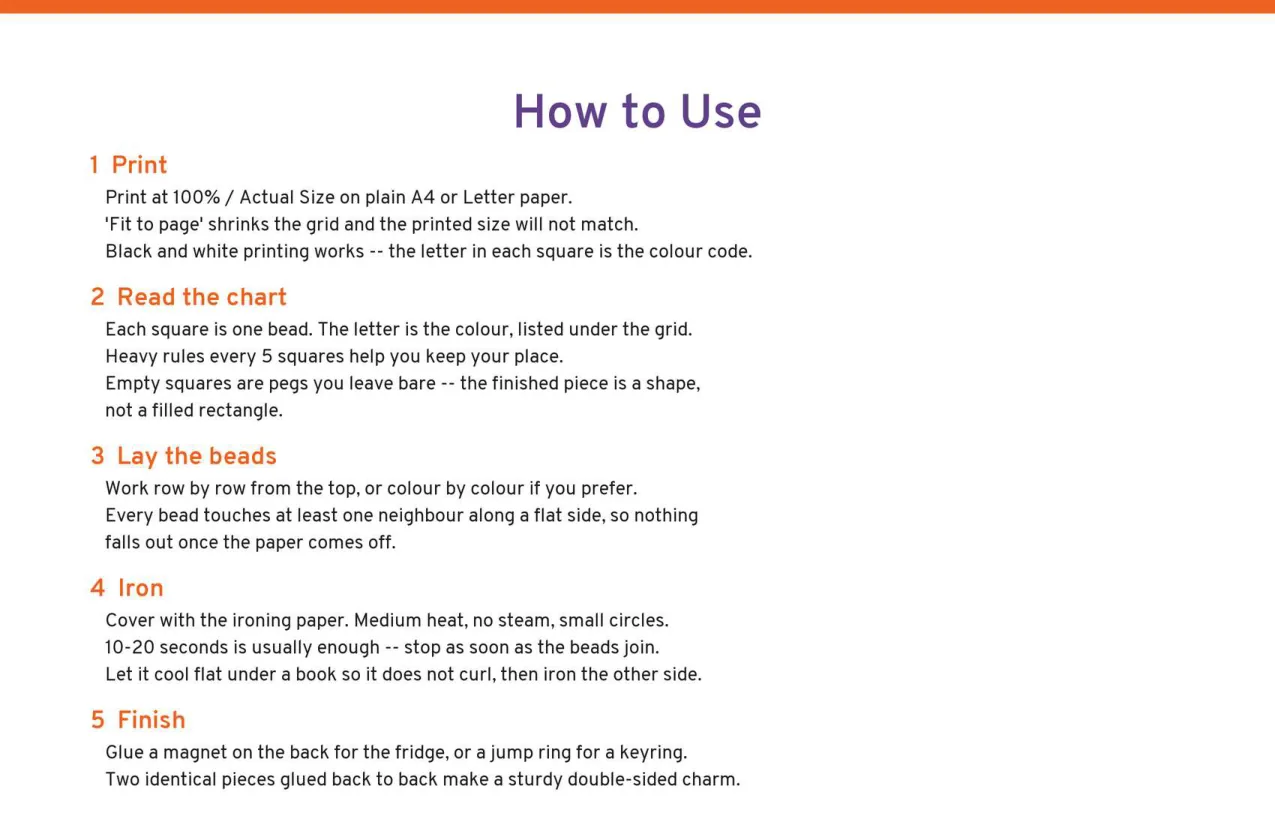
For an open-center piece, don’t skip the flip.
One beader’s note on a plaque ironed on one side says it’s still soft and needs the other side done too.
Perler adds one more warning: if the piece is going to be assembled with other pieces, don’t over-iron, because the bead centers close up and the parts get harder to fit together.
Open centers or a flat melt: how far to fuse the beads
The standard method stops while the holes are still open.
A lot of Chinese beaders aim for the opposite. They keep ironing until the holes close and the piece turns into a solid, smooth pixel picture.
They call it ironing “no-hole,” and most of the Chinese beaders quoted in this guide treat it as the goal.
Each finish has a cost. One Chinese beader says a fully melted piece is sturdier, but it’s easy to overdo, and an overdone piece slumps out of shape.
If one side is already melted flat, she doesn’t iron the other side at all, because it would thin out into a flat sheet.
She often leaves that second side unmelted on purpose, beads still round, so the front reads as a flat pixel picture and the back looks raised.
That only works for a piece that won’t hang or get handled much.
Going the other way has a cost too. Another beader says that if you don’t melt a piece all the way, you should iron both sides, or it stays brittle and bends easily.
The sheet between the iron and the beads changes the surface as well, and two Chinese beaders describe the same split.
A transparent plastic sheet leaves a glossy surface, which one of them found scratches easily.
A paper-like release sheet leaves a matte surface that doesn’t show wear.
The transparent sheet does have one advantage: you can watch the beads fusing through it.
A small design is the easiest place to try both finishes.
Doodlora Studio’s cute animal set was drawn so every animal fits inside 29 × 29 squares, the size of one standard square pegboard, and each one uses between 255 and 431 beads.
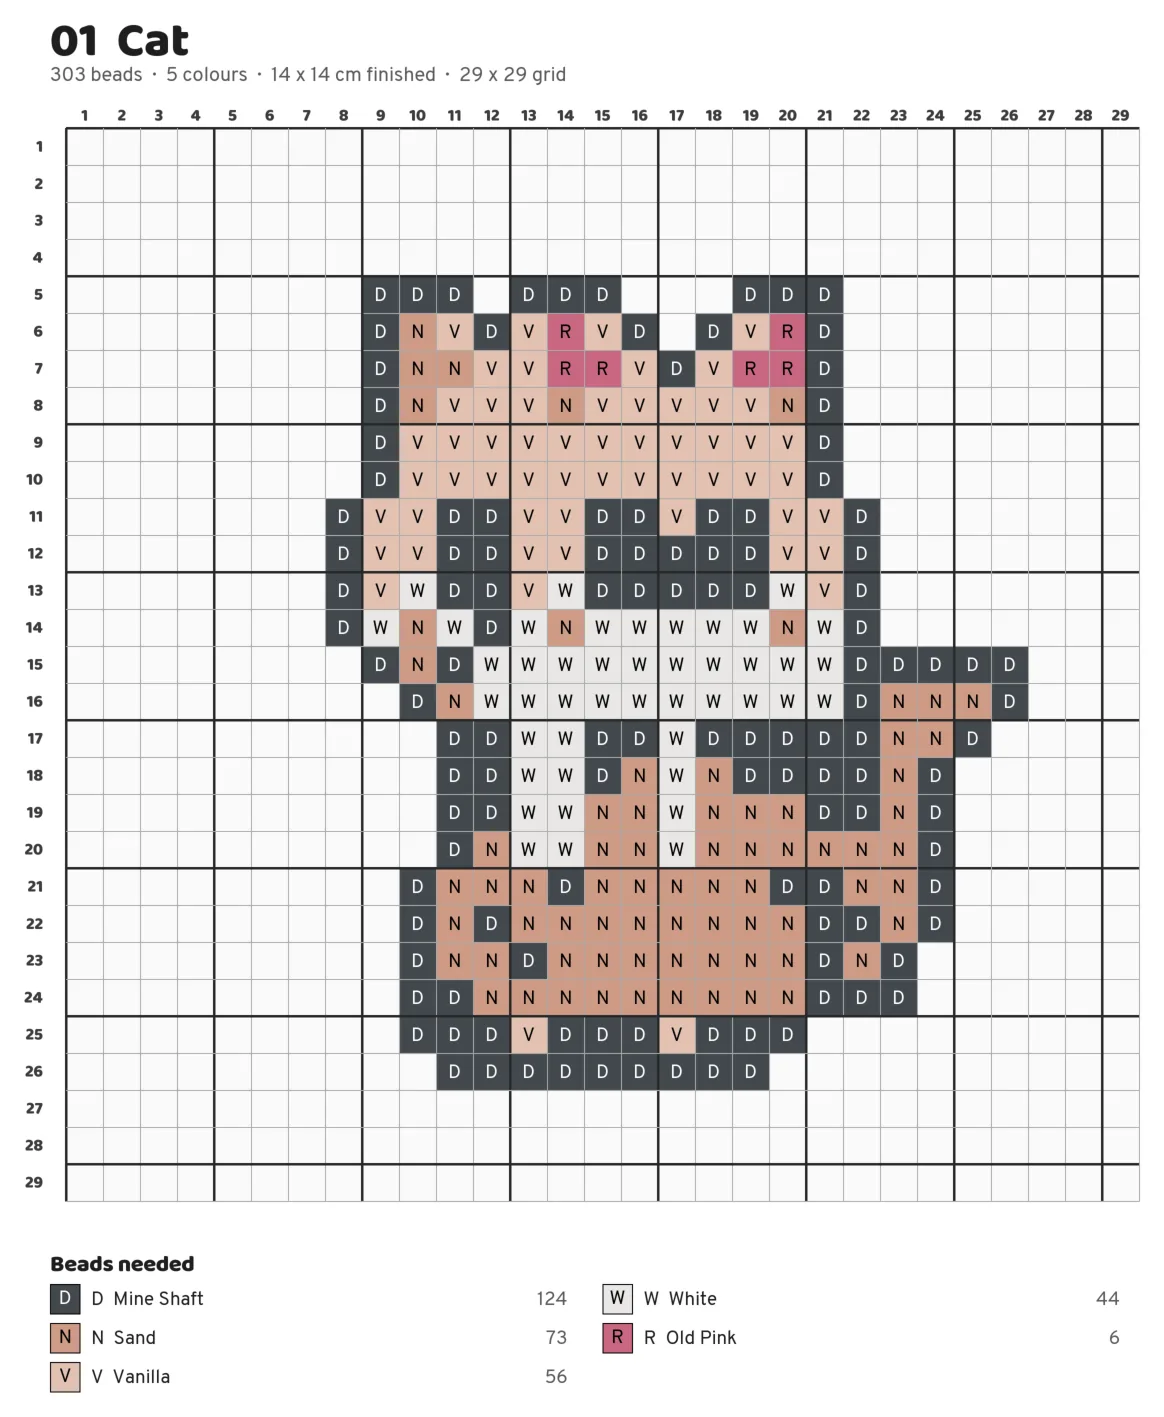
Every design in that set is one connected piece, with each bead touching another along a flat side, so nothing drops out after ironing.
Turning a finished piece into a keychain or fridge magnet is a separate job, covered in how to make a fuse bead keychain.
How to flat melt fuse beads with masking tape and a baking cloth
The steps below follow one Chinese beader’s beginner routine for a no-hole piece, in her order.
She irons away from the pegboard. Her design starts out already lifted off the board and held together by masking tape on one face.
Another Chinese beader describes that transfer: press wide masking tape over the finished design, rub it down so every bead sticks, then lift the whole thing off the pegboard in one go.
Instead of ironing paper, the routine uses a thin nonstick baking cloth.
Getting the iron and the baking cloth ready
Preheat the iron and set it between cotton and linen.
Her dial uses fabric names, and cotton and linen sit at the hot end of a fabric dial, well above Perler’s medium.
Clean the baking cloth and the ironing surface with a lint roller.
She doesn’t give a reason. Another beader rolls her cloth whenever it looks fuzzy.
That beader adds a detail about the cloth itself: it has a front and a back.
She cut hers with a notch in one corner and always keeps the notch at the top left, so the front faces up every time.
First side: ten counts in four directions
Cover the piece with the cloth, press lightly and count to ten.
Then turn the iron to face a new direction and count to ten again, for four directions in all.
Each time she changes direction, she can also slide the piece to a new spot on the board, which she says stops them from “stewing” (her word).
A second beader uses the same word and explains it: when the surface underneath the piece gets hot, she moves the piece to a cooler spot, because otherwise the beads become hard to melt fully closed.
Once all four directions are done, peel off the masking tape.
The ironed face is now stuck to the cloth, so the tape comes away from the other face and the beads stay put.
Second pass, light check and peeling the piece off
Lay the cloth back down and iron again, counting 15 to 20 in each direction.
She doesn’t say whether the piece gets turned over first. The cloth goes back on top and the four-direction routine repeats, just longer.
Shine a flashlight through the cloth to look for holes.
Wherever light comes through, a bead hasn’t closed yet.
Iron the spots that still show holes, then check again.
She repeats iron and check until nothing shows through.
Wipe the cloth with a wet wipe.
She doesn’t say why, just that you can.
Peel the piece off the cloth from the back.
That’s the last step of her routine.
A heat-soaking surface helps this routine.
Two other beaders iron flat melts on a slab of marble or tile, because it pulls heat out from underneath and makes a no-hole finish easier to reach.
Iron settings and timing for fuse beads: where the instructions disagree
Nobody agrees on one temperature setting.
The two manufacturers don’t match each other, and the Chinese flat-melt beaders run from “a bit lower than you think” to the top of the dial.
| Who | Iron setting | How long and how |
|---|---|---|
| Perler | Medium | Circles, no pressing down, about 10 to 20 seconds per side |
| Hama | Wool for Mini beads, cotton for Midi, linen for Maxi | Smooth circles, iron always moving, a few seconds; stop when the bead colors show clearly through the paper |
| Beginner flat-melt routine above | Between cotton and linen | Light pressure, count to 10 per direction, four directions; then 15 to 20 per direction |
| Beader showing beginner mistakes | Found the wool setting too cool, beads melted too slowly | Says to hold the iron in place 15 to 20 seconds instead of a quick pass |
| Another flat-melt beader | Highest setting | No circles, no heavy pressing; a few seconds in one spot, then move |
| Keychain maker | Second setting on her dial | Circles |
| 3D-parts beader | A little lower for beginners, raise it once you have the feel | Lower the iron slowly, don’t push down, lift it slightly as you move |
Part of the spread comes from different goals.
Perler and Hama want beads joined with holes open. The flat-melt rows want the holes closed, and that takes more heat, more time or both.
Bead size matters too, and Hama gives its smaller beads a lower setting.
The beader who found wool too cool doesn’t say what size her beads were, so her experience doesn’t settle the question for any one size.

To find your own setting, Hama’s advice is the practical one: test a smaller motif before you iron a big piece, because settings vary between irons.
Then read the result the way Perler suggests, by lifting the paper to check.
Leave the steam off.
Neither manufacturer mentions steam, and answers on a kandipatterns forum thread say you don’t need it because there’s nothing to de-wrinkle.
One Chinese beader recommends a small craft iron for beginners.
A full-size household iron is bigger and more powerful, and she says lingering even half a second too long can melt the beads out of shape.
Ironing large fuse bead pieces across linked pegboards
Perler notes that bigger projects need more heating time.
The harder part is keeping a design spread across several linked pegboards from shifting while the iron works over it.
Our dog set is drawn on 48 × 48 grids, which is bigger than one standard square pegboard, so you’d join boards or build in sections. Like all charts this size, it’s a counted chart, meant to sit beside your boards rather than underneath them.
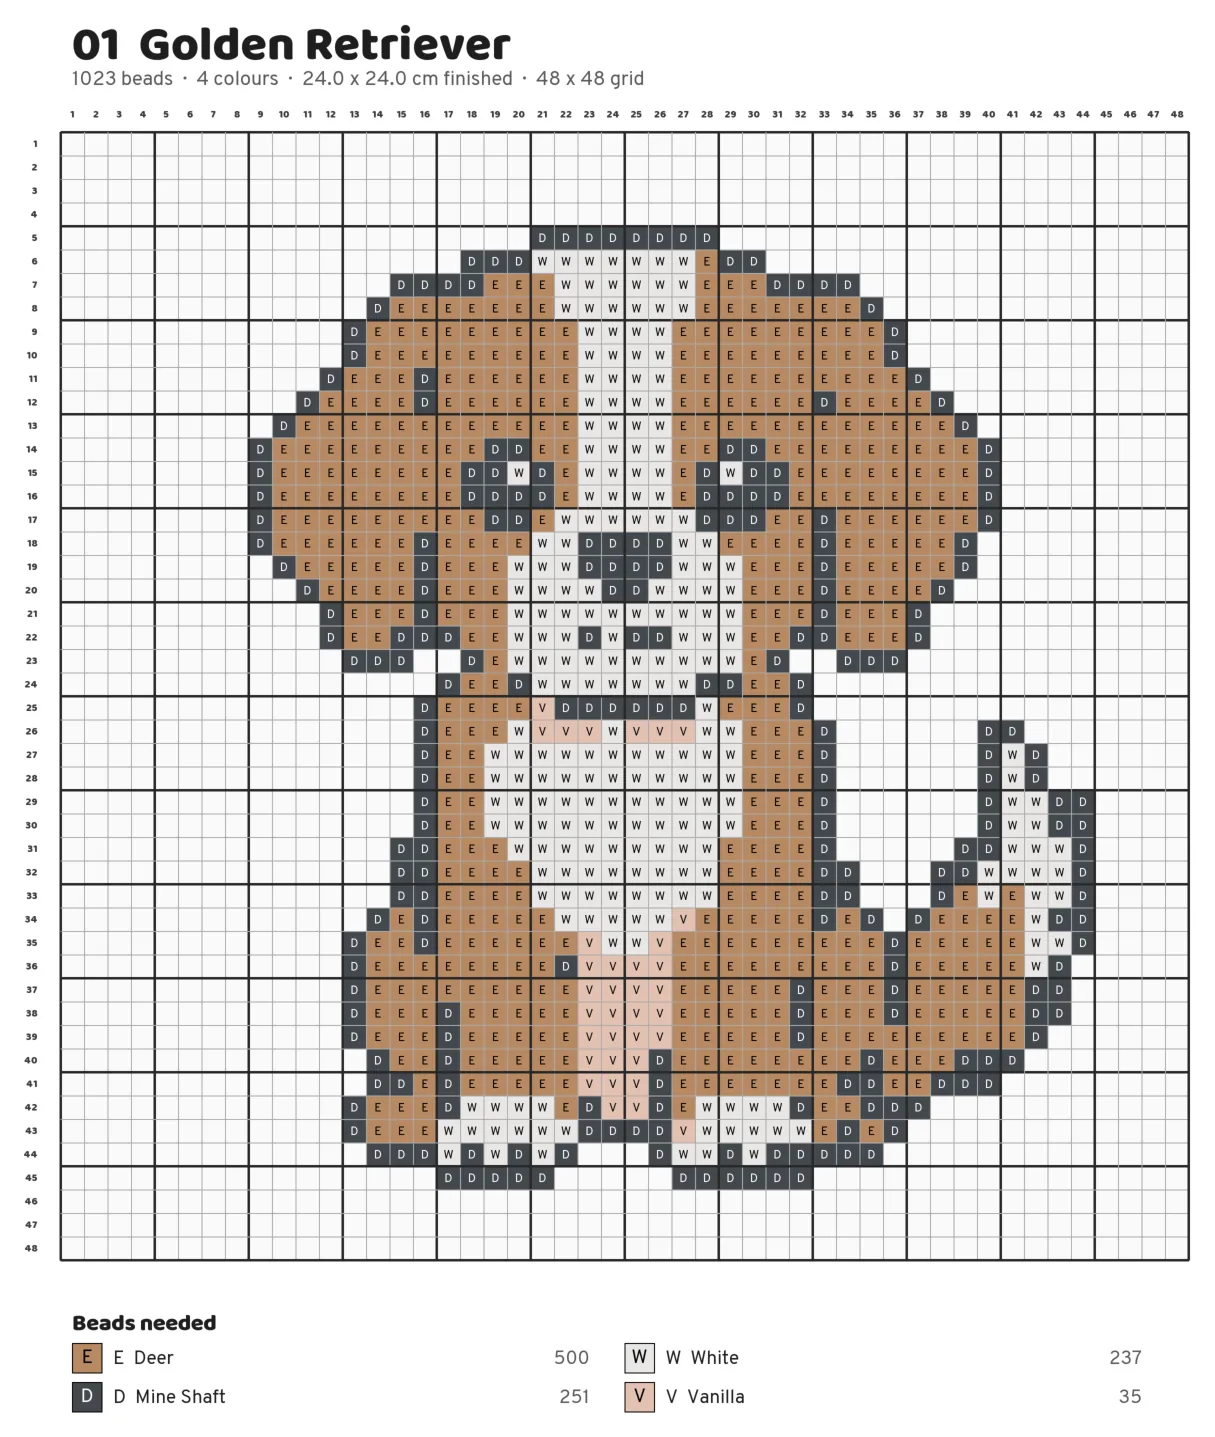
The rest of our printable fuse bead pattern books run from single-board animals up to 56-square Halloween grids.
The steps below follow one beader’s routine for large portrait pieces, in her order.
Step 1: Lay the ironing paper over everything, then weigh down all of it except the patch you’ll iron first.
She uses flat boxes or books, and suggests getting a friend to help with a big piece.
Step 2: Start ironing in the uncovered patch.
Step 3: Keep ironing and slide the boxes away a little at a time, moving the iron into the space you’ve just freed.
Even the ironed parts get a box on them before you move to the next area.
Two warnings come with this step.
An ironed patch turns darker, but that doesn’t mean every bead in it has fused.
And don’t lift the paper to peek. When she did, a few beads that hadn’t fused properly fell out.
That’s the opposite of Perler’s tip to lift the paper now and then. Her pieces are far bigger than a pegboard-sized design, which may be why.
Step 4: To flip the piece, lay a large, fairly stiff board over the top.
Step 5: Slide the whole stack to the edge of the table and get one open hand under the pegboards.
Hold the cross-shaped seam where the linked boards meet, and only move the stack off the table once you’ve got it steady. Then turn it over and lift the pegboards off.
The back side is easier, she says, since almost no unfused beads are left. It still gets the box treatment as you go, because the heat can pull the picture out of shape.
The last step is a weight on the piece while it’s still warm, covered in the next section.
She also stresses that the real ironing takes as long as the beads need to fuse. The box trick controls movement; it doesn’t speed anything up.
Two more warnings concern the pegboard itself.
Hama says not to touch the pegboard with the iron, because that damages the pegs.
And one Chinese beader says a pegboard left under the iron too long will warp, so once the beads are stuck to the paper she lifts the piece off the board and keeps ironing it on its own.
Why fused beads curl, and how to keep a piece flat
A piece that comes off the iron flat can bow as it cools.
One Chinese beader gives the reason: the outer edge cools faster than the middle. Her fix is to put something heavy on the piece while it cools.
Most sources that mention cooling agree on the weight, though not on the details.
Hama says to cool the design for a few minutes, take it off the pegboard and put it under a book until it’s completely cool.
Perler’s instructions don’t mention a weight at all.
The Chinese beaders use whatever is flat and heavy: a hardcover book, stacked bead boxes, a cutting mat.
One maker’s note says to press it for about as long as it takes to cool, and that ten minutes is more than enough.
Another stresses speed: get the weight on while the piece is still warm.
One beader who makes 3D parts gets them flat without any weight.
Her explanation is that beads shrink after heating. If the two faces are at different temperatures, the piece bends toward the cooler face.
So she keeps both faces equally hot.
She re-heats the first face gently, flips immediately and irons the second, then gives the first face another quick heat. She peels the paper off the first face while it’s slightly warm and off the second right away.
If a piece still bends a little, she says bending it back by hand usually fixes it.
When a 3D part comes from a mirrored chart, she lets the second face cool a while before peeling. That leaves a slight inward curve, so the edges don’t lift when the parts are fitted together.
Fuse bead ironing problems and how to fix them
The piece falls apart when you peel it.
The piece was ironed too little. The beader showing beginner mistakes did a quick, nervous pass, and the beads came out barely changed. Her fix was holding the iron in place longer.
Edge beads come loose when you peel off the tape.
The tape came off before the first side had fully stuck to the cloth. She tried it early and lost beads along the edge.
Holes are still showing, but you’ve already taken it off the cloth.
If you want a no-hole finish, don’t peel yet. The same beader lists this as a mistake: holes still visible means you can keep ironing.
Some beads melted lower or glossier than the ones next to them.
Answers on the kandipatterns forum point to mixing brands, since not all fuse beads melt the same, and to beads cut at slightly different heights. Leaving the iron on one spot longer than the rest does the same thing.
Two Chinese beaders single out cheap generic beads. One says they’re softer, melt at a lower temperature and have uneven holes. The other says they come out uneven, some flat and some pitted, while the smoother beads she prefers come out smooth.
The lines between beads went wavy.
One beader traces this to pushing the iron sideways late in the job, when the plastic is soft. Near the end she presses straight down and lifts straight up.
One patch won’t close up.
She moves the piece to a cooler part of the surface and works that patch with the tip of the iron, which runs hotter than the back of the soleplate on her iron.
You’re ironing on a plastic cutting mat.
It can’t take the heat. The beader showing beginner mistakes put one underneath her piece to protect the tablecloth, and lists that as mistake number one.
Not everyone agrees: the large-piece beader flips her work onto a cutting mat and irons the back side right there.
Beads drop out where they only touch at a corner.
A bead joined to its neighbor only at a corner has almost nothing to fuse to. Our cute animal and dog sets are drawn so every bead touches another along a flat side for this reason.
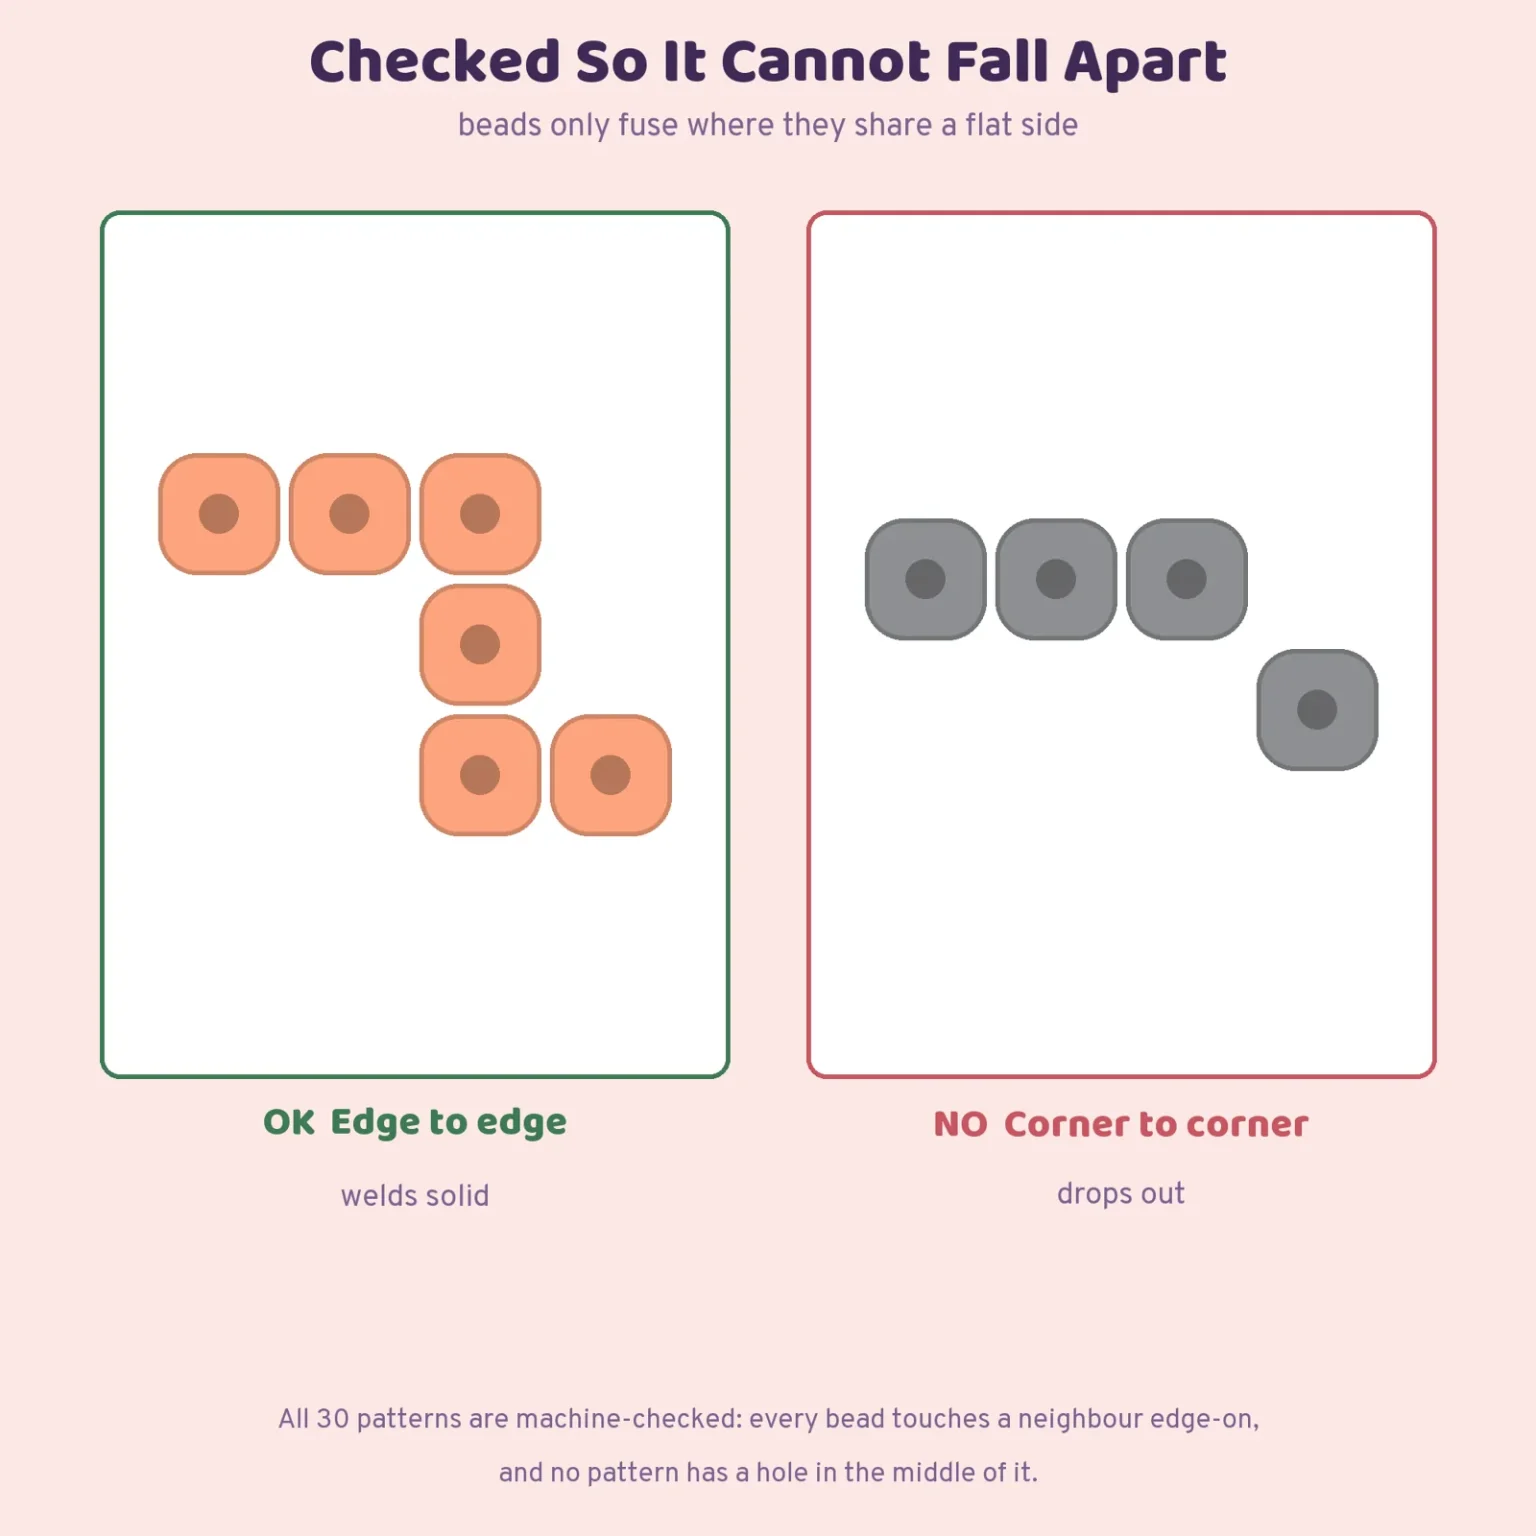
When one Chinese beader has a bead that only connects diagonally in her own designs, she adds transparent beads above and below it to give it something to hold on to.
Printables from this article




Related articles
Fuse Bead Patterns
How to Make a Fuse Bead Keychain (and Fridge Magnets)
Keep a bead hole open when you iron, or open one after, then hang the piece on a jump ring or lobster clasp and a key ring. For fridge magnets, the back takes a magnet strip or pad.
Printable Party Games
How to Plan a Baby Shower: Timeline, Food & 2-Hour Schedule
A baby shower plan from the first talk with the parents-to-be to the last gift: timing, guest list, budget, venue, a two-hour schedule, safe food and backup plans.
Printable Party Games
How to Plan a Bridal Shower: Timeline, Budget and Schedule
A host's plan for a bridal shower, from the first talk with the bride and co-hosts to the guest list, invitations, a timed party schedule, the gift opening and what to do when something slips.