Turtle Crafts for Kids: Paper Plate and Sea Turtle Ideas
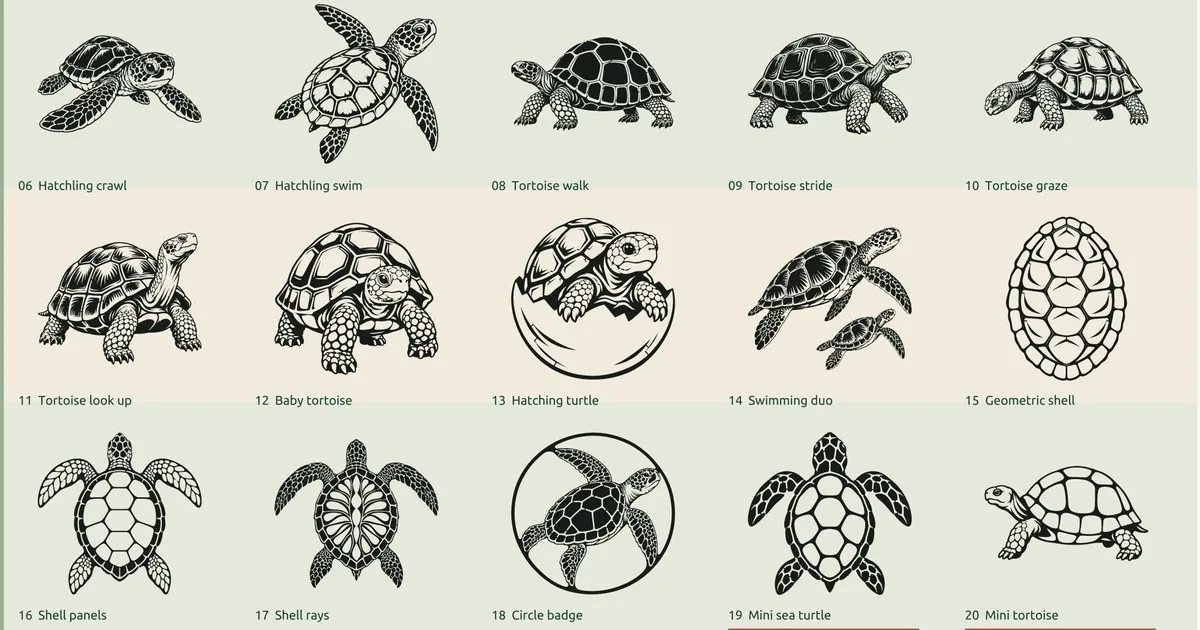
A turtle craft is really a shell craft. Give a child a dome or an oval to fill, then add a head, four legs and a short tail, and it reads as a turtle at any skill level. A two-year-old can press tissue squares onto that oval, while a nine-year-old can fill every plate of a real shell pattern with a different paper and still feel challenged. Pick the version that matches the hands at your table, using the chart below.
| Craft | Ages | Time | Main materials | Watch for |
|---|---|---|---|---|
| Handprint turtle | 2–4 | Ten minutes, then drying | Washable paint, paper | Paint on everything |
| Sticky-window turtle | 2–3 | Fifteen minutes | Clear contact paper, tissue squares | The sticky side curls onto itself |
| Paper plate turtle | 3–6 | Half an hour, then drying | Paper plate, paint, green cardstock | Legs glued before the paint dries |
| Egg carton turtles | 3–6 | Twenty minutes, then drying | Paper egg carton, paint, cardstock | Foam cartons won’t hold paint |
| Paper bowl or cup turtle | 4–7 | Twenty minutes | Paper bowl or cup, cardstock, glue | Plastic or coated bowls |
| Coloring-page turtle puppet | 3–7 | Twenty minutes | Printed turtle page, craft stick, tape | Thin paper tears at the stick |
| Shell mosaic | 6–10 | About an hour | Printed shell outline, paper scraps, glue stick | Tiny pieces everywhere |
| Tissue paper sea turtle | 5–9 | Half an hour | Printed outline, tissue, diluted glue | Wet tissue rips if rubbed |
| Traced-template turtle | 6–10 | Half an hour | Printed outline, cardstock, scissors | Cutting the outline band |
| Painted rock turtle | 6+ | Half an hour, then drying | Smooth rock, paint, felt | Rocks too round to stand |
| Hatching turtle card | 5–9 | Twenty-five minutes | Printed outline, paper, brad | Brads near toddlers |
| Sea turtle and tortoise sort | 5–10 | Half an hour | Printed outlines, blue and brown paper | Mixing up flippers and feet |
The times are planning estimates for one child working at a table, and they don’t include drying. When a whole group shares glue and scissors, add ten minutes or so.
Turtle crafts for the youngest crafters, around 2 to 3
Children this age want to press, stick and smear. They’re not ready to cut a turtle shape, so prepare the shape yourself and let them do the decorating. Keep the sessions short, and set out one material at a time so their attention stays on the turtle instead of the supply pile.
Small craft parts need a firm rule here. Federal small-parts rules treat toys for children under 3 that could choke them as banned products, so treat googly eyes, pom-poms, beads, dried beans and buttons the same way. Draw the eyes with a marker instead, and keep the bead jar on a high shelf.
Handprint turtle
Ages 2 to 4, about ten minutes plus drying. You need washable green paint, a paper plate to pour it on, a sheet of heavy paper, a damp cloth and a marker.
- Brush paint onto the child’s palm and fingers rather than dipping the hand, which loads on far too much.
- Press the hand flat onto the paper with the fingers spread. The palm becomes the shell, the four fingers become legs and the thumb becomes the head.
- Lift straight up and wipe the hand right away.
- Once it’s dry, draw an eye on the thumb, a short tail at the back and a few plate lines across the palm print.
The snag is a smudged print from a hand that slides. Hold the child’s wrist lightly and count to three before lifting.
If you want a pair of turtles, finish one hand, clean it completely, and only then paint the other.
Sticky-window turtle
Ages 2 to 3, about fifteen minutes. You need clear contact paper, green and brown tissue paper cut into squares, a marker and painter’s tape.
- Draw a turtle on the paper backing of the contact paper: a big oval, a round head, four leg bumps and a tail.
- Peel off the backing and tape the contact paper to a window or table, sticky side out.
- Let the child press tissue squares onto the oval. They don’t have to stay in the lines.
- When the shell is full, lay a second sheet of contact paper over it and trim around the turtle shape.
Contact paper curls and grabs itself the moment you peel it. Tape all four corners down before you remove the backing completely. Precut the tissue, too, because tearing it takes more finger coordination than most two-year-olds have.
Preschool turtle crafts, ages 3 to 5
Preschoolers can glue, paint inside a shape and snip with child scissors. They still need you to cut thick paper and anything curved. Every craft in this group has one part a child can finish alone, and that independence is what makes it their turtle rather than yours. For more projects at this level, the preschool crafts list sorts ideas by skill.
Paper plate turtle
This is the turtle craft most people picture. It suits ages 3 to 6 and takes about half an hour plus drying. Gather a paper plate, green and brown washable paint, a sponge or brush, green cardstock, scissors (for you), glue and a marker.
- Turn the plate upside down so the dome becomes a shell.
- The child paints the plate. Dabbing with a sponge cut into a hexagon gives a plate pattern.
- While it dries, cut a head, four legs and a small triangle tail from green cardstock.
- Glue the head and legs under the rim so they poke out from the edge, then add the tail.
- Draw an eye and a smile on the head.
The common mistake is gluing the legs on while the paint is still wet. Wet paint softens the plate, so the legs slide off or the rim buckles. Paint first, switch to something else, and attach the parts later. Shiny coated plates resist paint, so you’ll get better coverage from plain uncoated ones.
Egg carton turtles
Ages 3 to 6, about twenty minutes plus drying. One paper egg carton makes up to a dozen small turtles. You also need paint, green cardstock, glue and a marker.
- Cut the carton into single cups and trim the edges flat. This part is for an adult.
- The child paints each cup green or brown and adds dots or lines with a second color.
- Cut tiny heads, legs and tails from cardstock and glue them inside the cup rim.
- Add a marker eye.
Use a paper or pulp carton. Foam cartons are slick, so paint beads up and slides right off them.
Afterward, the little turtles line up nicely for counting games, which stretches a short craft into a math activity.
Paper bowl or cup turtle
Ages 4 to 7, about twenty minutes. A small paper bowl or a short paper cup gives a taller, rounder shell than a plate does. You’ll also need cardstock, glue, markers and a scrap of green paper for the base.
- Cut a base from green paper a little bigger than the bowl’s rim. Cut the head, legs and tail as part of this base, so it looks like a flat turtle body.
- Decorate the bowl with markers or torn paper plates.
- Run glue around the rim and press the bowl onto the base. Hold it for a slow count of ten.
Plastic cups and coated bowls won’t take school glue, so stick to plain paper ones. If the rim won’t stay down, a glue dot at four points holds better than a liquid line. A hot glue gun is faster, but it’s an adult-only tool, and the child should stand well back from the nozzle while you use it.
Coloring-page turtle puppet
Ages 3 to 7, about twenty minutes. This one starts with a printed sea turtle instead of a shape you draw. You need a turtle coloring page, crayons or markers, scissors, a craft stick and tape.
- Print the page on cardstock or heavy paper.
- The child colors the turtle. Big shell plates are easy targets for a different color in each one.
- Cut around the outside edge, leaving a small border so the flippers don’t snap off.
- Tape a craft stick to the back of the shell.
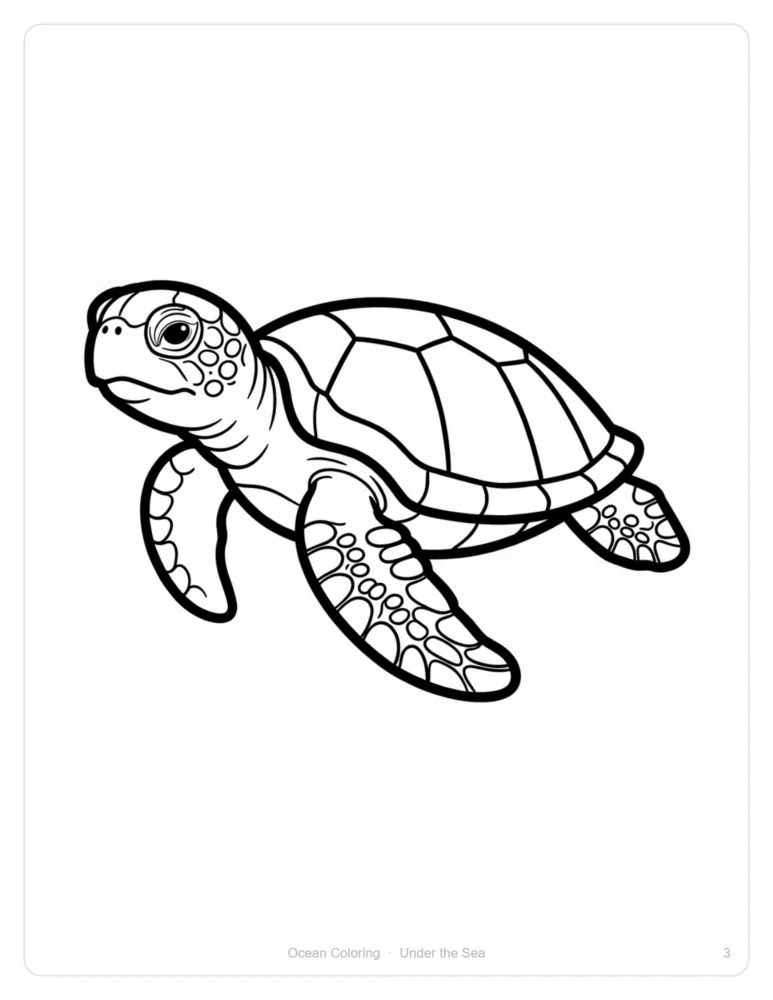
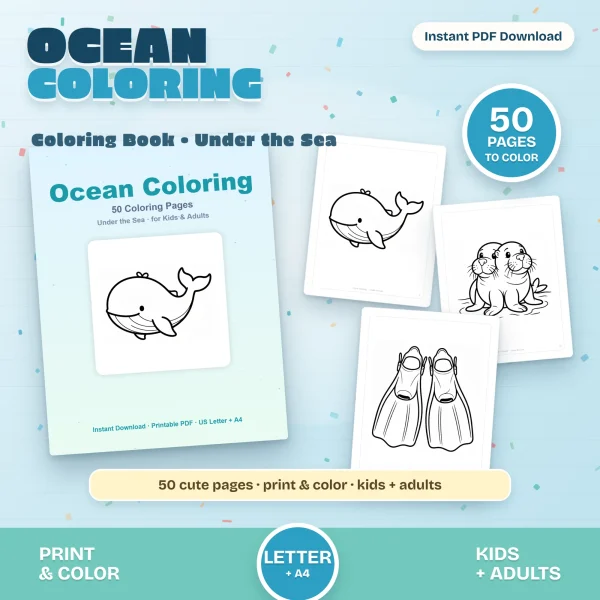
The sea turtle above is on page 5 of the PDF in our Ocean Coloring Book. Page 5 is the third coloring page, after the cover and a how-to-color page. The book has 52 pages in all, 50 of them coloring pages, so a whale or an octopus can join the turtle in a puppet show.
Plain printer paper tears where the stick is taped on. Use cardstock, or glue the colored page onto a cereal box panel before cutting. If the colors come out pale or the page prints shrunk, our guide to printing coloring pages walks through the printer settings.
School-age turtle crafts that use the shell pattern, ages 5 to 10
Older kids get bored decorating a plain dome, and that boredom shows up fast as scribbles across the whole page. Real shells give them a structure to follow. According to Wikipedia, the top shell of a typical turtle has five plates down the middle, four pairs beside them and 12 pairs of small plates around the edge. That layout turns a turtle into a puzzle you can fill plate by plate.
Shell mosaic
Ages 6 to 10, roughly an hour, with a natural stopping point halfway. You need a printed shell outline with its plates marked, paper scraps in several greens and browns, a glue stick and scissors.
- Print a shell page on cardstock.
- Cut or tear paper into small pieces, keeping each color in its own cup.
- Fill one plate at a time with glue and then paper, trimming pieces that cross the line.
- Give the center row a darker color and the edge plates a lighter one, so the pattern shows from across the room.
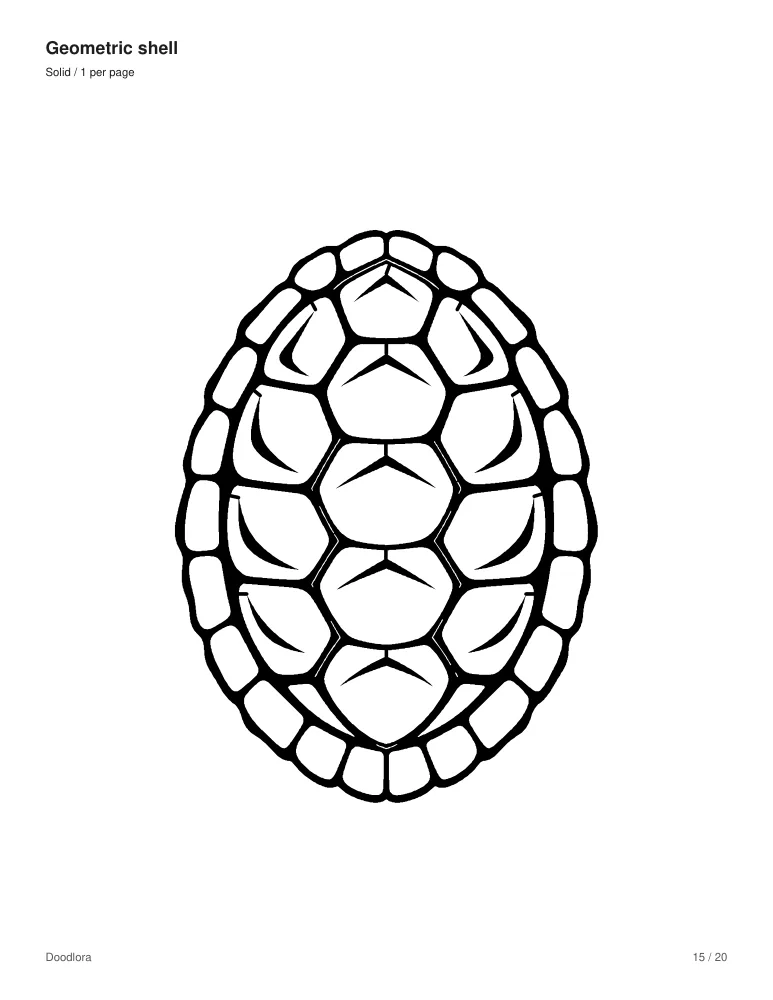
The shell above is design 15 in our turtle outline set, from the solid one-per-page PDF. Its white plates are big enough to fill with paper pieces about the size of a fingernail, which is small enough to feel like a real mosaic without testing anyone’s patience. Glue sticks dry quickly, so a child can work across the shell without smearing the finished plates.
The snag is a table covered in glue-stick crumbs and tiny paper. Put a tray or cookie sheet under each child’s page, and stop at the last row instead of pushing to finish a big shell in one sitting. The mosaic keeps fine overnight.
Tissue paper sea turtle
Ages 5 to 9, about half an hour. This one has a softer, stained-glass look. You need a printed turtle outline, tissue paper squares, white glue mixed half and half with water, and a paintbrush.
- Print a simple turtle outline on cardstock.
- Brush a small patch of the glue mix inside the shell.
- Lay tissue squares on it, overlapping them, and brush a little more glue over the top.
- Work patch by patch until the shell is covered, then do the flippers in a second color.
- Let it dry flat, then trim the tissue that hangs past the outline.
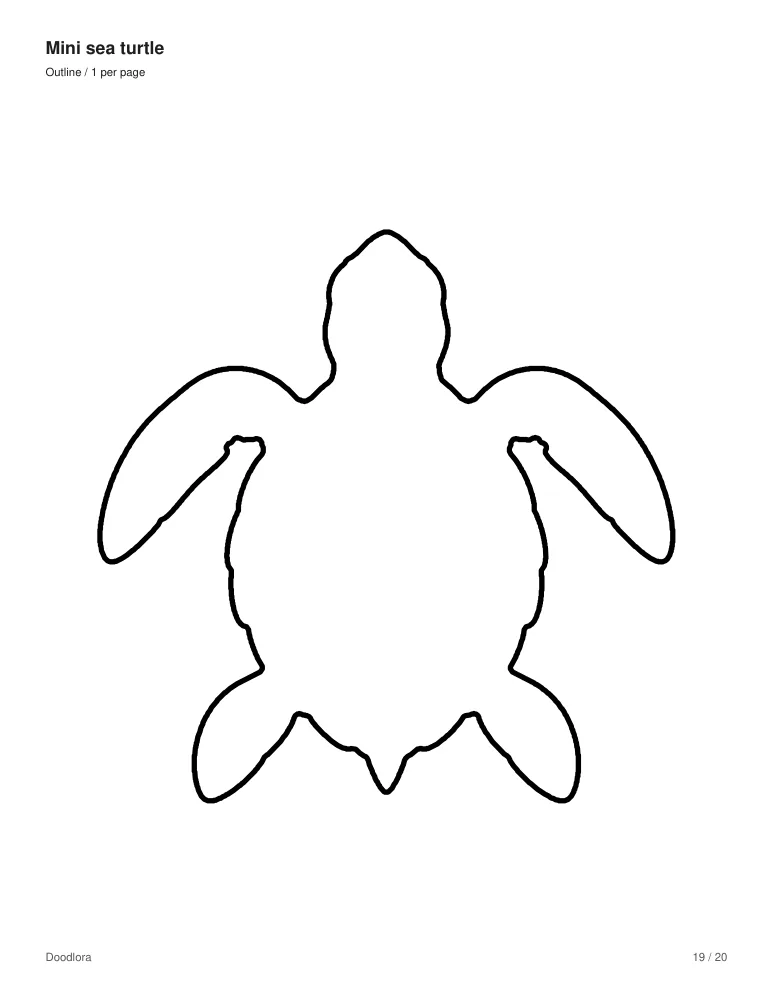
Design 19, the mini sea turtle, fills most of a Letter page as a single copy, about 6 inches across. It has no inside detail, so tissue covers it without hiding anything.
Wet tissue tears the moment a child scrubs with the brush. Tell them to dab, not paint.
Traced-template turtle
Ages 6 to 10, about half an hour. A cardstock template lets a whole group cut matching turtles from colored paper or felt, which is handy when everyone wants their turtle to look like their neighbor’s. You need printed outlines, cardstock, scissors, pencils and the paper or felt to cut.
- Print the outline on cardstock and cut it out on the outer edge. This becomes the template.
- The child lays the template on colored paper or felt and traces around it in pencil.
- Cut out the traced turtle, then decorate the shell with markers, stickers or a second paper layer.
The outlines in our set are a narrow band, not a thin single line. Cut along the outside edge of the band, or the template comes out a little fat on one side and thin on the other. If a child would rather draw a turtle freehand than trace one, the step-by-step how to draw a turtle guide handles that.
Painted rock turtle
Ages 6 and up, about half an hour plus drying. You need a smooth, flattish rock about the size of a palm, acrylic or poster paint, a fine brush, and green felt or cardstock.
- Wash and dry the rock.
- Paint the whole top green or brown and let it dry.
- Paint the plate lines in a darker color, starting with the center row.
- Glue a felt head, four legs and a tail underneath so they stick out from the edges.
Round stones roll and won’t stand on a shelf, so look for one with a flat underside. Acrylic paint is permanent on clothing, which means this one needs a smock or an old T-shirt. Adults handle any hot glue here too.
Hatching turtle card
Ages 5 to 9, about twenty-five minutes. This craft makes a small turtle that tips out of a cracked egg. You need a printed turtle (a hatchling or mini), white paper, a paper fastener (brad), scissors and markers.
- Draw a large oval egg on white paper and cut it out.
- Cut the egg across the middle with a zigzag line.
- Join the two halves at one side with the brad, so the top can swing open.
- Color and cut out a small turtle and glue it inside the bottom half.
Brads are small parts. Give them to kids over 3 only, and push the brad through for the child, because the points poke. Our set has a design of a tortoise climbing out of a cracked egg (design 13) if you’d rather color one than build one.
Sea turtle or tortoise? Pick a theme and get the details right
Kids notice when a turtle has the wrong feet, so it’s worth deciding which kind you’re making before you cut legs. Sea turtles have flippers, and Wikipedia notes they can’t pull their head and limbs into their shell the way many other turtles can. Tortoises are land turtles with sturdy legs, and they pull their heads straight back into the shell. Seven species of sea turtle are alive today, which makes a good wall chart for an ocean unit.
Sea turtle and tortoise sort
Ages 5 to 10, about half an hour. This craft doubles as a classification lesson. You need printed sea turtle and tortoise outlines, blue and brown construction paper, scissors and glue.
- Fold one sheet of blue and one of brown paper in half and label them “In the sea” and “On land.”
- Each child colors and cuts out a mix of turtles.
- They decide where each one lives by looking at the legs and glue it on the matching sheet.
- Ask each child to point out the detail that gave it away: paddle-shaped flippers or stumpy clawed feet.
Hatchlings cause the most confusion because they all have round heads and big eyes. Check the flippers, not the face.
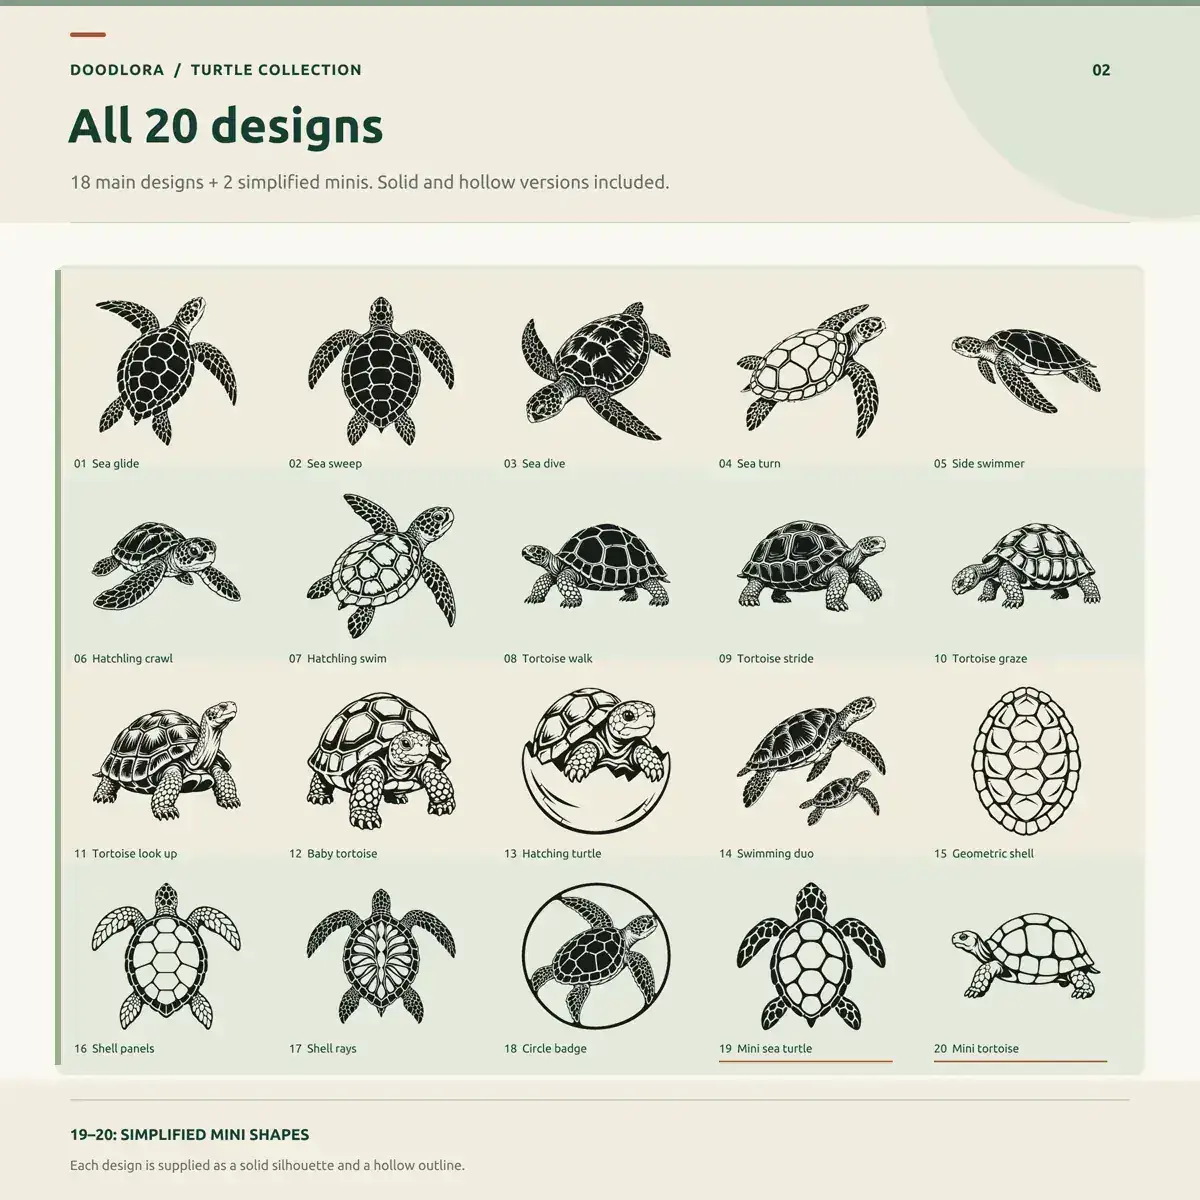
Our turtle outline set splits neatly for this sort. Designs 1 to 7 and 14 are sea turtles, 8 to 13 are land tortoises, 15 to 18 are shell and badge designs, and 19 and 20 are simplified minis of each kind. Each PDF page also prints the design’s name at the top, so you won’t need to identify them yourself before class.
Printing a turtle outline as a craft template
A printed outline takes care of the hardest step for small hands, which is drawing a turtle that actually looks like one. It also gives every child in a group the same size shape, and that consistency means legs and heads can be cut in batches ahead of time instead of one at a time while children wait.
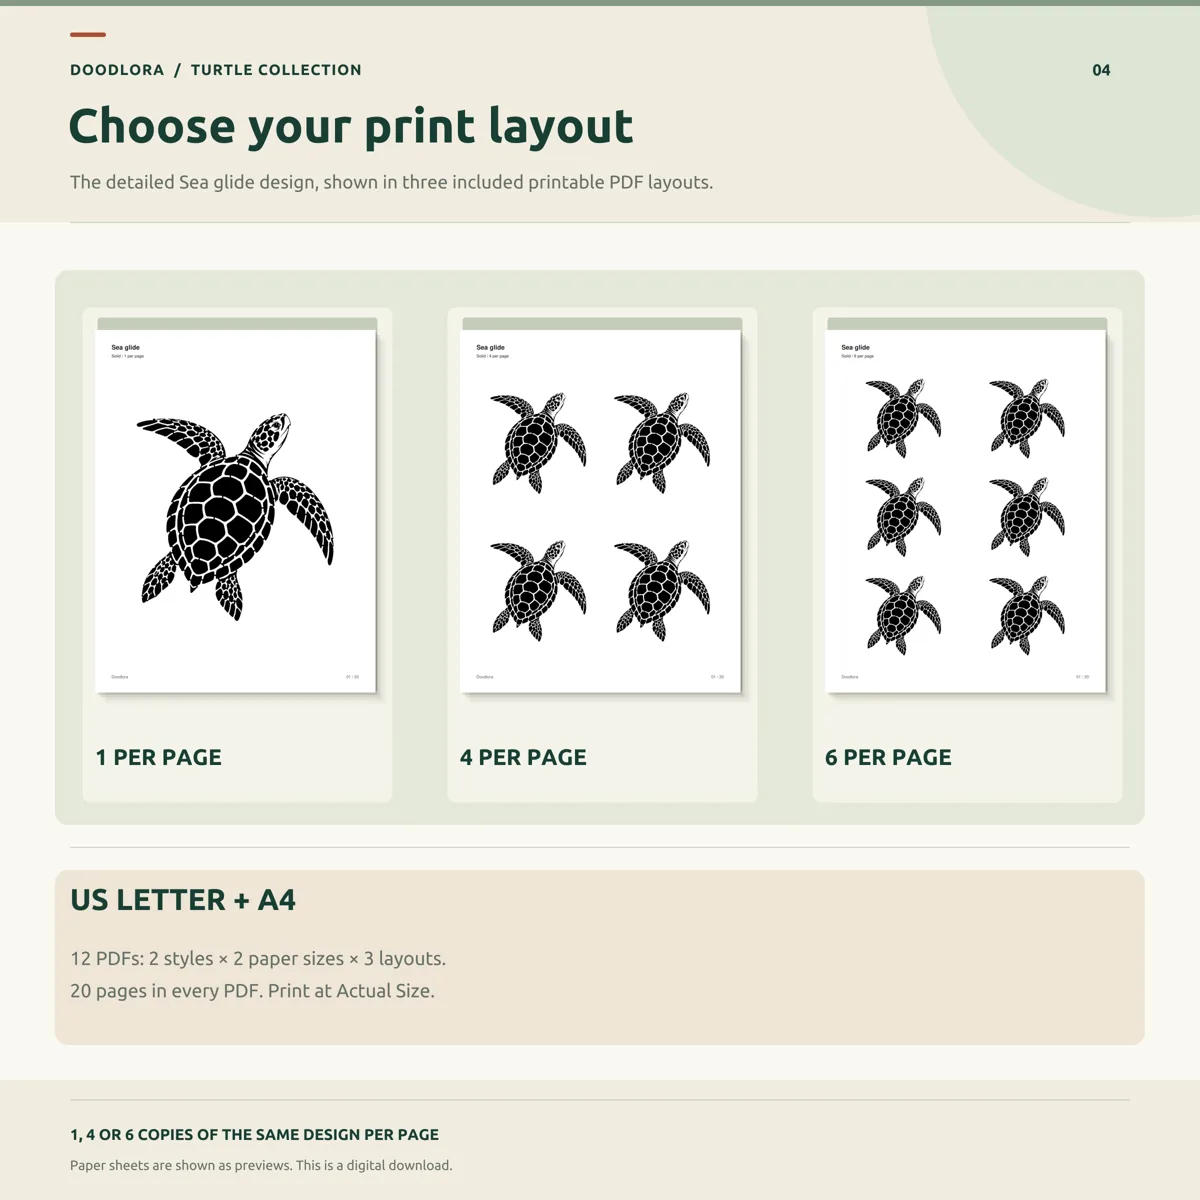
Choose the layout by the craft:
- One per page (about 6 inches across on Letter) for paper plates, tissue turtles and anything a preschooler colors.
- Four per page (about 3 inches) for cards, egg carton toppers and classroom sets.
- Six per page (about 2½ inches) for garlands, bookmarks and the sea-or-land sort.
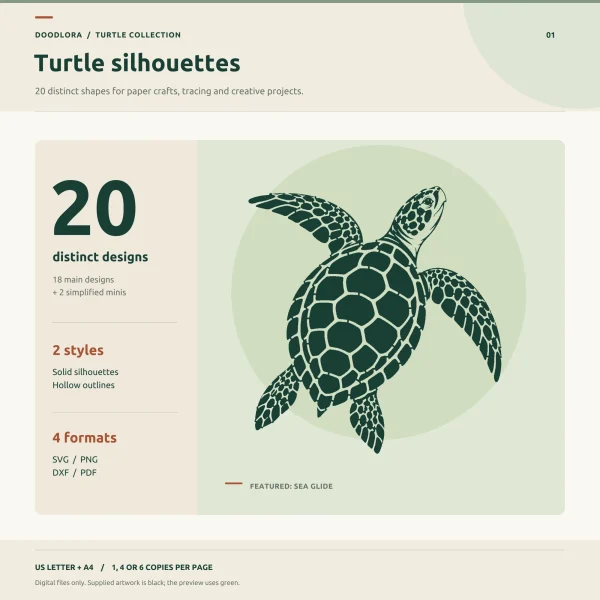
Our set has 20 turtle designs, each as a solid silhouette and as a hollow outline. It comes as 12 PDFs of 20 pages, in US Letter and A4, plus SVG, PNG and DXF files for cutting machines like Cricut or Silhouette. Use the hollow outline when you want an empty shape to color, cover or trace. Use the solid version when you want the shell plates already drawn, like the mosaic above, because the outline drops the entire inside pattern and turns the geometric shell into a plain oval.
Print at Actual Size or 100%, not “fit to page,” or the turtles shrink and the sizes above won’t hold. Run a single page on plain paper before printing a class set on cardstock. The personal license covers printing copies for the students you teach, so a classroom set is fine.
Running a turtle craft with a group
A turtle session goes smoothly when the cutting’s done before the kids sit down. For a class of 20, precut the heads, legs and tails into one bag per child, and set paint and glue at the center of each table.
- Stagger the steps. Paint the shells first, then switch to a story or a turtle coloring page while they dry, and attach the parts in a second round.
- One glue type per age. Glue sticks for younger children, white glue in a shallow lid with a brush for older kids, and hot glue only in adult hands.
- Keep the small parts sorted by age. Googly eyes, beads and brads go to the older table only.
- Plan the finish. Turtles on a blue paper “ocean” strip or a brown “beach” make a wall display, and children love finding their own turtle among everyone else’s.
- Have a fast-finisher job. A second small turtle from the six-per-page sheet keeps early finishers busy without new supplies.
That’s the whole plan: shapes cut ahead, one glue per table, and somewhere for the finished turtles to go.
If the group wants more sea animals after the turtles, the ocean crafts list has jellyfish, whales and fuse bead projects. For other creatures sorted by age, see the animal crafts list.
Printables from this article
Related articles
Outlines & Stencils
How to Draw a Mallard Duck: Drake, Hen and Flying Poses
A swimming mallard drake in ten pencil steps, the changes that turn it into a hen, a flying pose, a pair on the water and the color marks that make the bird read as a mallard.
Outlines & Stencils
Bird Crafts for Kids and Adults: Owl, Nest and Feeder Ideas
Thirteen bird crafts grouped by who is making them, from a toddler's handprint bird to a framed papercut and a cold-weather pinecone feeder, each with ages, time, supplies, steps and the snag to plan for.
Outlines & Stencils
How to Draw an Arctic Fox: Easy Sitting and Sleeping Steps
Two pencil versions of the arctic fox, sitting up and curled asleep, plus the five shape changes that separate it from a red fox and how to color a white animal in snow.