Crafts for Preschoolers: 14 Easy Ideas, 3 Year Olds and Up
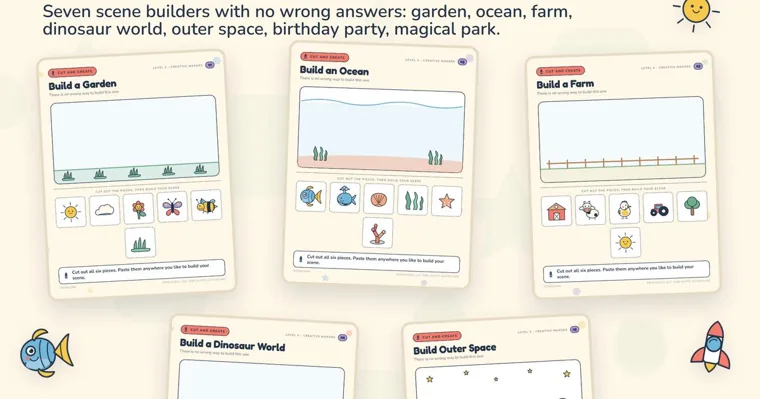
The easiest crafts for preschoolers are the ones a 3- to 5-year-old can mostly do alone once you’ve set them up: a paper chain, a cut-and-paste puzzle, a bag puppet, a bookmark to color. Messier crafts like coffee filter butterflies and handprints come next. Fuse beads come last, because an adult has to do the ironing and keep loose beads away from younger children.
Choose by two things before you choose by theme. First, how much mess can your table take today? Second, how much of the craft can you hand over? The table below sorts all fourteen that way. The times are rough planning guides for one sitting, not targets. One adult can usually run a paper craft for up to four children at a table, but the paint and bead crafts go better with one or two.
| Craft | Best age | About how long | Mess | What the adult does |
|---|---|---|---|---|
| Paper chain | 3–5 | 10–20 min | Low | Cuts strips for 3s |
| Cut-and-paste puzzle | 3–5 | 10–15 min | Low | Sits close for scissors |
| Friendly monster face | 4–5 | 15 min | Low | Cuts the tiny parts if asked |
| Paper bag puppet | 3–5 | 15 min | Low | Pre-cuts features for 3s |
| Coloring bookmark | 3–5 | 15–20 min | Low | Cuts it out |
| Paper plate mask | 3–5 | 15 min | Low | Cuts the eye holes |
| Cardboard tube binoculars | 3–5 | 10 min | Low | Punches holes, ties string |
| Cereal box lacing card | 4–5 | 15 min | Low | Cuts the card, punches holes |
| Leaf collage on contact paper | 3–5 | 15 min + a walk | Low | Peels the backing |
| Cotton ball sheep | 3–5 | 10 min | Medium (glue) | Pours the glue |
| Big pasta necklace | 4–5 | 15 min | Medium | Tapes the yarn end, ties it off |
| Coffee filter butterfly | 3–5 | 15 min + drying | Medium (wet) | Sprays the water |
| Handprint turkey | 3–5 | 10 min + drying | High (paint) | Paints the hand |
| Fuse bead animal | 4–5 | 2 sittings | Medium (beads) | All the ironing |
Before any preschool craft: the 5-minute setup
Most craft trouble at this age starts before the glue comes out. A few habits keep the table calm.
Cover the table with newspaper or an old tablecloth, even for “clean” crafts, because glue sticks leave smears. Put one craft’s supplies on a tray and keep the rest out of sight. Three-year-olds use everything you put in front of them. Use child-safe scissors with rounded tips and glue sticks instead of liquid glue for paper crafts. The printing guide in our cut-and-paste book gives the reason: liquid glue soaks through and curls the page.
Decide what “done” looks like before you start and say it out loud: “When the dinosaur has its tail, we’re finished.” Preschoolers stop when they’re tired, not when the craft is complete. A clear finish line helps them end on a win.
The catch: Older siblings’ supplies drift onto the table. Beads, googly eyes and small pom-poms are a different risk around a toddler under 3. Check the floor and the table edge before a younger child joins you.
Low-mess paper crafts: scissors, glue sticks and nothing wet
These five need only paper, scissors and a glue stick, so they suit a weekday afternoon or a classroom table. Plan on sitting close while scissors are out.
Paper chain
A paper chain is the simplest craft that ends with something big. Each loop is one strip of paper glued or taped into a ring, threaded through the last ring.
You need: construction paper cut into strips about 1 inch wide and 8 inches long, and a glue stick or tape.
How to make it:
1. Show how to curl one strip into a ring and press the ends together with glue or tape.
2. Thread the next strip through that ring, then close it.
3. Keep going, alternating two or three colors so a pattern grows.
The adult does: cuts the strips for a 3-year-old. Many 4- and 5-year-olds can cut along a straight ruled line themselves.
It’s done when: the chain reaches a set length, such as from the table to the floor, or when you’ve used every strip in the pile.
The catch: Glue stick alone sometimes lets go after a minute. Hold each ring closed for a slow count of five, or use a small piece of tape.
A countdown chain makes a good fall project: one loop for each day until Thanksgiving on November 26, and your child tears off a loop each morning.
Cut-and-paste puzzle
A build-the-picture page is a short puzzle with glue. The child cuts out a few big pieces and pastes them onto a faint outline until the picture appears.
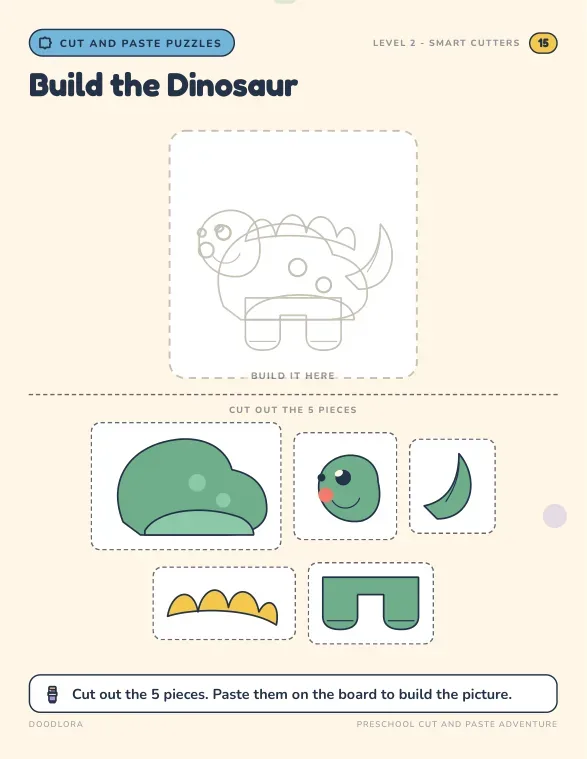
You need: a printed page, rounded-tip scissors and a glue stick. Light cardstock or thicker paper holds up better to small hands, according to the printing guide that comes with our book.
How to make it:
1. Cut every piece out first, along the gray dashed lines.
2. Lay all the pieces on the outline to see where they go.
3. Paste them one at a time, the biggest piece first.
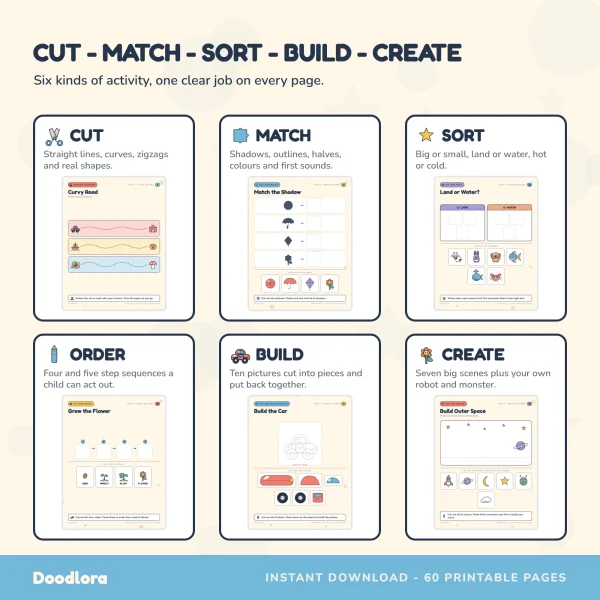
Our preschool cut and paste worksheets have ten of these puzzles, with 3 to 6 pieces each. They start with an apple in 3 pieces and work up to a car, a robot and a house in 6. The Build the Dinosaur page shown above has five: the body, the head, the tail, the spikes and the legs.
The adult does: sits close while the scissors are out, and cuts any piece your child gives up on. That still counts as finished.
It’s done when: every piece is on the outline.
The catch: Print at Actual Size, not Fit to Page. The guide warns that Fit to Page makes the pieces smaller than the board they belong on, and a child will think the mistake is theirs.
Friendly monster face
A design-your-own page has no right answer, which makes it a good next step after the puzzles. Your child picks which eyes, mouths and horns go on a blank body.
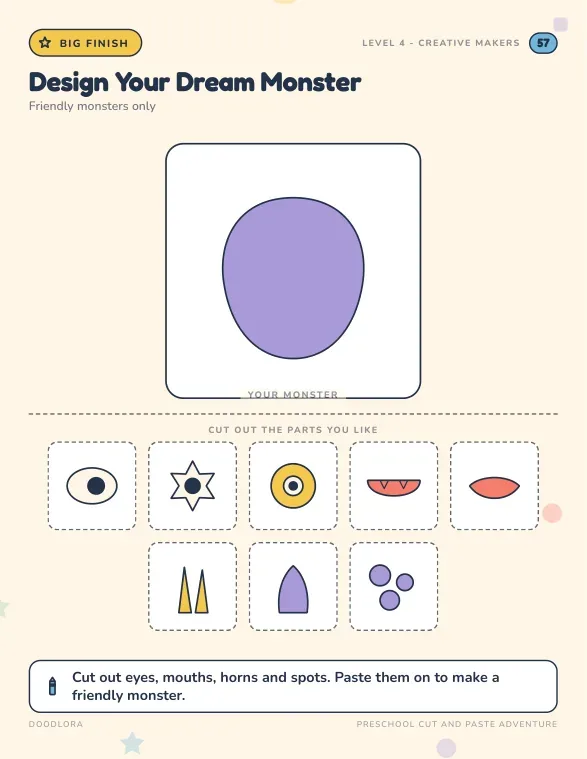
You need: the page, scissors, a glue stick and crayons for adding more details.
How to make it: Cut out the parts your child likes, try them on the body without glue, then paste them down. Crayons can add hair, arms or a name.
In our cut-and-paste book, Design Your Dream Monster is page 57, and its subtitle reads “Friendly monsters only.” The robot on page 56 works the same way if monsters aren’t popular in your house.
The adult does: cuts the smallest parts, like the three spots, if your child’s hands are tired.
It’s done when: your child says the monster is finished. Ask what its name is and write that at the top.
The catch: Some children paste the first part straight away and then want to move it. Do a “try it on” round with no glue first.
Paper bag puppet
A brown lunch bag turns into a puppet because the folded bottom flap moves like a mouth when a hand is inside.
You need: a flat-bottomed paper lunch bag, scraps of colored paper, crayons and a glue stick.
How to make it:
1. Lay the bag flat with the folded bottom on top, facing you.
2. Glue the eyes and top of the face onto the flap.
3. Glue a mouth or tongue just under the flap so it shows when the flap lifts.
4. Add ears, hair or whiskers with paper scraps or crayon.
The adult does: pre-cuts eyes, ears and a mouth for a 3-year-old. Four- and five-year-olds can cut simple circles and triangles themselves.
It’s done when: the puppet can “talk.” Finish with a one-minute show where the puppet says hello to everyone at the table.
The catch: Gluing over the fold seals the flap shut. Keep glue on the flap face only.
Crafts they keep and use afterward
Preschoolers like a craft more when it does something after the glue dries. These five end with a bookmark, a mask, a toy or a window decoration.
Coloring bookmark
A bookmark is a small craft with a real job. Your child colors it, you cut it out, and it goes straight into a library book.
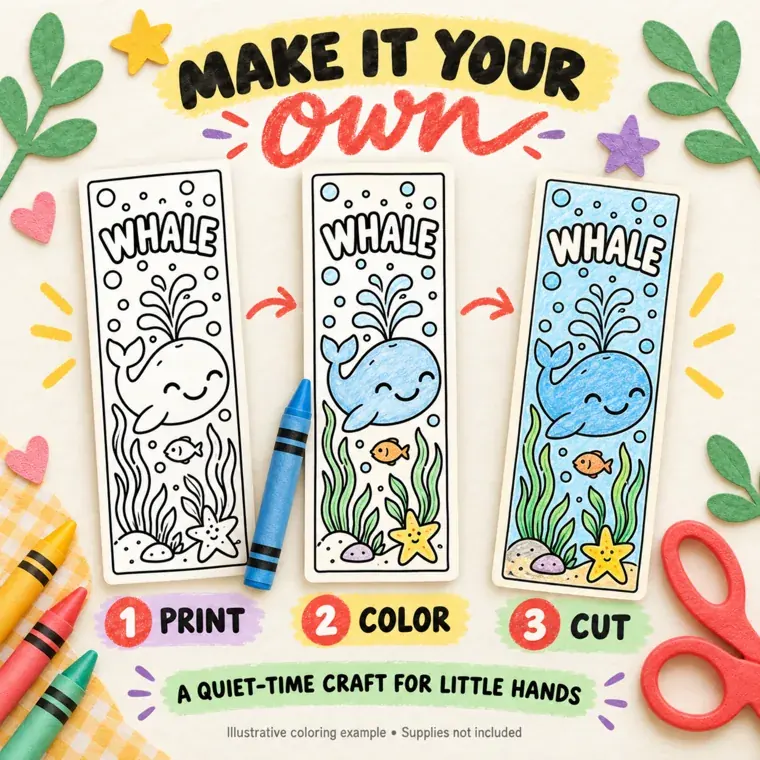
You need: a printed bookmark page, crayons or colored pencils, and scissors for the adult. Cardstock makes the bookmark last longer. Our set’s instructions suggest cardstock around 65 to 80 lb, after you check what your printer can take.
How to make it:
1. Print at Actual Size and check the 1-inch test line on page 2 before printing the rest.
2. Let your child color the animal and its background.
3. Cut along the outer solid rectangle.
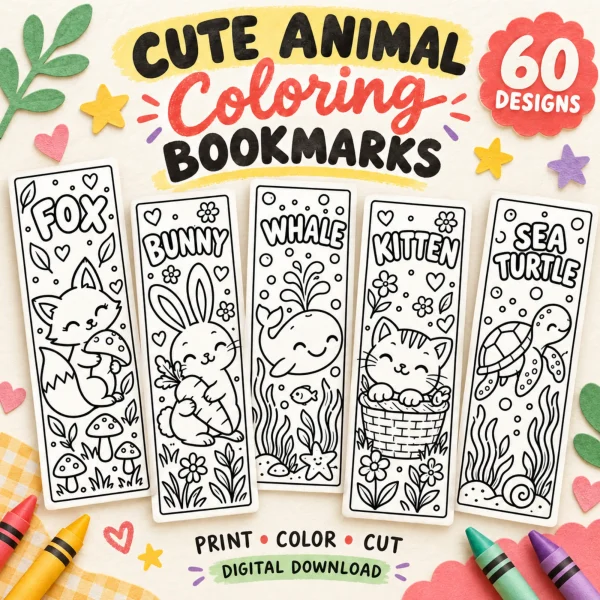
Our cute animal coloring bookmarks hold 60 animals, two bookmarks to a page, each 2 by 6 inches with the animal’s name in bubble letters at the top. The cover marks the set for ages 3 to 8 with adult help. For a 5-year-old who knows some letters, the name practice pages (pages 38 to 47) let them copy the animal’s name after coloring it.
The adult does: the cutting. The instructions in the file ask an adult to help with it.
It’s done when: the bookmark is in a book. Let your child choose the book.
The catch: Two bookmarks share each page. Cut the page in half first so a younger child colors only one at a time and isn’t facing a second blank bookmark.
Paper plate mask
A paper plate already has the right size and shape for a small face. Your child decorates it, and you turn it into a mask.
You need: a plain paper plate, crayons or markers, paper scraps, a glue stick, and a craft stick plus tape for a handle.
How to make it:
1. Hold the plate up to your child’s face and mark where the eyes are.
2. Cut the eye holes (adult job).
3. Let your child turn it into an animal with ears, whiskers or stripes.
4. Tape a craft stick to the bottom edge as a handle.
The adult does: marks and cuts the eye holes.
It’s done when: your child can look through it. Finish with a guessing game: “Which animal are you?”
The catch: An elastic band around the head can catch hair and snap. A stick handle is easier and lets your child take the mask off quickly.
Cardboard tube binoculars
Two cardboard tubes taped side by side make a pair of binoculars for a backyard or park “expedition.”
You need: two toilet paper tubes, tape, crayons or stickers, a hole punch and a length of yarn.
How to make it:
1. Decorate both tubes.
2. Tape them together side by side.
3. Punch a hole near the top of each outer side and tie the yarn on as a strap.
The adult does: punches the holes and ties the strap.
It’s done when: the binoculars go out on a walk. Pick three things to spot, like a bird, a red leaf and a dog.
The catch: A long strap around a small neck is a strangulation risk. Keep the strap short enough that it can’t loop twice, and take the binoculars off for climbing.
Cereal box lacing card
A lacing card is a picture with holes around its edge. Your child “sews” around it with yarn.
You need: the side of a cereal box, a hole punch, yarn, and tape.
How to make it:
1. Draw a simple shape on the plain side of the cardboard, such as an apple, a heart or a fish.
2. Cut it out and punch holes about an inch apart around the edge.
3. Wrap tape tightly around one end of the yarn to make a stiff tip, and tie the other end through the first hole.
4. Let your child thread in and out around the shape.
The adult does: cuts the card and punches the holes. Cereal box cardboard is too stiff for preschool scissors.
It’s done when: the yarn has gone through every hole. Tie the end off, or pull the yarn out to lace it again tomorrow.
The catch: A long piece of yarn tangles fast. Cut it only about twice the distance around the shape.
Leaf collage on contact paper
Clear contact paper sticks without glue, so a fall walk turns into a window decoration with almost no mess.
You need: clear self-adhesive contact paper, painter’s tape, and leaves or petals gathered on a walk.
How to make it:
1. Go on a walk and collect flat leaves, small flowers and grass.
2. Tape a sheet of contact paper to the table, sticky side up.
3. Let your child press the leaves onto it.
4. Lay a second sheet over the top, or fold the sheet in half to seal it.
The adult does: peels the backing, because it curls and sticks to itself.
It’s done when: the collage is taped to a window where the light comes through.
The catch: Thick or wet leaves leave air bubbles and spoil quickly. Pick flat, dry ones.
Messier crafts: wet, sticky or painted
These four need a smock or an old shirt and a table you can wipe down. Set them up near the sink and give them a little more time for cleaning up.
Cotton ball sheep
Cotton balls glued onto a sheep outline give a 3-year-old something soft to press and count.
You need: a sheep shape drawn on cardstock, cotton balls, white school glue in a small dish, and a cotton swab or brush.
How to make it:
1. Brush glue over the sheep’s body.
2. Press cotton balls onto the glue until the body is covered.
3. Draw the face and legs with a black crayon.
The adult does: pours a little glue into the dish. A full bottle in small hands usually ends up in a puddle.
It’s done when: no paper shows through on the sheep’s body.
The catch: Cotton balls stick to glue-covered fingers. Keep a damp cloth on the table.
Big pasta necklace
Stringing large tube pasta onto yarn makes a necklace, and it gives older preschoolers practice with patterns.
You need: large dry tube pasta such as rigatoni, yarn and tape.
How to make it:
1. Wrap tape around one end of the yarn so it’s stiff, and tie a large knot or a piece of pasta at the other end.
2. Let your child thread the pasta. For a pattern, color some pieces with markers first.
3. Tie the ends together loosely.
The adult does: tapes the tip and ties the necklace closed.
It’s done when: the necklace slides on and off over your child’s head without a struggle.
The catch: Pieces of dry pasta are small and hard. Keep the bowl away from babies and toddlers, and make sure the necklace is loose enough to come off over the head easily.
Coffee filter butterfly
Washable marker colors spread and blend when water drips on them. A coffee filter turns that into a butterfly.
You need: round coffee filters, washable markers, a spray bottle or a dropper of water, a clothespin, and a tray or plate.
How to make it:
1. Let your child scribble color all over a flat filter.
2. Put it on the tray and spray it lightly with water.
3. When it’s dry, pinch the middle together and clip it with the clothespin to make the wings.
The adult does: handles the spray bottle, or gives a 4- or 5-year-old a dropper instead.
It’s done when: the wings are dry and clipped. Drying can take an hour, so plan to finish later.
The catch: Permanent markers won’t spread. Only washable ones work for this.
Handprint turkey
A painted handprint becomes a turkey: the thumb is the head, and the fingers are the tail feathers. It’s a quick November keepsake ahead of Thanksgiving.
You need: washable paint, a paintbrush, paper or cardstock, a smock, and baby wipes.
How to make it:
1. Paint your child’s palm and thumb brown and each finger a different color.
2. Press the hand flat onto the paper and lift it straight up.
3. When it’s dry, add an eye, a beak and legs with a marker.
The adult does: paints the hand and guides the press. Have the wipes open before you start.
It’s done when: you’ve written the child’s name and the year on the back.
The catch: Children often curl their fingers as they press. Press their hand down gently with yours, and do one print, not five.
Fuse beads: the preschool craft that needs the most adult help
Fuse beads are small plastic tubes. Your child places them on a pegboard, and an adult irons them together into a solid picture. A 4- or 5-year-old can place the beads. The ironing is an adult job from start to finish.
Know the safety rules first
Loose beads are small parts, and U.S. toy rules draw firm lines around them. The Consumer Product Safety Commission’s rule at 16 CFR part 1501 bans toys intended for children under 3 if they have parts small enough to fit inside its small-parts test cylinder. A related rule, 16 CFR 1500.19, requires a choking-hazard warning on toys and games with small parts intended for children ages 3 to 5. Look for that warning on the bead package. It includes the words “Not for children under 3 yrs.”
At home, that means:
- Do bead crafts only when there’s no baby or toddler at the table, and sweep the floor afterward.
- Count beads out into a small dish instead of putting the whole tub in front of your child.
- Stay at the table the whole time. This isn’t a craft to leave a preschooler alone with.
Fuse bead animal
You need: a square pegboard, standard 0.2-inch (5 mm) fuse beads in the colors of your pattern, a printed chart, an iron and ironing paper. The ironing is explained step by step in our guide to how to iron fuse beads.
How to make it:
1. Sort the beads by color into small dishes, using the key under the chart.
2. Place the beads row by row. Your child can do one color while you do another.
3. Check the board against the chart, then the adult irons it.
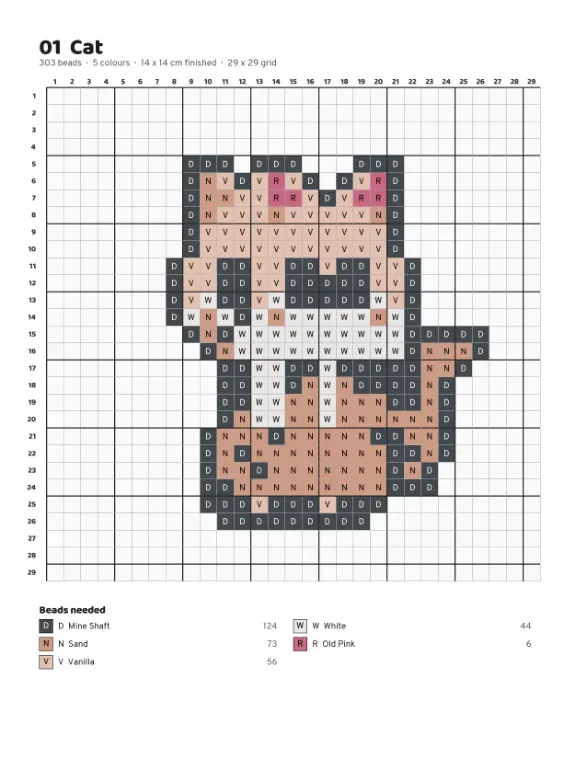
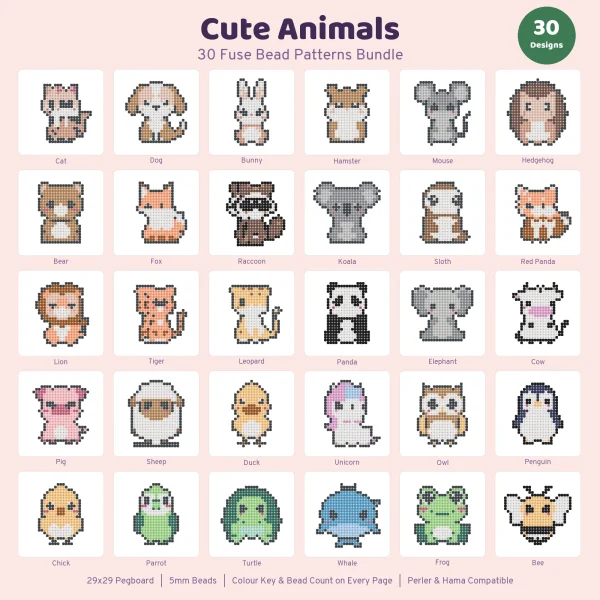
Our cute animal fuse bead patterns are 30 animals, each on a 29 by 29 grid that fits one square pegboard. Each animal needs a few hundred beads. The cat on page 1 takes 303 beads in five colors and finishes about 5.5 inches (14 cm) across. The printed chart is bigger than the pegboard, so keep the page next to the board. Don’t try to slide it underneath. The pattern pack doesn’t set a minimum age, so the safety rules above are your guide.
The adult does: sorts the colors with your child, places the fiddly outline beads if needed, and does all the ironing.
It’s done when: the piece is ironed, cooled and lifted off the board in one piece.
The catch: A few hundred beads is a lot for a preschooler in one sitting. Split it over two sittings and leave the board flat on a high shelf in between, where nobody can bump it. If standard beads are too fiddly, bigger ones exist: Perler and Hama both make a 0.4-inch (10 mm) size. On those, a 29-square chart comes out twice as wide, so it needs a much bigger board.
When a preschool craft goes wrong
A few problems turn up in almost every craft session. Most are easy to fix.
- “I can’t cut it.” Cut the piece out yourself and hand it over. Gluing it in place still finishes the craft. For a 3-year-old who’s just starting with scissors, the cutting ideas in our activities for 3 year olds build the skill separately.
- Glue everywhere. Swap liquid glue for a glue stick, or put a small amount in a dish with a cotton swab.
- Gave up halfway. Put the craft on a shelf with a sticky note and come back tomorrow. The fuse bead board and the butterfly both need a pause anyway.
- A sibling wants in. Paper chains, bag puppets and the cut-and-paste scene pages work for two children side by side. Give each one their own tray.
For crafts with a theme, our farm activities for preschool include a pig tracing craft, and the weather activities for preschool include a seasons diary and snow experiments.
Printables from this article
Related articles
Kids Activity Books
Letter M Craft Ideas: Monkey, Mouse & Mushroom for Preschool
Twelve letter M crafts grouped by who is at the table, from a foil-print moon for one toddler to monkeys swinging on a paper-chain vine for a whole class, with ages, minutes, supplies, steps and where each one tends to go wrong.
Kids Activity Books
Letter R Crafts for Preschool: Raccoon, Rabbit & Rainbow
Eleven letter R crafts grouped by what the child is into, from a sticky tissue rainbow for 2-year-olds to a raccoon shadow puppet, with ages, minutes, supplies, steps and the usual slip.
Kids Activity Books
Letter D Crafts: Dinosaur, Dog & Donut Ideas for Preschool
Eleven letter D crafts sorted by age, from a play dough D for 2-year-olds to a fuse bead dinosaur footprint, with supplies, times, steps and the snag in each one.