How to Draw an Arctic Fox: Easy Sitting and Sleeping Steps
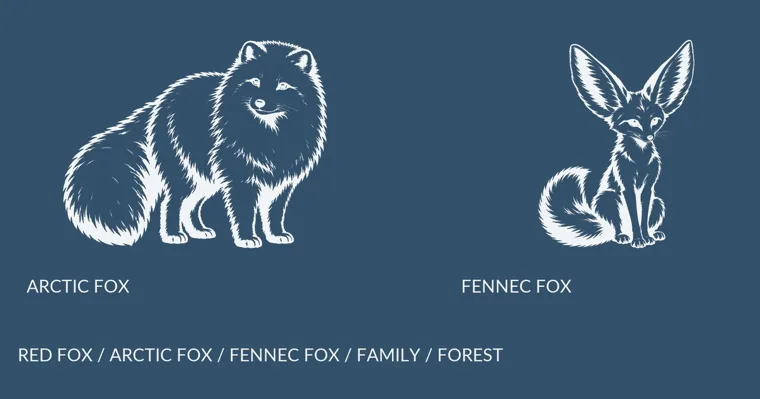
To draw an arctic fox, build a round, compact animal instead of a sleek one: a ball-shaped head with a short muzzle, small rounded ears, a body with almost no visible neck, short legs and a tail nearly as fat as the body. Then let the fur do the talking with short zigzag tufts on the cheeks, chest and tail.
Those proportions matter more than any detail. Get them right and even a quick pencil sketch is recognizable; get them wrong and it’s just a white dog. Below are two versions you can follow line by line, a fox sitting up and a fox curled asleep, followed by the part most drawings get wrong: making a white animal stand out against white paper.
Arctic fox or red fox? The five shapes that decide it
If your finished drawing looks like a red fox that’s been painted white, one of these five shapes is off.
The arctic fox is built to lose as little heat as possible in extreme temperatures, and Wikipedia’s Arctic fox article sums up that adaptation as a compact body shape with a short muzzle, short legs and short, thick ears. It’s also the smaller animal, about 25–30 cm (9.8–11.8 in) tall at the shoulder. Every difference in the comparison below follows from that one idea of keeping warm.
| Feature | Arctic fox | Red fox |
|---|---|---|
| Ears | Small, thick, rounded at the tip, set wide on the head | Tall and pointed, with black backs |
| Muzzle | Short and blunt, a small bump on a round face | Long and narrow, a clear wedge |
| Legs | Short, half hidden by belly fur in winter | Long and slim, with black paws |
| Body | Round and compact, neck buried in a fur ruff | Long and lean, neck easy to see |
| Coat | Long and white in winter, short and brownish in summer | Rusty red with white chin, throat and tail tip |
The red fox details in the right-hand column come from Wikipedia’s Red fox article, which describes black paws, black or brownish backs to the ears and a white tail tip. Those three dark marks are the quickest giveaway, so leave them off an arctic fox entirely.
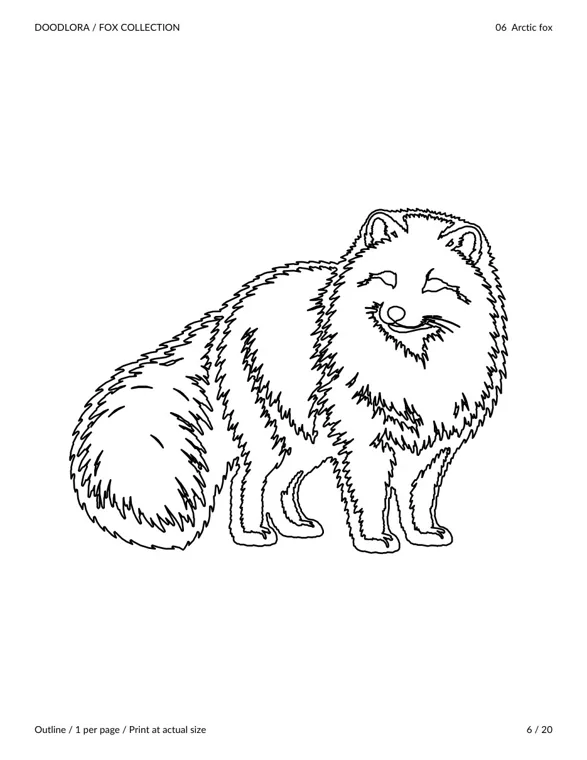
Look at the printed fox above before you start. The ears barely rise above the fur line of the head, the legs are short columns, and the tail is close to the size of the chest. Keep those proportions in mind for both versions below.
Who can draw it, how long it takes and what to put on the table
The sitting fox is eight steps and the sleeping fox is six, so the sleeping one is the better start for younger children. Plan on these rough numbers for a home or classroom session:
| Who’s drawing | Version to start with | Pencil time | Tip |
|---|---|---|---|
| Ages 4–5 | Trace the printed fox, then add a tail curl | 10 minutes | Let them color the snow and sky, not the fox |
| Ages 6–8 | Sleeping fox, then sitting fox | 15–20 minutes each | Read one step aloud and wait for the whole table |
| Ages 9 and up, teens, adults | Sitting fox with full fur tufts | 20–30 minutes | Spend the extra time on the shading section |
The supply list is short: a graphite pencil you can erase lightly, an eraser, white printer paper, and a gray, a pale blue and a lavender colored pencil. A fine-tip pen is optional. Don’t reach for a heavy black marker for the outline, because a white fox inked in thick black looks like a cartoon sticker.
A fox drawing fits nicely into a snowy indoor afternoon. If you’re planning a whole day of them, our list of winter activities for kids has quieter projects to pair with it.
How to draw a sitting arctic fox in 8 steps
This version sits facing slightly left, front legs straight, tail wrapped around the feet. Keep every line in steps 1–2 faint, since they’re guide shapes you’ll erase.
Step 1: Start with a circle for the head
Draw a circle in the top third of the page, roughly 2 inches (5 cm) across on a full sheet. This is the whole skull plus cheek fur, so make it rounder than you would for a dog or a red fox.
Step 2: Hang a big egg-shaped body behind it
Draw a tall egg below and slightly behind the head, narrow end up, wide end on the ground. Let the top of the egg overlap the bottom of the head circle. That overlap is deliberate: an arctic fox in winter coat shows almost no neck, because the fur ruff fills the space between chin and chest.
Step 3: Add a short, blunt muzzle
On the front side of the head circle, add a small rounded bump that sticks out no more than a third of the head’s width. Put a dark oval nose at the tip and draw a short curved mouth line underneath. If the muzzle starts to look like a long pointed wedge, you’ve drawn a red fox. Rub it back.
Step 4: Set two small ears wide apart
Draw two short triangles with rounded tips on top of the head, one at each upper corner of the circle rather than close together. Each ear should be shorter than the muzzle is long. Add a curved line inside each ear for the fur lining.
Step 5: Place the eyes and cheek ruff
Draw two almond-shaped eyes on a line across the middle of the head, a little closer to the muzzle than to the ears. Then draw a zigzag edge from below each ear down to the chin, sticking out past the head circle. That zigzag is the cheek ruff, and it turns the plain circle into a fluffy face.
Step 6: Drop two short front legs
From the front of the body egg, draw two short straight columns down to the ground. They should be about as tall as the head is wide, not longer. Finish each with a rounded paw. Arctic fox feet are furry (the Latin name lagopus, “hare foot,” refers to that hair), so draw the paws as soft ovals with no sharp toe pads.
Step 7: Fold the hind leg and wrap the tail
On the back half of the body, draw a large curve for the folded hind leg, with the hind paw peeking out next to the front paws. Then draw the tail: a long, thick sausage shape that starts at the back of the body, curves along the ground and wraps around the front paws. Make it nearly as wide as the lower body. When a fox drawing ends up looking like a cat, a skinny tail is usually to blame.
Step 8: Turn smooth lines into fur, then clean up
Go around the outer edge and replace the smooth guide lines with short zigzag tufts, especially on the chest, the cheeks, the back of the hind leg and the whole tail. Leave the ears, muzzle and paws smooth so the eye can find them. Erase the circle and egg lines, then go over the final line with a sharp gray or graphite pencil rather than black.
How to draw a curled-up sleeping arctic fox in 6 steps
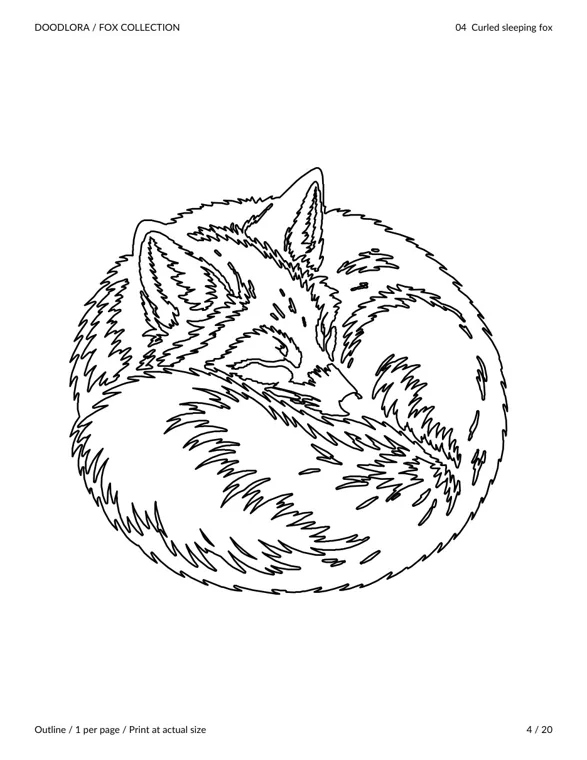
Arctic foxes do sleep in a tight ball. Wikipedia describes the fox curling up with its legs and head tucked under its body and behind its furry tail, which protects the least insulated parts. On paper that pose is mostly one big round shape, which makes it the easier of the two.
- Draw a slightly flattened circle. Make it wider than it is tall, like a dinner roll. This is the whole sleeping fox.
- Wrap the tail across the front. Starting at the back bottom of the circle, draw a thick crescent that sweeps along the bottom and up the front side. Its tip should end near where the nose will go.
- Rest the head on top of the tail. Inside the circle, near the front, draw a small rounded head lying sideways on the tail. Give it a short muzzle that tucks into the tail fur and two curved lines for closed eyes.
- Add two small ears flattened back. A sleeping arctic fox’s ears are even less visible than an alert one’s. Two rounded bumps lying back along the head are enough.
- Show the hip. Draw one curved line on the back half of the circle for the hind leg. You can add a single paw peeking from under the tail or skip the feet entirely.
- Fluff the outline and ground it. Break the outer edge into short tufts, keep the line light, and shade a thin pale-blue band beneath the ball so it rests on the snow instead of floating.
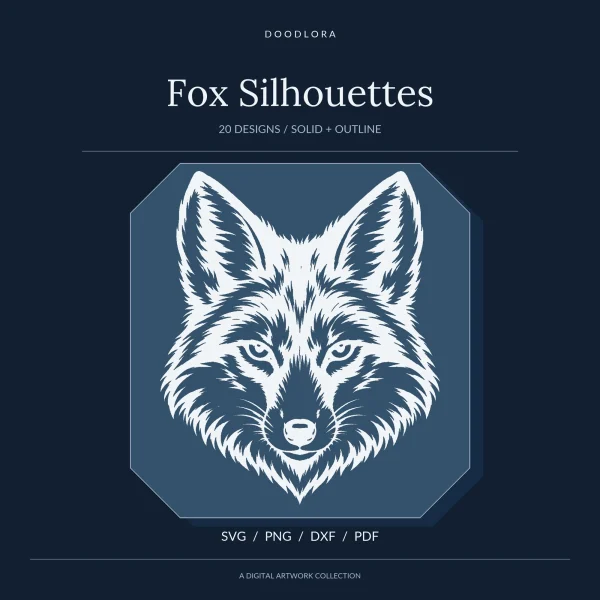
The printed curled fox above is the right pose but the wrong ears. Compare its tall, pointed ears with the small rounded ones on design 06 and you’ll see the single change that turns a red fox into an arctic one.
Making a white fox show up on white paper
Coloring is where arctic fox drawings usually fall apart. If you outline a white fox in black and stop, it looks unfinished. If you color it gray all over, it looks dirty.
The trick is to leave most of the fox as bare paper and put color only where light doesn’t reach. Artists call this using the white of the paper as your highlight, and it’s the same technique behind every convincing drawing of snow, clouds or a white cat.
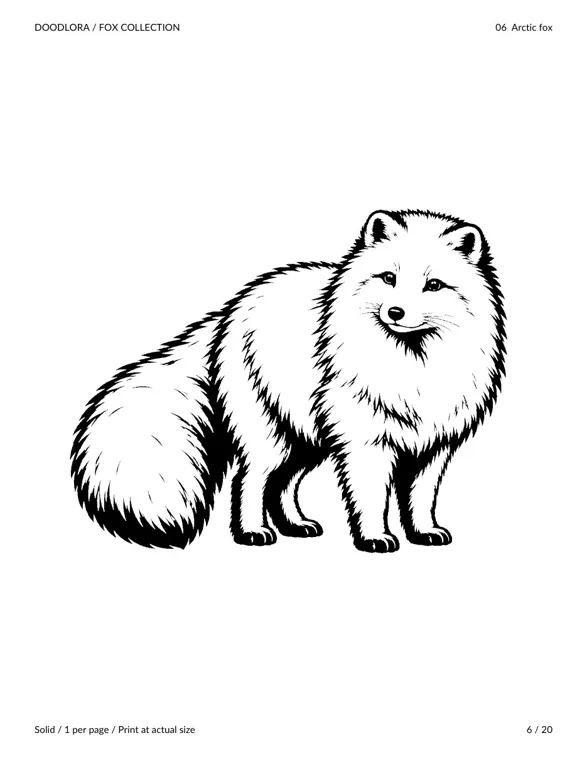
The solid version of design 06 shows the approach in black and white. Copy where its dark marks sit, then soften them with color:
- Decide where the sun is. Say the light comes from the upper left. Then the shadow side of your fox is the right side of the body, the underside of the belly, the inner legs, under the chin and the inside curve of the tail.
- Shade with cool colors, not gray alone. Pale blue and lavender read as shadow on snow. Lay them in very lightly along the shadow side, then add a little gray only in the deepest spots: between the legs, under the chin, where the tail meets the body.
- Leave the lit side bare. The upper back, the top of the head and the top of the tail stay pure paper white. Don’t color them at all.
- Save the darkest dark for the face. Eyes and nose are the only spots that should be close to black. That small amount of contrast makes the whole fox look whiter.
- Darken the world, not the fox. A pale fox needs something behind it. Color the sky a medium blue, add gray-blue rocks or a dark sea line behind the fox, and the white edge pops without any outline at all.
- Give the snow its own shadow. A blue-lavender oval under the paws, darker right under the feet and fading out, puts the fox on the ground.
If you’d rather blend the shadow colors smoothly, our colored pencil blending guide covers layering light colors without the paper turning waxy. One more trick for older kids: draw on light blue or gray paper and use a white colored pencil for the fur. The paper becomes the shadow, and the white pencil becomes the light.
Drawing the arctic fox in a snowy scene
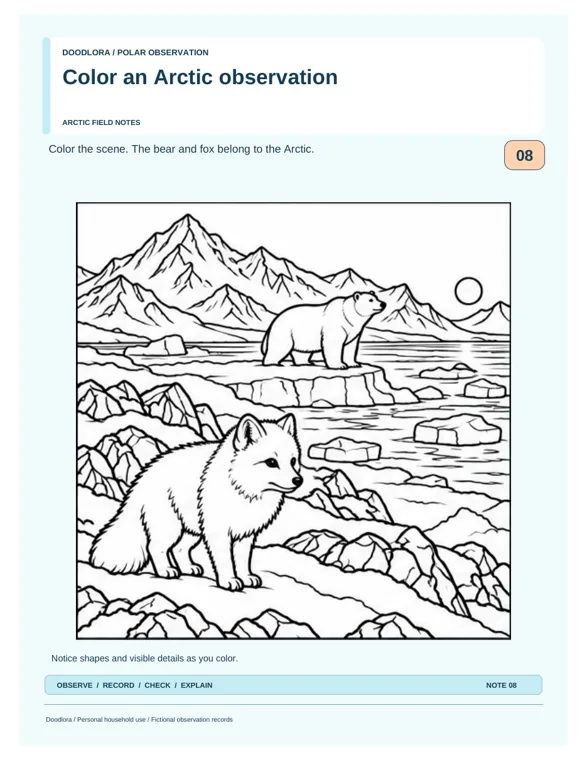
A fox alone on a page gives you no snow to shade, so a simple background helps. The scene below from our polar animals pack is a good layout to borrow: rocks and ice in front, flat water in the middle, mountains and a sun at the back.
Three things make a snow scene work around a white fox:
- Put the horizon high. If the fox stands in the lower half of the page with a lot of snow around it, you get plenty of ground to shade blue.
- Use rocks as dark shapes. Gray-brown rocks around the paws frame the fox’s white legs better than more snow does.
- Keep the animals in the right hemisphere. Arctic foxes share their range with polar bears, walruses and snowy owls, not penguins. The polar pack sorts its six animals by region for exactly this reason, and kids often put a penguin next to an arctic fox without thinking. Penguins belong at the other pole.
Summer coat and the blue arctic fox
Not every arctic fox is white. Wikipedia describes two color types. The common white type turns entirely white in winter, and in summer it’s brown with lighter brown to cream sides and belly. The blue type is black, brown or gray in summer and only slightly lighter in winter. About 90% of arctic foxes worldwide are the white type, so a white fox is the safe default, but the other two coats make good variations.
The summer coat changes the silhouette too, not just the coloring. The winter coat is about twice as long as the summer one, so a summer fox looks noticeably thinner, with slimmer legs and a less puffy tail. To draw one, use the same steps but skip most of the zigzag tufts in step 8, pull the body egg in a little, and let the neck show. Color the back brown, fade to cream on the sides and belly, and keep the ears and muzzle short.
For a blue fox in winter, the problem from the snow section flips: the fox is the dark shape and the snow is light. Shade the whole body in blue-gray and charcoal, leave a few lighter strokes on the top of the back and tail for highlights, and the white background does the rest.
Where arctic fox drawings usually go wrong
| What you see | Why it happens | Fix |
|---|---|---|
| It looks like a white red fox | Ears too tall, muzzle too long | Cut the ears to half height and round the tips, shorten the muzzle to a bump |
| It looks like a cat | Tail too thin, face too flat | Make the tail almost as wide as the lower body; add a small muzzle |
| It looks like a dog or a wolf | Legs too long, neck visible | Shorten the legs to about one head width; let the ruff cover the neck |
| It looks dirty or gray | Shaded everywhere in gray | Erase back to white on the lit side; shade only the shadow side in blue and lavender |
| It disappears into the page | White fox, white background, light outline | Color the sky or rocks behind it, not the fox |
| Black paws and ear backs | Copied from a red fox reference | Leave them white, or pale gray in shadow |
| A penguin in the picture | Mixing up the two poles | Swap it for a snowy owl, a walrus or a polar bear |
Kids also tend to draw every single hair, which is understandable but exhausting. Fur tufts work best only along the outer edge and in a few places inside, such as the cheek ruff and where the leg meets the body.
The middle of a white fox should stay mostly empty.
Tracing the printed fox first
If a child gets stuck on proportions, tracing one printed fox teaches the shapes faster than any explanation. Print design 06 from the outline PDF at one per page and hold it against a sunny window with a blank sheet on top. Follow just the silhouette’s edge and ignore the inner fur strokes. Then put the original away and draw the same fox freehand next to the tracing. After one trace, most kids remember how small the ears are.
The Fox Silhouettes set also has 4-up and 6-up PDFs, which are handy for a group: one sheet gives four children a fox each to trace. Design 04, the curled sleeper, works the same way for the sleeping steps, as long as you remind them to shrink its ears. Print the pages at actual size, as the footer on every page reminds you; our printing guide for coloring pages explains the printer setting that controls that.
If your group wants something to do with the finished foxes, cut them out and add them to a snow scene or one of the projects in our winter crafts roundup.
Arctic fox drawing questions
Is an arctic fox always white?
No. The white type is white only in winter and brownish in summer, and the blue type stays dark gray, brown or black all year with a slightly lighter winter coat. If you want an instantly recognizable arctic fox, draw the white winter coat.
Why are an arctic fox’s ears so small?
Small, thick ears lose less heat. Wikipedia lists the short ears, muzzle and legs together as part of the fox’s compact cold-weather build, and its fur as the best insulation of any mammal. In a drawing, those small ears are the single most important identification detail.
What colors do I need for an arctic fox?
For a white winter fox, a pale blue, a lavender and a gray are enough, plus black for the eyes and nose. The paper itself is the white. For a summer coat, add a medium brown and a cream or tan.
How do I make the fur look fluffy instead of spiky?
Keep the zigzags short and uneven, and point them in the direction the fur grows: down and back on the body, outward on the cheeks, and toward the tip on the tail. Long, even spikes look like a hedgehog. Leave stretches of smooth line between the tufts; that contrast between smooth and broken edges is what reads as softness.
Can I draw an arctic fox pouncing in the snow?
Yes, and it’s a real behavior. Arctic foxes listen for lemmings under the snow, then jump and punch down through it. Draw the body as a curve arching head-down, front paws together reaching toward a small snow mound, and the tail streaming up behind.
Printables from this article

Related articles
Outlines & Stencils
How to Draw a Mallard Duck: Drake, Hen and Flying Poses
A swimming mallard drake in ten pencil steps, the changes that turn it into a hen, a flying pose, a pair on the water and the color marks that make the bird read as a mallard.
Outlines & Stencils
Turtle Crafts for Kids: Paper Plate and Sea Turtle Ideas
Twelve turtle crafts sorted by age, each with time, materials, steps and the snag to watch for, plus how to use a printed turtle outline as a cutting template.
Outlines & Stencils
Bird Crafts for Kids and Adults: Owl, Nest and Feeder Ideas
Thirteen bird crafts grouped by who is making them, from a toddler's handprint bird to a framed papercut and a cold-weather pinecone feeder, each with ages, time, supplies, steps and the snag to plan for.