How to Draw a Mallard Duck: Drake, Hen and Flying Poses
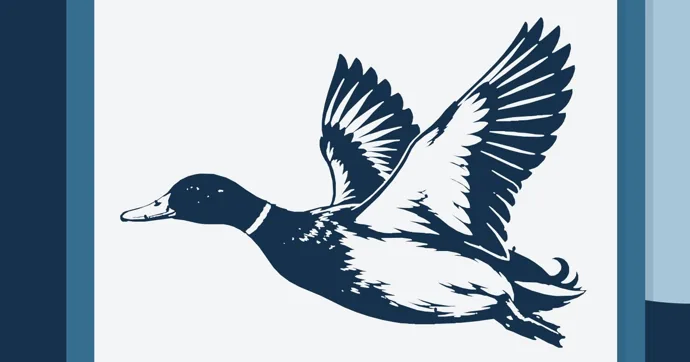
To draw a mallard duck, start with a long egg-shaped body sitting on a waterline, put a round head on a short neck, and give it a long, flat bill. That shape alone is just “a duck.” Three small marks turn it into a mallard: the drake’s thin white ring between the green head and the brown chest, the curled feather above his tail, and a bright patch on the folded wing that both males and females carry.
Grab an HB pencil, a soft eraser and a sheet of copy paper. For a color finish, set out five colored pencils: dark green, chestnut brown, gray, yellow-orange and blue. A first pencil sketch of the swimming drake below takes most beginners somewhere around 20 to 30 minutes. That’s our rough planning figure, not a timed test. Kids from about 7 can follow the shapes. Under that age, start by tracing over a printed mallard, which the practice section further down explains.
Drawing talent matters less than proportions here. Get the body, neck and bill in the right relationship, and the identification marks do the rest.
Drake or hen: decide before the first line
The male mallard is called a drake and the female a hen. They share one body plan, so the pencil skeleton is identical. The markings are what change, and if you mix them up the duck stops looking like a mallard. Pick one before you start, because the head and tail are drawn differently.
| Drake (male) | Hen (female) | |
|---|---|---|
| Head | Glossy bottle-green, smooth | Buff face with a darker crown and a dark stripe through the eye |
| Neck | White collar between head and breast | No collar |
| Chest | Purple-tinged brown | Mottled brown like the rest of her |
| Body | Gray-brown wings, pale gray belly, black rear | Every feather mottled, buff to very dark brown |
| Bill | Yellowish-orange with a black tip | Darker, black to mottled orange and brown |
| Center tail feather | Curled upward | Straight |
| Wing patch (speculum) | Purple-blue, edged with white | Purple-blue, edged with white |
The descriptions come from the mallard entry on Wikipedia and the Cornell Lab’s All About Birds identification page. Cornell puts the wing mark simply: both sexes have a white-bordered, blue “speculum” patch in the wing.
For a side-by-side comparison while you draw, three of the designs in our mallard duck silhouettes put a drake and a hen next to each other.
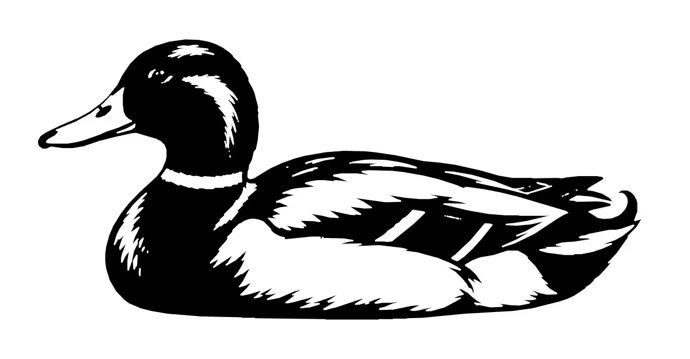
How to draw a swimming mallard drake in 10 steps
The swimming pose is the easiest way in. The water hides the legs and feet, so you only have to get the body, head and bill right. Draw lightly until step 8; you’ll erase a few guide lines.
-
Draw the waterline. Make a long, nearly flat line across the lower middle of the page. Everything below it stays empty, so the duck looks like it’s floating rather than standing on a table.
-
Draw the body. Sit a long egg shape on the line, rounder and fuller at the front where the chest is and tapering toward the tail at the back. Let the bottom of the egg sink just under the waterline. A mallard’s body makes up around two-thirds of its total length, so leave room at the front for the head, neck and bill.
-
Place the head. Draw a circle above the front third of the body, a little forward of the chest. It should be clearly smaller than the body; if it’s close to half the body’s height, the duck will read as a duckling.
-
Connect the neck. Join the head to the body with two short curves. The front curve swings out and down into the chest, and the back curve drops almost straight into the top of the back. The neck on a swimming mallard is short and thick, not swan-like.
-
Add the bill. Draw a long, flat wedge from the front of the head, angled slightly down. Run the top line of the bill almost straight out from the forehead and round off the tip. Wikipedia gives the bill as 1.7 to 2.4 inches (4.4 to 6.1 cm) on a bird 20 to 26 inches (50 to 65 cm) long, so it’s long for the head but nowhere near the length of the neck.
-
Place the eye. Put a small dot high on the head, closer to the bill than to the back of the skull. On a drake the eye sits in dark green, so in a pencil drawing you’ll leave a tiny white spot around it later.
-
Draw the collar. Draw two close parallel lines circling the neck just where it meets the chest. This is the white ring that separates the green head and neck from the brown breast. Keep it narrow and keep it high, just below the head.
-
Fold the wing. Draw a long leaf shape lying along the upper side of the body, starting behind the chest and ending in a point near the tail. Near the back of the wing, draw a small rectangle and outline it twice. That’s the speculum, and the double line marks the white edges on each side of the colored patch.
-
Finish the tail and the curl. At the back of the body, draw a short, pointed tail that tips up above the waterline. Then add the drake’s signature: one small feather curling up and forward over the tail, like a hook. Leave it off if you’re drawing a hen.
-
Clean up and shade. Rub out the guide shapes left inside the duck. Shade the head darkest, leave the collar white, shade the chest a mid tone, keep the side of the body lightest, and darken the black rear between the wing tip and the tail.
Check one thing before you move on. Cover the head with your thumb and look at the body alone. If the outline still reads as a boat floating on water, the proportions are right.
Turning the drake into a hen
The hen uses the same ten steps with four changes. Skip the collar in step 7. Skip the tail curl in step 9. Add a dark stripe through the eye and a slightly darker cap on top of the head. Then cover the whole body in small marks instead of smooth shading.
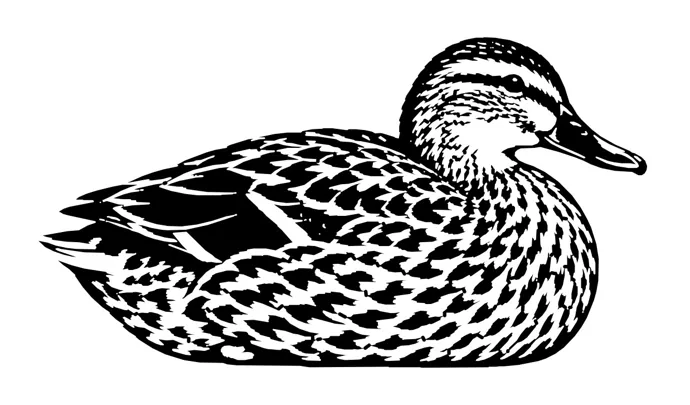
Those marks are what make a hen look like a hen. Wikipedia describes her plumage as predominantly mottled, each feather contrasting from buff to very dark brown. In pencil, draw rows of small U shapes, like fish scales turned upside down, starting at the tail and working toward the chest. Make them smaller and tighter on the head and neck and larger along the back and wing. Leave a little white inside each U so the pattern doesn’t turn into a gray smudge.
Patience beats accuracy on this part. The eye recognizes the overall impression of a speckled bird, not each individual feather.
A hen takes longer than a drake for exactly this reason. Plan on an extra 10 to 15 minutes for the feather marks, and stop when the back and sides are covered; the face can stay lighter.
How to draw a mallard in flight
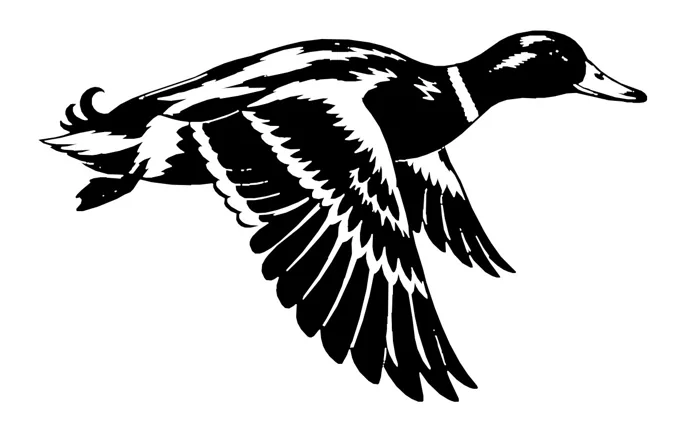
A flying mallard looks nothing like a swimming one. The neck stretches straight out, the body turns into a long torpedo, and the wings take over most of the page. The good news is that the head, bill and collar are drawn exactly the way you already learned.
-
Draw a long, slightly tilted line across the page. This is the direction of flight.
-
Draw the body as a long, narrow oval on that line, much slimmer than the swimming egg. Taper both ends.
-
Stretch the neck forward. Put the head circle well ahead of the body on the same line, and join it with a long, even neck. The head is small compared with the spread bird.
-
Add the bill and collar. Draw them the same way as in the swimming steps. In flight the collar is often the easiest mark to see.
-
Draw the wings. Start each wing at the shoulder, just behind the neck. For wings raised, draw two long shapes rising up and back; for a downstroke like the page above, sweep them below the body. Wikipedia lists the wingspan as 32 to 39 inches (81 to 98 cm) on a bird 20 to 26 inches long, so tip to tip the wings should be roughly one and a half times the bird’s length. Short wings are the most common reason a flying duck looks like it’s falling.
-
Split the wing into feathers. Draw long, separated feathers at the outer end of each wing and shorter, overlapping rows near the body. Place the speculum along the back edge of the wing, closer to the body than to the tip, with its white border on both sides.
-
Tuck the feet. Draw the feet folded back under the tail, or leave them out. A short tail and the drake’s curl finish the bird.
Photographs of flying ducks are particularly useful for this pose, because the wing position changes completely between the upstroke and the downstroke.
Banking turns, gliding and landing are variations on the same frame. For a glide, keep both wings nearly straight out from the body. For landing, tip the body up, raise the wings and push the feet forward.
Drawing a pair on the water
A drake and a hen swimming side by side is the classic mallard picture. A pair is two of the swimming drawings with one overlap problem to solve.
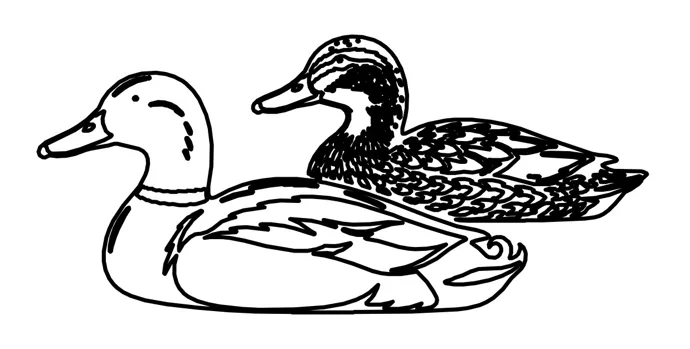
Draw the front bird completely first. Then draw the second bird a little higher on the page and slightly smaller, and stop each of its lines where it touches the front bird. Those interrupted lines give an immediate impression of distance. Put the hen behind the drake, as on this page: the plain drake reads clearly in front, and the busy feather pattern stays in the background instead of fighting with his outline.
Continue the same waterline under both birds. If each duck gets its own waterline at a different height, they’ll look like they’re on two different ponds.
Coloring a mallard so it reads as a mallard
Color is where a mallard drawing either clicks or doesn’t. Work from light to dark, and leave the white parts as bare paper instead of trying to color them white.
| Part | Drake | Hen |
|---|---|---|
| Head and upper neck | Dark green, darkest at the crown | Buff, with brown crown and eye stripe |
| Collar | Leave white | None |
| Chest | Chestnut brown with a hint of purple | Mottled brown |
| Side and belly | Pale gray | Buff and brown marks |
| Wings | Gray-brown | Brown |
| Speculum | Purple-blue between two white lines | Purple-blue between two white lines |
| Rear and tail | Black rear, dark tail feathers with white borders | Mottled brown |
| Bill | Yellowish-orange, black tip | Orange and brown with dark mottling |
For the drake’s head, layer a dark green over a lighter green and press harder toward the top of the head. Leave a narrow white streak to show the gloss. For the speculum, color the patch first, then go around it with a sharp pencil so the white edges stay crisp.
A summer photo can trip you up. After breeding, drakes molt into a duller “eclipse” plumage. All About Birds notes that the nonbreeding male is browner, like a female, but keeps his black-and-white tail and often a trace of green on the head. If you’re drawing from a picture of a brown duck with a yellow bill and a dark tail, it may be a drake in summer.
Trace a plain duck, then add the mallard marks yourself
Tracing is a fair way to learn a shape, especially for kids under about 7 or anyone who wants to understand the proportions before drawing freehand. Tape a printed outline to a sunny window and tape a blank sheet over it. Follow just the outside edge of the duck with your pencil. Then take the paper down and add the eye, collar, wing and tail from memory.
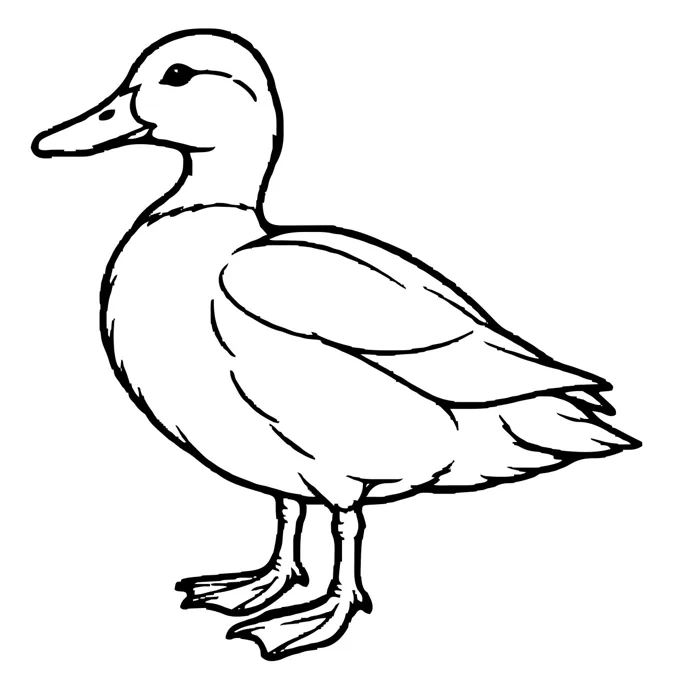
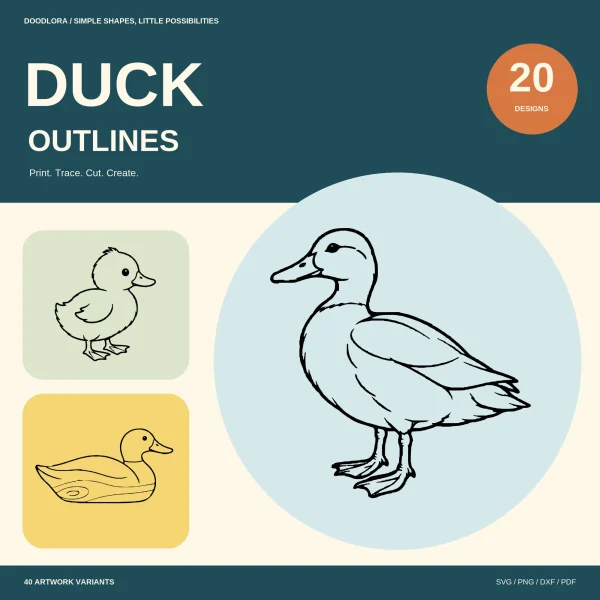
The standing duck above comes from our duck outlines PDF, which closes with a big, simple tracing page each for a standing duck, a duck taking flight, a duckling and a decoy (pages 59 to 62). It’s drawn as a plain duck, with no collar and no tail curl. That makes it good practice: trace the body, then add the mallard marks yourself.
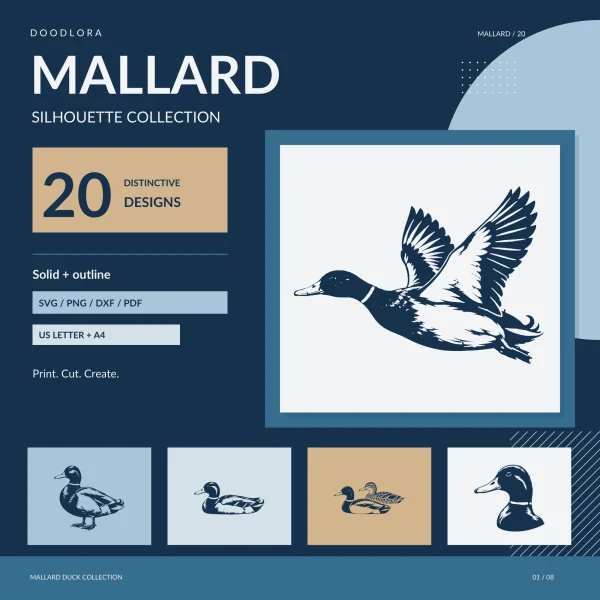
For mallard poses already drawn with the markings in place, our mallard silhouette pack has 20 designs, including five flight poses, a resting hen, three drake-and-hen pairs and two head portraits. Every bird is drawn twice, filled black and as open lines. Each of the 12 PDFs has a cover and 20 design pages, one design per page or repeated four or six times. The outline pages color in well, and the solids are good for studying where the light marks fall.
The pack’s START-HERE file asks for Actual Size (100%) with Fit to Page switched off, so the birds come out at their drawn size. If your printer dialog hides those options, the walkthrough in how to print coloring pages shows where they live. The mallard pack and the duck outlines carry a personal license: print them for your own noncommercial projects, and don’t sell finished pieces made from them.
In a classroom, one outline page per child works well. Give each student the same design so you can walk the class through the collar, the wing patch and the curl together, then let early finishers start a second pose freehand. As a planning estimate, allow about 30 to 40 minutes for tracing, marking and coloring.
Where a mallard drawing usually goes wrong
Most of these mistakes come from drawing from memory instead of observation. A quick comparison with a photograph or a printed page catches them immediately.
- The collar is too low or too wide. It’s a thin ring near the top of the neck, not a bib on the chest. If it sits halfway down, the head looks stretched.
- The hen has a green head. Green head, collar and curl all belong to the drake. A hen with any of them looks like a mistake rather than a female.
- The bill is short and pointed. A mallard bill is long, flat and rounded at the tip. A short pointed bill makes a songbird.
- The wing patch is missing. Both sexes have it, and without it the bird could be almost any brown duck.
- The flying wings are too short. Measure them against the body: wingtip to wingtip should be wider than the bird is long.
- The duck floats too high. If the whole underside shows above the waterline, it looks like it’s sitting on the water’s surface instead of in it. Sink the bottom of the body slightly.
Drawing a mallard duckling
Younger artists often want the baby. A real mallard duckling isn’t all yellow. Wikipedia describes a newly hatched duckling as yellow on the underside and face, with streaks by the eyes, and black on the back up over the top and back of the head. Its bill and legs are black too.
To draw one, use a round body and a head nearly as big, with a very short bill. Shade the back and the top of the head dark and leave the face and belly light. Add a dark streak running back from the eye.
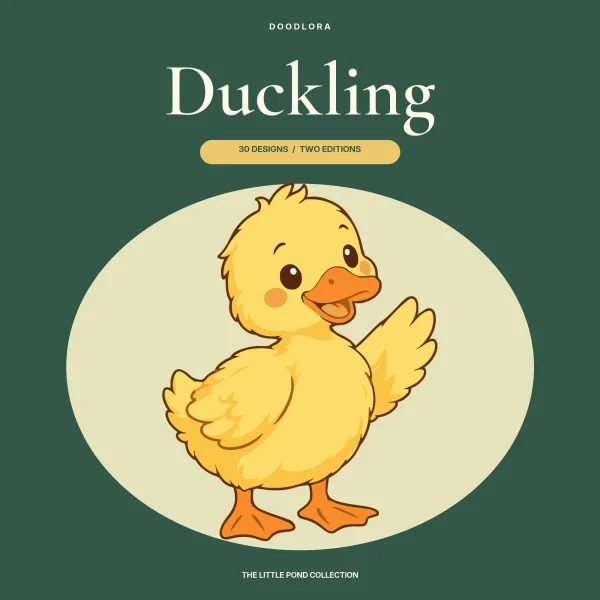
If your child would rather draw the bright yellow storybook kind, the cartoon ducklings in our duckling SVG set are round, fluffy and yellow all over, with orange feet. They make a friendly reference for a cartoon version, as long as you know the real bird has a dark back.
When the drawing is done, our duck crafts page has paper bag puppets, flapping-wing ducks and a duck crossing scene to make next, and the coloring tips guide helps with layering colored pencils.
What people ask about drawing mallards
Is the duck with the green head the male?
Yes. The glossy green head, white neck ring and curled tail feather belong to the drake. The hen is mottled brown with a dark eye stripe.
Which mallard pose should a beginner draw first?
The swimming drake. The water hides the legs, the shapes are simple, and the collar and curl give you a quick win. Try the hen next, then a flying bird.
Do female mallards have the blue wing patch too?
Yes. Both sexes have the purple-blue speculum with white edges. On a swimming bird it shows near the back of the folded wing.
Why does my mallard look like a goose?
The neck is probably too long. A swimming mallard’s neck is short and thick, and the head sits close to the chest. Shorten the neck and make the bill flatter.
Printables from this article
Related articles
Outlines & Stencils
Turtle Crafts for Kids: Paper Plate and Sea Turtle Ideas
Twelve turtle crafts sorted by age, each with time, materials, steps and the snag to watch for, plus how to use a printed turtle outline as a cutting template.
Outlines & Stencils
Bird Crafts for Kids and Adults: Owl, Nest and Feeder Ideas
Thirteen bird crafts grouped by who is making them, from a toddler's handprint bird to a framed papercut and a cold-weather pinecone feeder, each with ages, time, supplies, steps and the snag to plan for.
Outlines & Stencils
How to Draw an Arctic Fox: Easy Sitting and Sleeping Steps
Two pencil versions of the arctic fox, sitting up and curled asleep, plus the five shape changes that separate it from a red fox and how to color a white animal in snow.