DIY Home Decor: Cheap Ideas, Printable Art & How to Hang It

DIY home decor is worth the effort when it changes something you look at every day: a bare wall, a tired dresser, an empty shelf. The cheapest ways to do it use paint, paper, fabric and things picked up outside, and most of the 17 ideas below take an afternoon or less. Printable wall art is the fastest of them, since a print made at home can be framed and hung the same evening, as long as the file size, the frame and the hanging height agree. The ideas are grouped by situation, starting with renters who can’t put holes in the walls.
Pick a DIY home decor project by time, tools and wall rules
Choose by the two things that rule out the most projects: whether you can make holes, and how much time you have. Cost stays low across the whole list, because none of these needs anything bigger than a drill.
| Idea | Time | Holes in the wall? | What you need |
|---|---|---|---|
| Lean prints on a shelf | 30 minutes | No | Frames, a shelf or ledge |
| Tape frame around a print | 20 minutes | No | Washi or painter’s tape |
| Peel-and-stick paper on furniture | 1–2 hours | No | Removable wallpaper, craft knife |
| One framed print | 1 hour | One nail or strips | Printer, frame, hook |
| Seasonal swap frame | 10 minutes a season | One nail | A frame that opens from the back |
| Grid or gallery wall | An afternoon | Several | Paper templates, level |
| Painted thrift frames | A weekend (drying time) | No | Sandpaper, primer, spray paint |
| Painted pots or vase | 2 hours plus drying | No | Acrylic paint, sealer |
| Painted bookcase back | An afternoon | No | Paint, small roller |
| New knobs and pulls | 1 hour | No | Screwdriver, tape measure |
| Pressed leaves in a frame | Days of pressing, 20 minutes to frame | Optional | Heavy books, paper, frame |
| Branches in a tall vase | 15 minutes | No | Pruners, a heavy vase |
| Printed jar labels or a sign | 1 hour | No | Printer, sticker paper |
| Rotating kids’ art wall | 30 minutes | A few, or strips | Clipboards or string and clips |
| Collage panel | 1–2 hours | One nail | Paper scraps, glue, board |
| No-sew pillow covers | 1 hour | No | Fabric, fusible hem tape, iron |
| Candle tray | 15 minutes | No | Tray, candles or battery candles |
Renter-friendly DIY home decor that leaves no holes
Renters get the most out of decor that sits on furniture or sticks to it, since the walls are usually off limits. These three ideas come off cleanly when you move.
Lean framed prints on a shelf or ledge
Leaning art is the easiest way to get pictures up without a single nail. Clear a bookshelf, a mantel or the top of a dresser, then stand two or three frames against the wall, the largest at the back and a smaller one overlapping its corner. Mix in one object with height, such as a jug or a plant, so the shelf doesn’t look like a row of tiles. The catch is a slippery surface: on glass or polished wood, a frame can slide forward, so put a strip of rubber shelf liner under its bottom edge. Before buying frames to lean, check our picture frame sizes chart, which shows how a frame’s outside measurement grows with the molding, the number that decides whether it fits the shelf.
Tape a frame straight onto the wall
A frame drawn in tape costs almost nothing and reads as a deliberate border. Stick a print to the wall with removable mounting putty, then run washi tape or colored painter’s tape around it, 1 inch out from the edges, cutting the corners square with a craft knife. It takes about 20 minutes, and you can redo it whenever the print changes. Test the tape first in a closet: on fresh or flat paint, some tapes lift a flake when they come off, so pull slowly and at a low angle.
Peel-and-stick paper on a bookcase back or drawer fronts
Removable wallpaper is made for walls, but a small piece on furniture makes a bigger change for less money. Measure the back panel of a bookcase or the fronts of a dresser’s drawers, cut the paper 1 inch oversized, smooth it on from the top down with a plastic card, then trim the edge with a sharp knife. Plan an hour or two. Wood with a glossy finish holds it best, while raw particleboard can tear when the paper comes off, so try a corner before covering the whole thing.
Printable wall art: choose the print size, then the frame
Printable wall art is where a budget room can look finished fastest, because one file can fill several frames and you can print it again if something goes wrong. The order matters: check how big the file will print, choose the frame to match, and only then decide where it goes. The frame chart linked in the shelf idea above covers every standard frame and mat in detail. This section covers the decor side: what to print, how to group it and how to hang it.
One framed print over a sofa, bed or desk
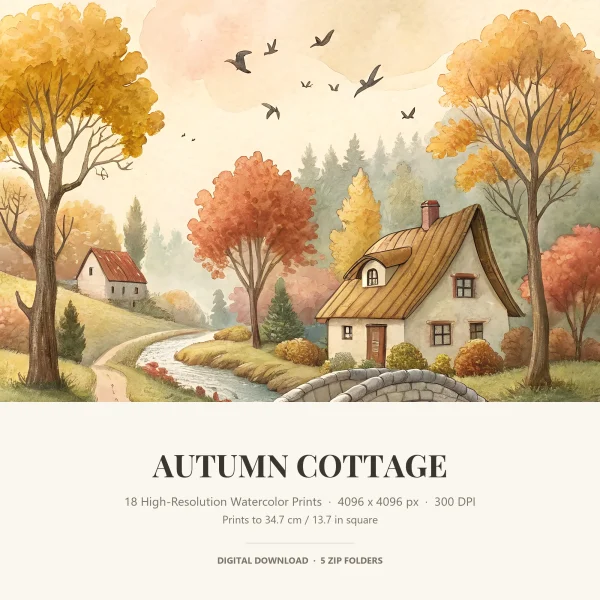
A single print works best when it’s sized to the furniture under it. We’d aim for art (or a group of frames) roughly two-thirds the width of the sofa or headboard below it, because anything much smaller floats on the wall. Divide the file’s pixel width by 300 to see how large it prints sharply. Our square autumn, fairytale and storybook cottage files are 4096 pixels on a side, about 13.6 inches (34.7 cm) square at 300 pixels per inch, so a 12 × 12 frame is the comfortable top size.

Home printers are the limit here. A US Letter sheet takes a square print up to 8 × 8 inches, so a 10 × 10 or 12 × 12 print goes to a print shop. Set the printer to “Actual size” rather than “Fit to page”, or the print won’t match the frame; our guide to printing at home walks through those settings and the paper choices. The common mistake is putting a square print in an 8 × 10 frame without thinking, which cuts 2 inches off whatever sits near the edge.
A seasonal swap frame by the door
One good frame with a picture you change each season gets more attention than a wall of art nobody notices after a month. Hang a small square frame in the entry, keep the next season’s prints flat in an envelope taped inside the back, and swap them on the first weekend of each season. It takes 10 minutes. Our Four Seasons set is built for this: 78 square pictures, 20 for spring, 20 for summer, 18 for autumn and 20 for winter, with the season at the start of each file name.
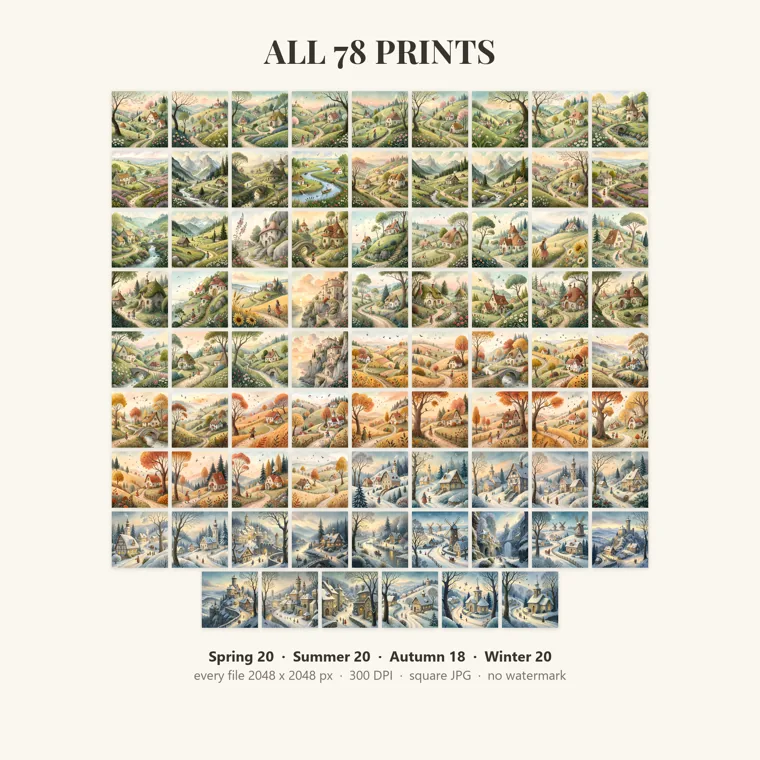
Keep these small. At 2048 pixels, each picture prints sharply to about 6.8 inches (17.3 cm) square, so 5 × 5 or 6 × 6 frames suit them, and an 8 × 8 print is a little soft up close.
A grid or gallery wall of square prints
A grid of matching square frames is the gallery wall that’s hardest to get wrong, because the spacing is the only decision. Four or nine frames in a square block look tidy above a console or a bed. Cut paper templates to the outside size of each frame, tape them to the wall with painter’s tape, and live with the layout for a day before any nail goes in. We keep every gap the same, usually 2 to 3 inches, so the group reads as one piece.
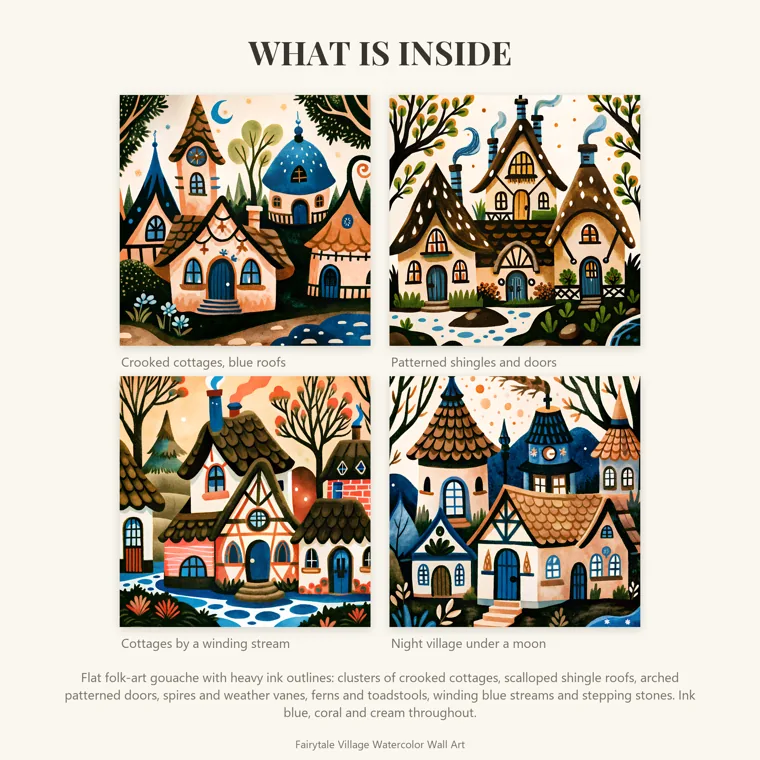
A grid needs pictures that clearly belong together. The 19 folk art prints in our Fairytale Village set share heavy dark outlines and the same few colors, so any four of them hang well side by side. For a softer grid that runs from spring to a snowy night, the Storybook Village set has 25 watercolor pictures; 24 are 4096 pixels square and one is 5120.

How to hang framed prints so they sit straight and level
Hanging is where a well-chosen print still goes wrong, usually by ending up too high. Put the center of the picture at eye level for a standing adult, not lined up with the top of a door frame. Measure your own eye height, mark it on a strip of painter’s tape on the wall, and treat a group of frames as one picture whose center goes on that mark. Over a sofa, leave a gap of a hand’s width or more above the back so heads don’t knock it.
Then match the hardware to the frame:
- Sawtooth hanger. Light frames often come with one on the back. Hammer a picture hook at the mark, then hang the sawtooth on it.
- Wire. Pull the wire up tight toward the top of the frame with one finger and measure from there to the top edge. That’s how far below the top line the nail goes, and skipping this step is why wired frames end up lower than planned.
- Two D-rings. Wide frames hang straighter from two hooks, one under each ring, set level with each other.
- Heavy frames. Use a stud, found with a stud finder, or a drywall anchor rated for the weight on its package.
Renters can use adhesive picture-hanging strips instead of nails. Go by the weight rating printed on the package, count the glass as part of the weight, and follow its press-and-wait instructions before hanging anything. Put a small piece of painter’s tape where the nail goes on a plaster wall, which helps stop it chipping.
Weekend paint projects for thrift-store finds
A can of paint turns cheap or secondhand pieces into something that looks bought on purpose. Each of these takes a weekend at most, mostly because paint needs drying time between coats.
Paint mismatched thrift frames one color
Painting a bag of mismatched secondhand frames the same color is how many gallery walls start. Take out the glass and backing, sand the old finish lightly so primer grips, prime, then spray paint outdoors in thin coats. Two or three thin coats beat one thick one, which drips into the corners. Leave everything to dry fully before the backing goes back in, or the paint sticks to it.
The pitfall is old paint. The US Environmental Protection Agency says homes built before 1978 are more likely to have lead-based paint, the year the federal government banned it for home use. If a frame or a piece of furniture might have old paint on it, don’t sand or scrape it; test it with a lead test kit first, or choose bare wood instead.
Paint terracotta pots, a vase or a lamp base
A plain clay pot, a glass vase or a ceramic lamp base can take a new color in a couple of hours. Wipe it clean, paint with acrylic craft paint, then seal it with a clear sealer so it can be wiped. Painter’s tape gives you clean stripes or a color-dipped bottom half. Keep paint off the inside of a pot that will hold a real plant and off the rim of anything that touches water, since craft paint can peel when it stays wet.
Paint the back of a bookcase
The back panel of an open bookcase is a small surface, so it’s a low-risk place to try a bold color. Take everything off the shelves, sand the panel lightly, and roll on paint with a small foam roller. Thin coats keep it from looking streaky. The color shows between the books, so a darker shade than you’d use on a wall usually looks right.
Swap the knobs and pulls on a dresser
New hardware changes a dresser or a cabinet in an hour without any paint. The mistake is buying pulls by looks alone. Measure the distance between the centers of the two screw holes on the old pull first, and buy pulls with the same center-to-center spacing, or you’ll be filling and drilling holes. Single knobs avoid that problem altogether.
Free decor from outdoors
Some of the best budget decor costs nothing, because it’s picked up on a walk. Gather only from your own yard or places that allow it, and leave anything that’s still growing.
Pressed leaves or flowers in a frame
Pressing is the old herbarium method: lay a fresh leaf or flower flat between two sheets of plain paper, then put heavy books on top so the pressure flattens it while the paper soaks up the moisture. Check it every few days and leave it until it’s stiff and papery. Then lay it on a sheet of card and frame it, or sandwich it in a double-glass frame so the wall shows through. Thin leaves and flat flowers press best, while thick blooms such as roses tend to brown. Our list of fall activities for kids starts with a leaf walk, which is a good way to collect them.
Branches in a tall, heavy vase
A few bare or berried branches in a tall vase give a corner height for nothing. Cut branches two or three times the height of the vase, trim the ends at an angle, and put a few stones in the bottom if the vase is light. Shake every branch outside before bringing it in, since bugs and loose bark ride along. Keep stems with berries out of reach of small children and pets.
Paper decor you can print or make at the table
Paper projects are easy to redo, so they suit anyone who changes their mind about a room every few months.
Printed labels for jars or a simple sign
Matching labels on pantry jars or bathroom bottles make open shelves look organized. Print names on sticker paper, or print a short word or a house number with a small picture for a sign in a frame. Print a test sheet on plain paper first and hold it against the jar to check the size. Our guide on how to use clipart explains how big a picture can print before it blurs. Paper labels don’t survive water, so use clear packing tape over them on anything in the bathroom.
A rotating wall for kids’ art
Kids’ drawings change too often for frames, so give them a display that’s built to change. Hang three to six clipboards in a row, or run a length of string between two hooks and use clothespins. A new drawing replaces the oldest one. It takes about half an hour to set up, and the clips mean nobody has to tape over the paint.
A collage panel
A collage on a board or canvas is a one-of-a-kind piece made from paper you already have. Pick a color range first, tear or cut magazine pages, old maps or wrapping paper, and glue them down with a matte glue that dries clear. Our collage ideas post has themes and the glue to use so the edges don’t curl.
Fabric and light for a cozy room
Soft things and low light change how a room feels more than anything on the walls.
No-sew pillow covers from fabric or napkins
An envelope cover needs no sewing machine at all. Measure the pillow insert, cut fabric as wide as the insert plus 1 inch, and a little more than twice as long, so the ends overlap at the back. Fold the raw edges under and bond them with fusible hem tape, using the iron setting printed on the tape package. Wrap the fabric around the insert, overlap the ends at the back and bond the two sides. Large cloth napkins or tea towels make quick covers for small pillows. Cotton and linen take fusible tape better than slippery synthetics.
A candle tray for the coffee table
Grouping candles on a tray turns scattered pieces into one arrangement and gives them a safe base. Use three candles of different heights, add a small branch or a few pinecones around them, and leave space between the flames. The National Fire Protection Association advises keeping candles at least 12 inches from anything that can burn, which includes those pinecones and the curtains. Battery candles look nearly the same and are the better pick in homes with small children or pets.
A room rarely needs all of these. One framed print, one painted piece and one soft change are usually enough to make it feel new.
Printables from this article



Related articles
Printable Wall Art
Winter Decorating Ideas: Cozy Wall Art & Mantel Decor
Eighteen winter decorating ideas grouped by room, with what to pack away after Christmas, what to keep, the time each one takes and the usual mistake to avoid.
Printable Wall Art
Standard Picture Frame Sizes and How to Frame Prints
A chart of standard US frame sizes, with mat openings, A4 and A3 conversions, print resolution math and the measuring mistakes that leave a gap or a cropped edge.