How to Wrap a Gift: Easy Steps, Ideas and Gifts From Santa
To wrap a gift in a box, cut a piece of paper that goes all the way around the box with about 2 inches (5 cm) to spare, and that reaches a little more than halfway up each end. Tape the long seam on the bottom of the box, then close each end like an envelope: push the sides in, fold the top flap down and the bottom flap up. A shoebox-size gift takes about five minutes once you have the hang of it. The step that decides whether it looks neat happens before you cut: measuring the paper against the actual box, not guessing.
Below are the box steps in order, then tubes, bottles and soft gifts, wrapping with no tape, where the tag goes, and how many families handle the presents that come from Santa.
What you need to wrap a gift
Gather everything before you start, because a half-wrapped box that you have to leave to find the tape usually comes back crooked. Work on a hard, clear surface like a table or a clean floor. A bed or a carpet lets the paper sag, and the creases come out soft.
- Wrapping paper, enough for the box plus some extra
- Sharp scissors for the adult, and child-safe scissors for any kids helping
- Clear tape, and double-sided tape if you want the seams to disappear
- Ribbon, string or twine
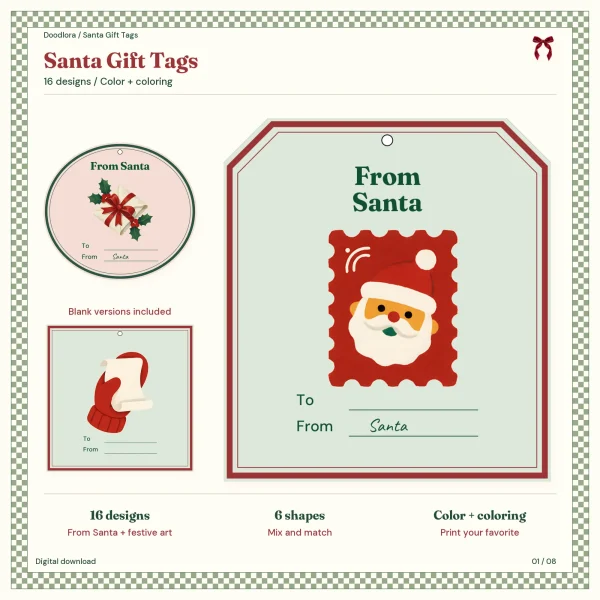
- A gift tag and a pen that doesn’t smear (our printable gift tags are cut from a home printer sheet)
- The box itself, which works as your ruler
If the gift isn’t in a box, decide first whether it should go in one. A box is the easiest shape to wrap well. Anything soft or lumpy gets its own section further down.
How to wrap a box step by step
The box method is worth learning properly, because every other shape is a variation of it. Take the price sticker off the gift and close the lid with a small piece of tape so it can’t slide open while you work.
Measure and cut the paper
Step 1: Roll out the paper, printed side down. Set the box in the middle, top side down, so the seam ends up on the bottom of the finished gift.
Step 2: Measure the width. Pull the paper up and around the box until it overlaps itself on the bottom. Add about 2 inches (5 cm) past the point where the edges meet, then mark it with a small crease. Too little overlap leaves a gap you can see the box through. Too much makes a thick, bulky seam.
Step 3: Measure the length. Look at the two ends of the box. The paper needs to stick out past each end by a little more than half the box’s height. On a box that is 4 inches tall, that means a bit over 2 inches on each side. If the paper is shorter, the end flaps won’t meet. If it is much longer, the ends turn into a thick wad of folded paper.
Step 4: Cut along a straight line. Fold the paper along your mark, run a fingernail over the fold, and cut along the crease. On a long cut, use the gliding method: open the scissors partway and push them through the paper instead of snipping, which keeps the edge from zigzagging.
Wrap the long sides
Step 5: Tape the first edge. Bring one long edge of the paper up onto the bottom of the box and tape it to the middle.
Step 6: Fold under the second edge. Bring the other long edge over the first one. Before you tape it, fold its raw edge under by about half an inch (1 cm). A folded edge looks finished, and it hides any wobble left from cutting. Pull the paper snug, without tearing it, and tape the seam in the center and near both ends.
Fold the ends
Step 7: Push the sides in. At one end, push the paper on the left side in flat against the end of the box, then do the same with the right side. As the two sides go in, the paper above and below them folds into two triangles, one pointing up and one pointing down. Crease the side folds and the slanted edges of both triangles sharply with your fingers.
Step 8: Fold the top flap down. Fold the top triangle down over the end of the box and crease it. If it reaches past the middle, fold its tip under so the edge lands neatly.
Step 9: Fold the bottom flap up and tape. Fold the bottom triangle up over the top one, fold its edge under for a clean line, and tape it. Repeat Steps 7 to 9 on the other end.
Step 10: Sharpen the edges. Turn the box right side up and pinch along each of the 12 edges between your thumb and finger. This takes a minute, and it makes plain paper look crisp and deliberate.
The most common mistake is wrapping the paper loosely. Loose paper puckers at the ends, and no amount of tape fixes it, so keep the paper pulled firm against the box from Step 5 onward.
How to wrap a cylinder, bottle or odd-shaped gift
A box gives you flat sides and sharp edges to fold against, which is why it’s easy. Round and lumpy gifts don’t, so the trick is either to give them a shape or to choose a wrap that doesn’t need folds.
Tubes and cylinders
For a candle in a tube, a canister or a rolled poster, measure the width by rolling the paper around the cylinder with about 2 inches (5 cm) of overlap. For the length, leave a little more than half the cylinder’s diameter past each end. Roll the cylinder up in the paper and tape the seam with the raw edge folded under.
Then close the ends with pleats. Press the paper at one end inward toward the center in small overlapping folds, working your way around like the petals of a flower, until all the paper meets in the middle. Tape the center, and cover it with a sticker, a bow or a round gift tag. For a softer look, skip the pleats and twist each end like a candy wrapper, then tie it with ribbon.
Soft and lumpy gifts
Clothes, plush toys and anything squishy wrap far better if you give them a firm shape first. Fold clothes neatly around a piece of cardboard or put them in a shirt box. A plush toy fits in a gift bag with a few sheets of tissue paper on top.
If you’d rather use paper, wrap the item in tissue first, then set it in the center of a square of wrapping paper. Gather the corners together above the gift, squeeze the paper into a neck and tie it tightly with ribbon. The result looks like a small sack, and it suits gifts that would never sit flat.
Bottles
A bottle is the hardest shape to wrap with paper, because the neck narrows so much. A gift bag or a fabric wrap is usually the better choice. If you want paper, roll the bottle up in it like a tube, fold the bottom closed with pleats, then gather the paper at the neck and tie it with ribbon.
How to wrap a gift without tape
Running out of tape halfway through is common, and some people skip it on purpose so the paper can be reused. You have three good options, depending on what you have in the house.
Ribbon or string as the fastener
Wrap the box as in the steps above, folding the ends tightly, and hold each fold in place with your fingers. Then tie a ribbon around the box in both directions, crossing it on top, and knot it. The ribbon pressing down on the paper is what keeps the folds closed, so pull it snug. Twine or kitchen string works the same way and looks good on brown paper.
A fabric wrap
Japanese furoshiki are wrapping cloths, traditionally silk or cotton, used to wrap and carry things. A square scarf, a tea towel or a cut square of fabric works the same way. Wikipedia’s furoshiki entry says the gift should fit into about a third of the cloth, so pick a square that is roughly three times as wide as the gift.
For the basic wrap, lay the cloth flat with a corner pointing toward you and set the gift in the middle. Fold the near corner over the gift, then the far corner over that. Pick up the two remaining corners, bring them together on top and tie them in a double knot. The knot works as a handle and as the bow.
Bags and gift boxes
A gift bag with tissue paper needs no tape at all. A box with a lid that you decorate once can be used again every year, and so can a cloth gift sack.
Where to put the gift tag on a wrapped gift
The tag goes on last, after the ribbon, and where you put it depends on whether it has a hole for ribbon. Write the names before you attach it, because writing on a tag that’s already on the gift means pressing a pen into a soft box.
A tag with a punch hole hangs from the ribbon. Thread one ribbon tail through the hole before you tie the bow, so the tag sits right under the knot on top of the box. Tying it on after the bow is finished usually leaves it dangling off the side.
A tag without a hole lies flat on the paper. Put it on the top of the box, near one corner, with a loop of tape or a glue dot underneath. Avoid placing it across a seam or a fold, where it will lift.
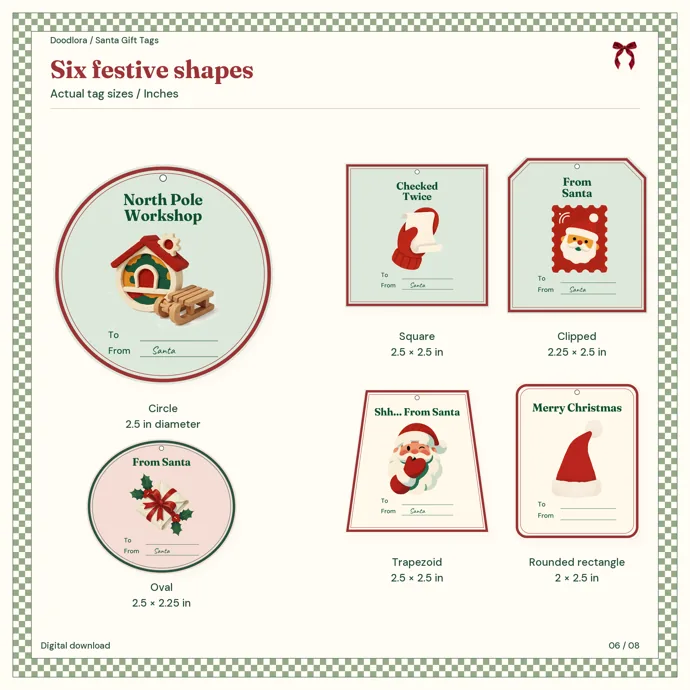
Size the tag to the gift. Our Santa gift tags come in six shapes between 2 and 2.5 inches (about 5 to 6.5 cm), which fits on top of most boxes. On a very small gift like a jewelry box, hang the tag from the ribbon instead of sticking it on, or the tag will cover the whole lid.
Two things go wrong with printable tags, and both are easy to prevent:
- The tags come out too small. That means the printer scaled the sheet. Turn off “fit to page” or “shrink to fit” in the print settings, and load Letter paper for the Letter file or A4 paper for the A4 file.
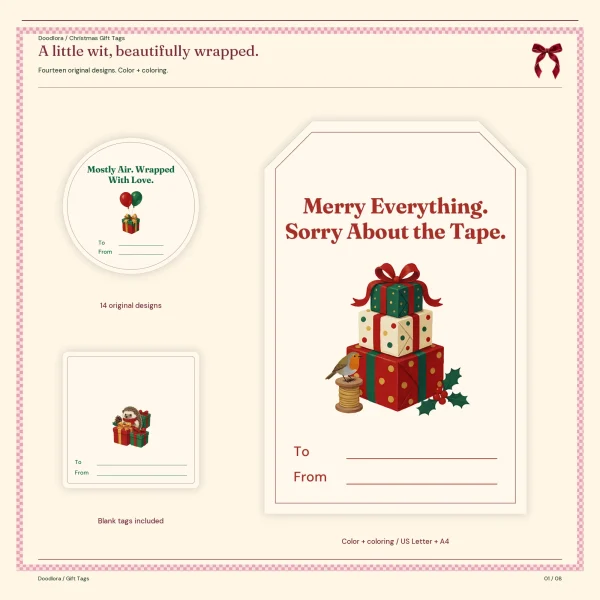
- Holes get punched in the wrong place. Both of our tag sets say to punch only where a hole marker is printed. The Santa tags each have a small circle at the top. The funny Christmas gift tags have no marker, so they are meant to be taped or glued flat on the gift.
For the gift exchange at a party, the tag also carries the secret. Our Secret Santa rules cover what to write on a tag when the giver is meant to stay anonymous.
How to wrap gifts from Santa
Many families keep the presents from Santa looking different from everything else under the tree. The usual approach covers three things: the paper, the handwriting and the tag. Some families leave Santa’s gifts unwrapped and set out on display, and others wrap every present the same way. All of these are common, and each household decides for itself.
A separate wrapping paper
The most common habit is a roll of paper that is only used for Santa’s gifts. It works best when that roll never appears on any other present and stays stored away from the regular wrapping supplies. Some families also choose a different ribbon or skip ribbon entirely on Santa’s presents.
Santa handwriting
The handwriting on the tag is the detail children are most likely to notice. Families usually handle it in one of these ways:
- Block capitals. Write everything in neat printed letters instead of your normal cursive.
- The other hand. Writing with the hand you don’t normally use gives slower, larger letters that don’t look like yours.
- A different pen. Use one color, such as red or green, only for Santa’s tags.
- Another grown-up writes them. A partner, grandparent or friend fills in the tags.
- Printed names. Type the names and print them, so there is no handwriting at all.
Gift tags from Santa
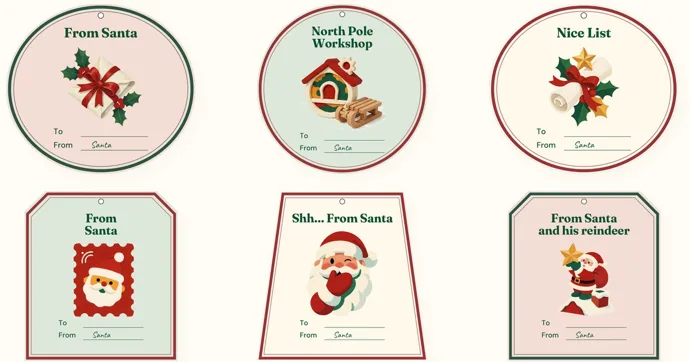
A tag that already says it came from Santa saves the handwriting problem on half the card. In our Santa gift tags, designs 01 to 08 have headings like From Santa, North Pole Workshop, Nice List, Shh… From Santa and Checked Twice. Each one already has Santa written in a looping script on the From line, so you only fill in the child’s name on the To line.
Typing the names removes handwriting from the question entirely, and the download includes Canva templates for exactly that, used in your own Canva account. Typed names also look identical on every tag, so there is nothing for a sharp-eyed child to compare.
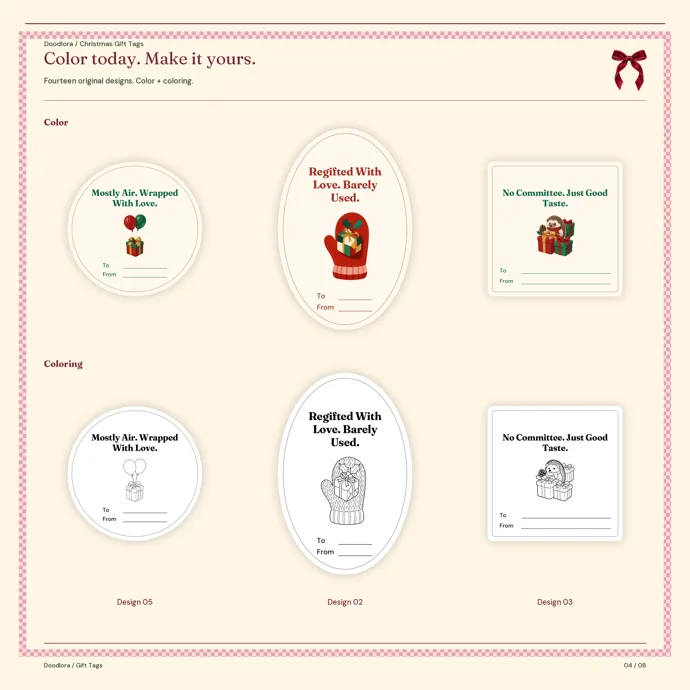
With more than one child, giving each child a different design makes the gifts easy to sort. The tags 09 to 14 say Merry Christmas and leave the From line empty, so they work for gifts from grandparents or parents under the same tree.
Wrapping gifts with kids
Kids can do a real share of the wrapping if you split the jobs by what the tools allow. The cutting is the part that needs the most care.
Give children child-safe scissors only, and do the long straight cuts on wrapping paper yourself. Craft knives and hot glue guns stay with the adults. Curling ribbon with a scissor blade is an adult job too, since it means running a bare blade along the ribbon.
Jobs that suit kids, roughly by age:
| Age | Jobs that work well |
|---|---|
| 3 to 5 | Coloring line-art tags, pressing on stickers, holding a finger on the ribbon while you tie the knot |
| 6 to 8 | Cutting out printed tags with child-safe scissors, folding the end flaps of a box with help, writing names on tags |
| 9 and up | Wrapping small boxes on their own with child-safe scissors, measuring paper against the box, pleating the ends of a tube |
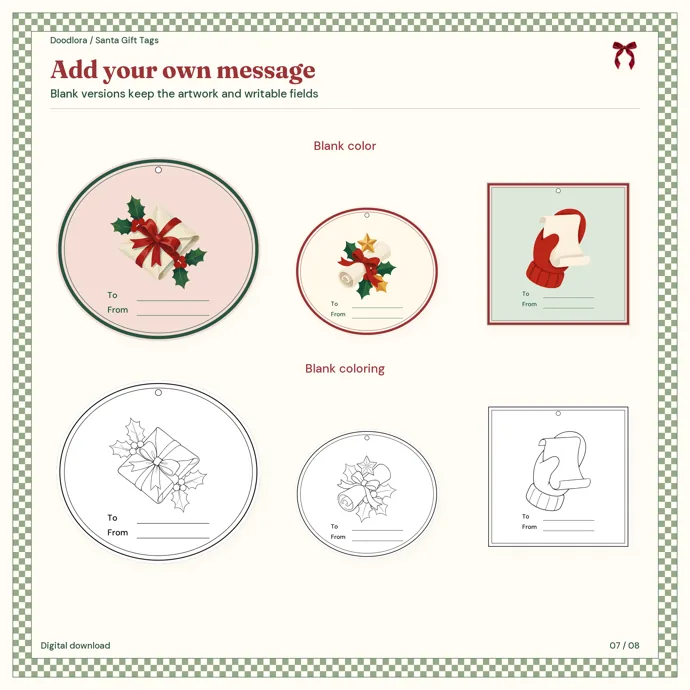
Both of our tag sets come with every design in color and as black line art, so a younger child can color the tags at the table while the boxes get wrapped. Older kids are usually better at the folding than the cutting. Cutting a long piece off a roll with child-safe scissors is hard, so it often helps if you cut the paper to size and they do the rest.
Christmas gift wrapping ideas
Once the folding is easy, the look comes from the paper, the ribbon and the tag. These gift wrapping ideas use materials most homes already have, and each one fits a different situation.
| Idea | Best for | What you need |
|---|---|---|
| Brown paper and twine | A pile of matching gifts, mailing | Brown kraft paper, twine, a tag |
| One paper per person | Big families, gifts for several kids | A different roll for each person |
| Kids’ drawings as paper | Gifts for grandparents | Large drawing paper, crayons or markers |
| Newspaper, maps or old calendars | Using up paper you already have | Paper from around the house, ribbon |
| Fabric wrap | Bottles, odd shapes, no tape | A square scarf or cloth |
| Funny tag as the decoration | Office gifts, gift exchanges | Plain paper, a joke tag |
Brown paper and twine. Plain kraft paper folds crisply, and red or white twine looks finished without any bow. A sprig of greenery or a candy cane tucked under the twine adds color.
One paper per person. Give each person their own pattern, and anyone can find their gifts at a glance. It also helps with tags that come loose, since the paper tells you whose gift it is.
Kids’ drawings as paper. Tape several drawing sheets together, let the kids decorate them, and wrap gifts for relatives. It works best on small boxes, since drawing paper is stiffer than wrapping paper.
Newspaper, maps or old calendars. Wikipedia’s gift wrapping entry notes that many people now wrap with newspaper, magazine pages, old maps and calendars. Use a solid ribbon so the busy paper has a clear focus.
Fabric wrap. The cloth from the no-tape section above doubles as part of the gift when you pick a nice scarf or tea towel.
Funny tag as the decoration. On plain paper, a joke tag does all the decorating. That suits a gift exchange game where everyone reads the tags out loud.
If recycling matters to you, choose plain paper. According to Wikipedia’s gift wrapping entry, only simple printed wrapping paper recycles easily with regular paper, while glossy, glittery and laminated papers often carry plastic coatings. Check your local recycling rules for what they accept.
Printables from this article
Related articles
Printable Invitations & Cards
What Is a Golden Birthday? Meaning, Ages and Party Ideas
Your golden birthday is the year you turn the same number as the day of the month you were born. Find yours from the day, not the month, plan around the number, and say what it means on the invitation.
Printable Invitations & Cards
Christmas Pregnancy Announcement Ideas: Holiday Card Wording
Pick the reveal by who you're telling: something private and small for your partner on Christmas morning, a stocking or a gift box at the family gathering, a job for an older child, a quick joke for friends, and a card or phone image for everyone far away.
Printable Invitations & Cards
Thanksgiving Table Setting Ideas: Place Cards and Layouts
Set each place with forks on the left, the knife and spoons on the right and the glass above the knife, then pick a layout that fits your guest count: one long table, a buffet line or a separate kids' table. Write the name cards once the RSVPs stop changing.