Crafts With Bees: Honeycomb Craft, Bee Template, Preschool
The easiest crafts with bees for a 2- to 4-year-old are a paper plate bee and a page of thumbprint bees; both take about 15 minutes of hands-on time and need only paint, paper and glue. Kindergarten and early grades can build a paper honeycomb from hexagons or color a bee outline while counting its six legs and four wings. Kids 7 and up can make a coiled paper skep or a bee garland, and teens and adults can stencil a bee onto a tote bag.
Every time below is a planning estimate for a calm group, not a measured result. Paint-drying time is extra, so start the wet projects first and come back to them.
Pick a bee craft by age, time and mess
Use this table to choose before you buy anything. “Mess” means paint or glue that needs a cover on the table. Templates print best on plain copy paper for crayons and on card stock for anything you’ll cut; our guide to printing coloring pages covers paper weight for markers and paint and why thin lines sometimes print gray.
| Craft | Ages | Hands-on time | Mess | Needs a template? |
|---|---|---|---|---|
| Thumbprint bees | 2–5 | 10 min | Paint on fingers | No |
| Paper plate bee | 3–5 | 15–20 min + drying | Paint or glue | No |
| Bubble wrap “honeycomb” print | 2–5 | 10 min + drying | Paint | No |
| Cardboard tube bee | 3–6 | 20 min | Glue | No |
| Count-the-parts bee | 4–7 | 20 min | None | Yes, a bee outline |
| Pom-pom pollen bee | 3–6 | 15 min | Chalk dust | Optional |
| Paper hexagon honeycomb | 5–8 | 25–30 min | Glue stick | A hexagon to trace |
| Bee and flower coloring | 4–9 | 20–40 min | None | Yes |
| Clothespin bee | 6–10 | 15 min | Glue | No |
| Coiled paper skep | 7–11 | 40 min | Glue | A reference picture |
| Bee garland | 7–12 | 30–45 min | None | Yes, small outlines |
| “Bee Kind” card | 6 and up | 20 min | None | Optional |
| Freezer paper bee stencil on fabric | 12 and up | 60 min + drying | Fabric paint | Yes, a solid bee |
| Cut vinyl or iron-on bee | Teens, adults | 45–60 min | None | Yes, a cut file |
A few real bee facts to build the crafts around
Bee crafts work better when the bee is right, because children notice when the paper bee has eight legs and the picture book bee has six. Wikipedia’s entry on insects describes a three-part body (head, thorax and abdomen), three pairs of jointed legs and a pair of antennae. Its entry on bees adds that the thorax carries a pair of legs on each of its three segments and two pairs of wings, with the smaller hind wings hooked onto the forewings in flight. So a bee has six legs, two antennae and four wings, even though the two wings on each side often look like one.
Honeycomb is where many bee crafts go slightly wrong. Honey bees build hexagonal cells out of beeswax, and they store honey and pollen and raise their young in them. Bumblebees, the round fuzzy bees most cartoon bees are based on, don’t. Wikipedia’s bumblebee entry says their nests aren’t organized into hexagonal combs, and the cells are clustered together untidily, often underground in an old rodent burrow. A hexagon next to a bumblebee is a decoration, and older kids enjoy being told that.
One more fact helps with the pollen craft further down. Of some 20,000 bee species, only 7 are honey bees, and most bees live alone rather than in hives. Many carry pollen on hairs on their hind legs or bellies, and some have flat “pollen baskets” on their hind legs.
Bee crafts for toddlers and preschoolers (ages 2 to 5)
At this age the craft is mostly the paint and the sticking. That’s fine. Pick one with a single wet step, cover the table, and have wipes ready before the first hand goes into the paint. If any child still puts things in their mouth, skip googly eyes and pom-poms; the small-parts section of our pattern activities guide explains how to keep loose pieces in check with this age group.
1. Thumbprint bees
Thumbprint bees are the quickest craft on the list: 10 minutes for one child or a table of four. You need a yellow washable ink pad or a smear of yellow paint on a paper plate, a black fine marker and a sheet of paper or a blank card.
- Press a thumb into the yellow and stamp three to six prints on the paper, spaced apart.
- Let the prints dry for a few minutes, or the marker will smear.
- Draw two or three black stripes across each print, then two small wings on top as loops.
- Add two antennae and a dotted flight path from bee to bee.
An adult usually draws the stripes and wings for 2-year-olds; a 4-year-old can do the stripes alone. The snag is too much paint. A wet thumb makes a blob instead of an oval, so press once on scrap paper first.
2. Paper plate bee
A paper plate bee takes 15 to 20 minutes plus drying, and it hangs well on a classroom wall. For each child you need a paper plate, yellow paint or yellow construction paper torn into pieces, two or three strips of black paper about 1 inch wide, white paper or wax paper for the wings, a black pipe cleaner and a glue stick.
- Paint the back of the plate yellow, or cover it with torn yellow paper and glue.
- When it’s dry, glue the black strips across the plate and trim the ends at the rim.
- Cut two teardrop wings and glue them at the top edge, slightly behind the plate.
- Poke the pipe cleaner through the top, bend it into two antennae and draw a face.
Yellow, black, yellow, black is an AB pattern. Ask the child what color comes next before each strip goes on. The snag is wet paint under the strips, which makes them slide and bleed. Wait until the plate is dry, or use torn paper instead of paint and skip the wait.
3. Bubble wrap “honeycomb” print
Toddlers love pressing bubble wrap into paint, and the print makes a yellow honeycomb background for thumbprint bees. Plan on 10 minutes, then a drying rack. Tape a square of bubble wrap to the table, roll or brush yellow and orange paint over it, press a sheet of paper on top and peel.
The snag is the shape. Bubble wrap prints round dots, not hexagons. With preschoolers that’s fine, but if you’re also doing the paper honeycomb later, say so: “Real honeycomb cells have six sides. Ours are circles.”
4. Cardboard tube bee
A toilet paper tube becomes a standing bee in about 20 minutes. Wrap the tube in yellow paper and glue it, add black paper strips around it, and glue two paper wings to the back. Bend a pipe cleaner over the top for antennae and draw a face on the front.
Three- and four-year-olds can do the wrapping if you cut the paper to size first: one sheet of yellow paper that fits the tube exactly. The snag is glue on a curved surface. A glue stick dries too slowly to hold the paper while little hands let go, so a strip of tape at the seam saves the craft.
Bee crafts that teach how bees work (ages 4 to 8)
These crafts suit a preschool or kindergarten insect unit, a library program or a homeschool morning. Each one carries a real fact, so the talking is part of the craft.
5. Count-the-parts bee
This craft turns a bee outline into a body-parts lesson in about 20 minutes. Give each child a printed outline of a bee seen from above, three crayons in different colors and a pencil.
- Color the head one color, the thorax (the middle part, where the wings and legs attach) a second color, and the abdomen a third.
- Count the legs out loud and write the number next to the bee.
- Count the wings. Point out that there are two on each side, a big one in front and a smaller one behind.
- Find the two antennae and draw a short line to each one with the word “antenna.”
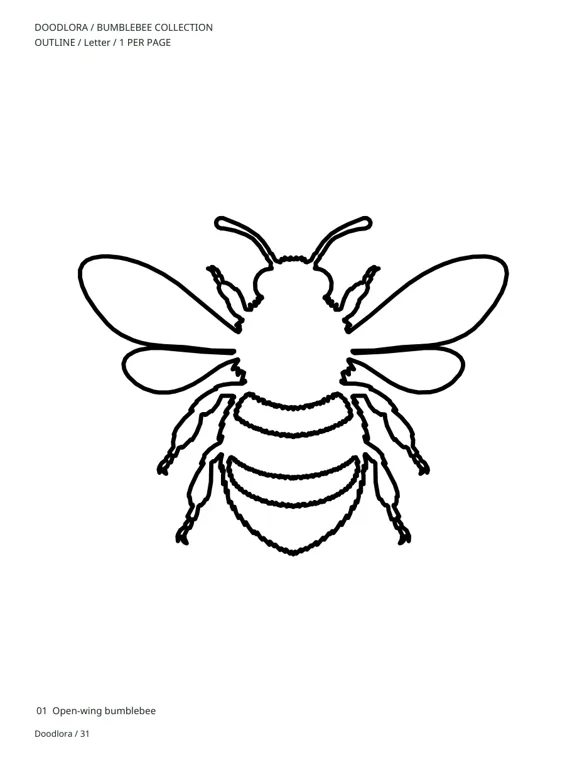
The open-wing bumblebee in our bee outlines is useful for this because every part is drawn separately: six legs, two antennae, and a forewing and a hind wing on each side. Use the outline version, not the solid black one, so there’s room to color. The snag is the front pair of legs, which sits close to the head and is easy to skip in a count. Have them touch each leg with a pencil as they count.
6. Pom-pom pollen bee
This craft shows how a bee moves pollen from flower to flower, and it takes about 15 minutes. You need a yellow pom-pom, a clothespin, three paper flowers cut from different colored paper, and a little colored chalk rubbed into the center of each flower.
- Clip the pom-pom in the clothespin; that’s the bee.
- “Fly” the bee to the first flower and dab its center. Some chalk sticks to the fuzz.
- Fly to the next flower and dab again. A little of the first color lands there.
- Look at the pom-pom and the flowers together and talk about what moved.
Bees carry pollen on hairs, and many have pollen baskets on their hind legs, so a fuzzy pom-pom is a fair stand-in. The snag is chalk on clothes. Use a tray or a cookie sheet and do it at the end, before hands are washed anyway.
7. Paper hexagon honeycomb
A paper honeycomb shows why the cells are hexagons, and it takes 25 to 30 minutes for 5- to 8-year-olds. You need yellow and orange paper, a hexagon to trace (a pattern block works, or a printed one), scissors, a glue stick and a large sheet of paper as the base.
- Trace and cut 7 to 12 hexagons. Adults can pre-cut for 5-year-olds.
- Glue one in the middle of the base.
- Fit six more around it, edge to edge, with no gaps.
- Keep adding rows outward, then glue a thumbprint or small paper bee on top.
The fact to share is that hexagons fit together with no gaps, and the honeycomb entry on Wikipedia notes that this shape divides space into equal cells using the least wall around them. Try the same thing with circles first. The gaps make the point. The snag is the first ring of six. If the center hexagon is crooked, nothing else fits, so glue it straight before going on.
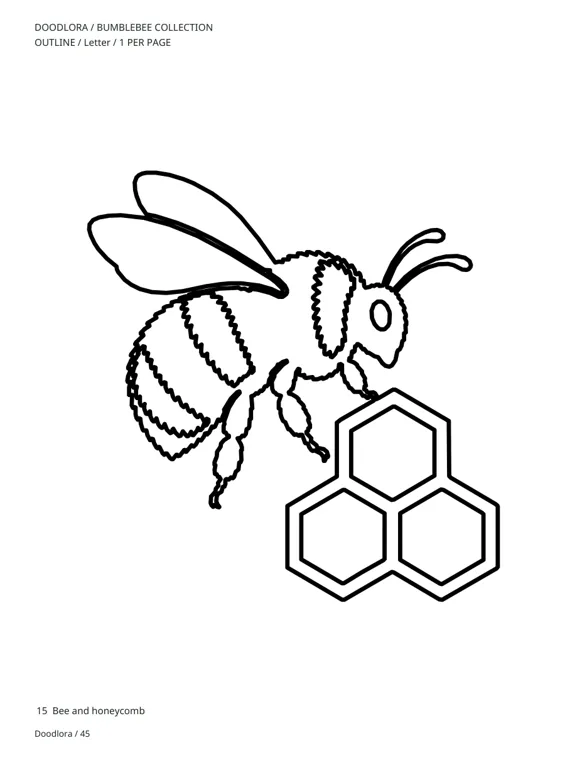
This page from the bee outline set works as a coloring follow-up or a model for the honeycomb. It also starts a good conversation for 7- and 8-year-olds: the bee is a bumblebee, and bumblebees don’t build hexagons.
8. Bee and flower coloring
Coloring a bee on a flower is the quiet option for a mixed-age table, 20 to 40 minutes depending on the page. The bee outline set has four bee-and-plant designs: a daisy, a round clover head, a lavender sprig and a sunflower.
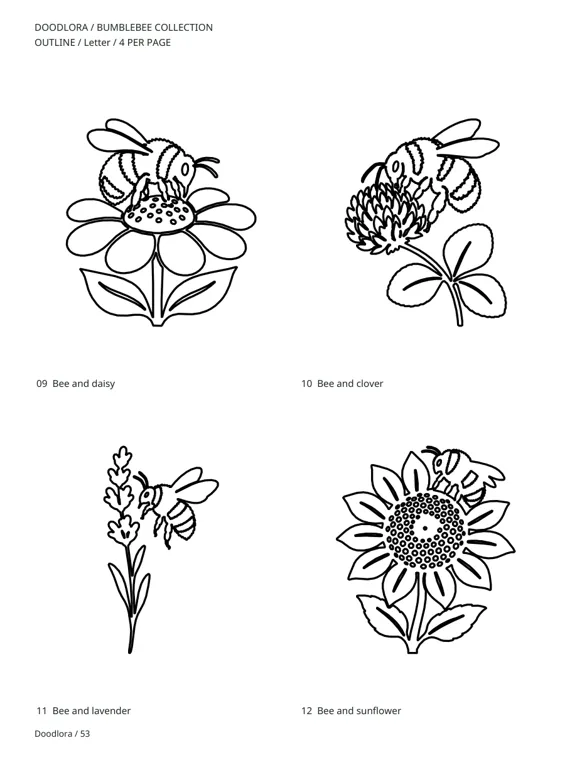
Give the daisy or the lavender to younger children; they have large, open spaces. The sunflower is for patient colorers: its seed head is a crowd of small circles, roughly a hundred of them. That density is great with a fine marker and frustrating with a fat crayon.
Bee crafts for school-age kids (ages 6 to 10)
From about 6, kids can cut on a line, follow four or five steps and finish something they’ll keep. These crafts take longer and have less paint.
9. Clothespin bee
Clothespin bees take about 15 minutes and can clip onto a lunch bag, a plant pot or a card. For each bee you need a wooden spring clothespin, yellow and black markers or paint, a scrap of white paper for wings and glue.
- Color the clothespin yellow and let it dry if you used paint.
- Draw black stripes across it with a marker.
- Cut two small wings from white paper and glue them on top.
- Draw eyes at the clip end, so the bee “bites” whatever it holds.
The snag is glue on the spring. Keep the glue on the flat top only, or the clothespin won’t open. Squeeze it once before the glue sets.
10. Coiled paper skep
A skep is the old woven-straw hive shape, a dome of stacked coils. A paper one takes about 40 minutes and suits ages 7 to 11. You need strips of brown or yellow paper about 1 inch wide, a paper cup or a small yogurt pot turned upside down, a glue stick and a dark paper circle for the door.
- Start at the rim of the upside-down cup and glue the first strip all the way around.
- Add the next strip just above it, overlapping a little, and keep going up.
- Finish at the top with a small rolled coil.
- Glue the dark circle near the bottom as the entrance, and add two or three paper bees.
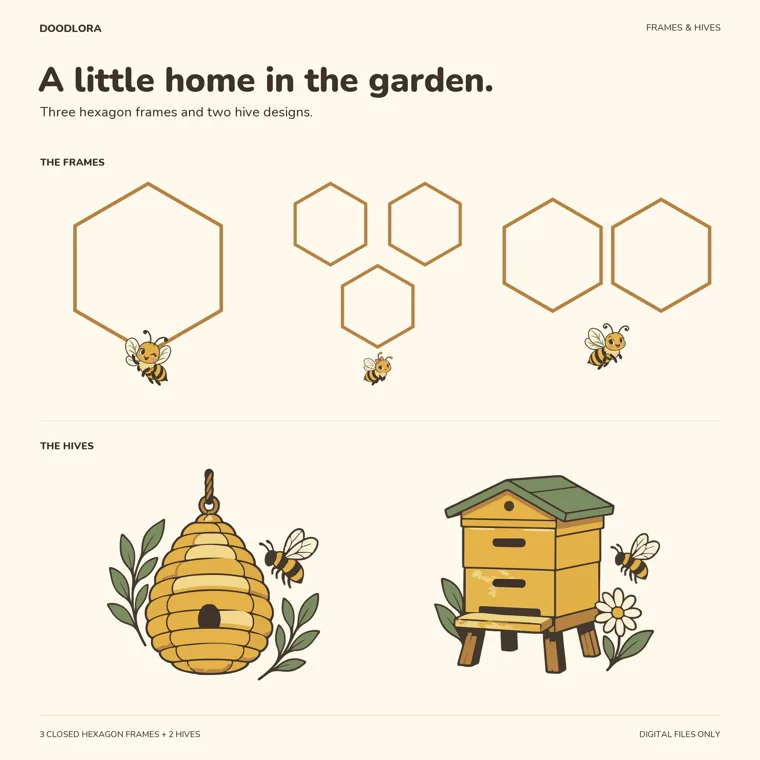
The honey bee SVG set has this skep and a wooden box hive, and showing both makes a nice comparison: one is woven straw, the other is wooden boxes stacked on legs. The snag is strips that run straight up. Each new strip goes around, not up. Think of a coil pot.
11. Bee garland
A bee garland is a good class project, 30 to 45 minutes, and each child adds one or two bees to a shared string. You need small bee outlines printed on white or yellow card stock, crayons or markers, scissors, a hole punch and yarn.
- Color the bees.
- Cut them out, leaving a margin around thin legs and antennae instead of cutting along them.
- Punch a hole near the top of each bee.
- Thread them onto yarn, alternating bees with paper flowers or hexagons.
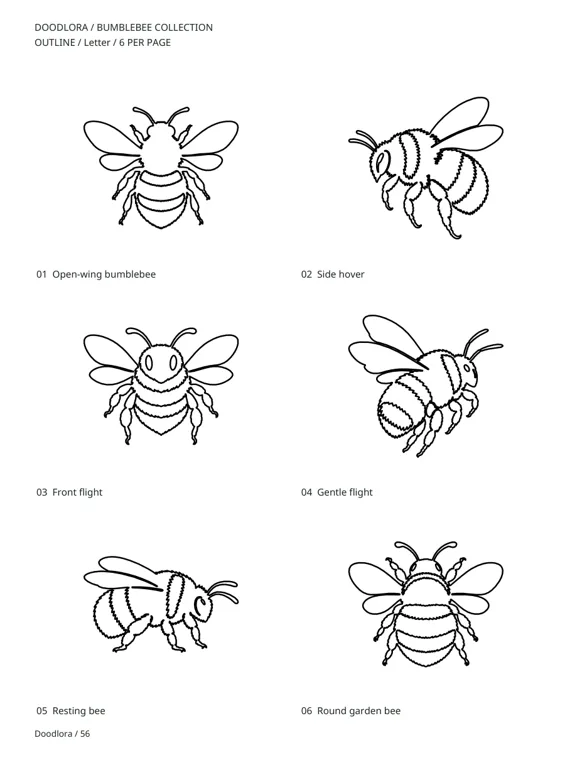
The snag is the legs. Thin bee legs tear when children try to cut around each one, so the “leave a margin” rule in step 2 saves a lot of tears. A rounded or oval cut around the whole bee looks fine on a string.
12. “Bee Kind” card
A bee pun card takes about 20 minutes and works for teachers, birthdays or a thank-you. Fold a sheet of card stock in half, draw or glue a bee on the front, and write a bee pun under it: “Bee Kind,” “Bee Happy,” “You’re the Bee’s Knees” or “Sweet as Honey.” Inside, the child writes one real sentence to the person.
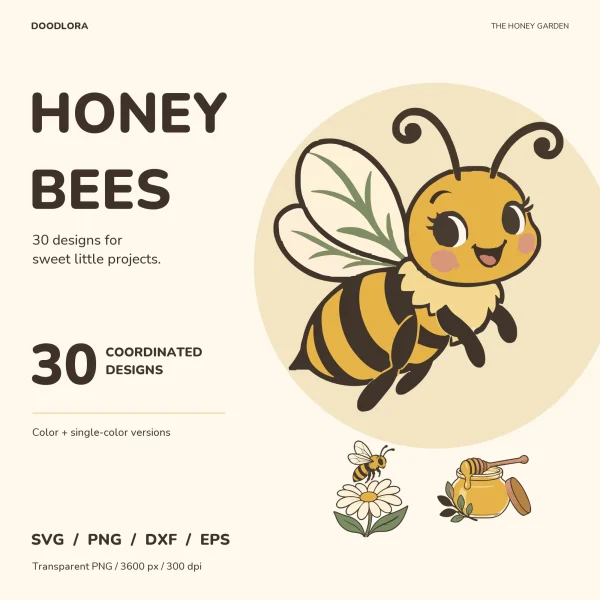
If you’d rather print the front than draw it, the honey bee SVG set has four sayings as artwork, each under a cartoon bee: Bee Kind, Bee Happy, Queen Bee and Sweet As Honey. The snag is that the pun takes over. Ask for one plain sentence inside, like “Thank you for helping me read,” so the card says something.
Bee crafts for teens and adults
Older crafters usually want something to use or wear. Both crafts below rely on a solid bee shape, and both need a little planning around small separate pieces.
13. Freezer paper bee stencil on fabric
A freezer paper stencil puts a crisp bee on a tote bag, a pillow cover or a T-shirt. Allow an hour of work plus the drying time on your fabric paint label. You need freezer paper (the kind with a plastic coating on one side), a printed solid bee, a craft knife and cutting mat, fabric paint, a sponge dauber and an iron.
- Trace the bee onto the paper side of the freezer paper.
- Cut out the black parts of the bee with the craft knife. Keep the small loose pieces, like the pale stripes, on a plate.
- Iron the stencil shiny side down onto the fabric. Then place each loose piece into its spot and iron it down too.
- Dab the paint straight down with the sponge. Don’t brush sideways.
- Peel the paper while the paint is still slightly wet, then heat-set it as the paint label says.
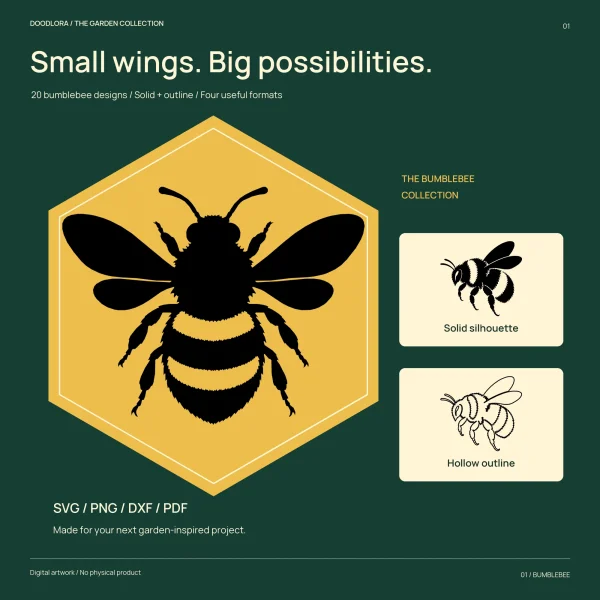
Step 3 is the reason to use freezer paper. The solid bees in our outline set have pale fur bands cut out of the black body, so when you cut the black away, each band becomes a loose island of paper. The guide with the set says plainly that these aren’t one-piece stencil sheets. A normal cardboard stencil would lose those stripes; freezer paper lets you iron each one down where it belongs. The open-wing bee is a good first try: one black shape with just two pale bands inside it.
14. Cut vinyl or iron-on bee with a cutting machine
If you have a Cricut, Silhouette or another cutting machine, a bee decal for a tumbler or an iron-on for a shirt is a 45- to 60-minute project. Use the single-color cut file, not the shaded color version; the color SVGs in the honey bee set have many fill colors, and cutting them layer by layer would give you a stack of near-identical tones.
The honey bee set’s start-here guide gives specific sizes: keep the 12-inch canvas for detailed cuts, which puts the artwork at about 10 inches, try 10 to 11 inches wide for a shirt, and keep wing and antenna stems at least 0.04 inch (1 mm) thick. For small things like cup labels at 3 to 4 inches, it points you to printing the PNG instead of cutting. That guide also says the files haven’t been physically test-cut, and the bee outline guide asks for a test cut in your own material for fine legs and antennae, so cut a scrap piece first. The bee outline set’s flight-trail designs have every dash as a separate piece, which means transfer tape and patience.
Both bee sets are personal-use files. You can make things for yourself and give them as gifts, but you can’t sell what you make from them.
Running a bee craft session with a group
For a class of 20 to 25, pick one wet craft and one dry craft and run them as stations, rather than doing everything at once.
- Before: Pre-cut wings, strips and hexagons for anyone under 6. Print templates the day before, at Actual Size.
- Start: Show one finished sample and one fact, such as “bees have six legs and four wings.” Don’t explain every step up front; show each step at the table.
- Middle: Keep the wet station (paper plates, thumbprints) to four or five children at a time, with a drying rack or a cleared windowsill next to it.
- End: Five minutes before clean-up, ask everyone to put the name on the back. A garland or honeycomb wall gives the session a clear finish, because each child adds a piece and sees the whole.
- If someone is stuck: Offer the thumbprint bee. It’s done in 10 minutes and always looks like a bee.
If the class is also heading outside, the bee crafts pair well with a flower hunt. Our nature scavenger hunt ideas include seasonal lists and a look-only rule for things that should stay where they are, which suits watching bees from a distance.
Printing the bee templates: which page for which craft
Our bee outline PDF has 59 pages: a page of notes, then every design as a solid version and an outline version, each at one, four and six per page. Pick the layout by the craft.
| Layout | Bee size on the page | Good for |
|---|---|---|
| One per page | About 6 inches across | Count-the-parts bee, fabric stencil, wall display |
| Four per page | About 3 inches | Bee and flower coloring, cards |
| Six per page | A little over 2 inches | Garland, classroom sets, thumbprint models |
Print at Actual Size or 100%, not “Fit to page,” or the sizes shift. Use the outline pages for coloring and the solid pages for stencils and silhouettes. If you’re placing the PNG or SVG bees on your own card or label instead, how to use clipart explains which file type to open for print versus cutting.
Printables from this article
Related articles
Outlines & Stencils
How to Draw a Mallard Duck: Drake, Hen and Flying Poses
A swimming mallard drake in ten pencil steps, the changes that turn it into a hen, a flying pose, a pair on the water and the color marks that make the bird read as a mallard.
Outlines & Stencils
Turtle Crafts for Kids: Paper Plate and Sea Turtle Ideas
Twelve turtle crafts sorted by age, each with time, materials, steps and the snag to watch for, plus how to use a printed turtle outline as a cutting template.
Outlines & Stencils
Bird Crafts for Kids and Adults: Owl, Nest and Feeder Ideas
Thirteen bird crafts grouped by who is making them, from a toddler's handprint bird to a framed papercut and a cold-weather pinecone feeder, each with ages, time, supplies, steps and the snag to plan for.