Toddler Crafts: Easy, Mess-Free Crafts for 2 Year Olds
Toddler crafts work best when your child does one big action, like tearing, sticking, squishing or stamping, and you handle anything sharp, small or wet. For a 1- or 2-year-old, that means a sticky wall or paint sealed in a bag. Closer to 3, a child can glue pieces you’ve cut onto a printed picture. Plan on 5 to 15 minutes, then stop while it’s still fun.
Below are 14 crafts grouped by how much mess and help each one needs. Every one lists what to set out, how to start, how it ends and the spot where it usually goes wrong. The ages and times are our planning guide, not milestones. Go by what your child does with things, especially whether everything still goes in the mouth.
| Craft | Rough age | Time | Mess | You’ll need |
|---|---|---|---|---|
| Sticky wall collage | 18 months+ | 10 min | None | Contact paper, painter’s tape, paper scraps |
| Dot sticker art | 18 months+ | 5–10 min | None | Removable dot stickers, a marker |
| Paint in a bag | 18 months+ | 5–10 min | None | Freezer bag, washable paint, tape |
| Water painting | 18 months+ | 10 min | Damp | Wide brush, a little water, dark paper |
| Torn paper shape | 2+ | 10 min | Low | Magazine pages, glue stick, cardstock |
| Tissue paper sun catcher | 2+ | 10 min | Low | Contact paper, tissue paper, paper plate |
| Paper plate jellyfish | 2+ | 10–15 min | Low | Paper plate, crayons, crepe paper, tape |
| Handprint keepsake | 1+ with you holding the hand | 5 min | Messy | Washable paint, cardstock, wipes |
| Sponge stamping | 2+ | 10 min | Messy | Kitchen sponge, paint, paper plate |
| Cardboard tube stamps | 2+ | 10 min | Messy | Toilet paper tubes, paint |
| Bubble wrap prints | 2+ | 10 min | Messy | Bubble wrap, paint, brush |
| Build-a-picture page | 2½+ | 10 min | Low | Printed page, glue stick |
| Glue-down face | 2½+ | 10–15 min | Low | Printed page, glue stick |
| Cut-and-paste scene | 2½+ | 10–15 min | Low | Printed page, glue stick |
Toddler craft safety: what stays off the table
Toddler craft safety mostly comes down to size and mouths. The American Academy of Pediatrics’ HealthyChildren site lists balloons, marbles, toys with small parts, small balls, and pen or marker caps among the household items to keep away from young children. The same page says balloons pose a choking risk to children up to 8 years old. So skip balloon stamping, even though it’s a popular toddler craft.
Craft drawers are full of the small parts that list warns about. Googly eyes, pom-poms, beads, buttons and dried beans don’t belong in a craft for a child who still mouths things. Every craft here uses pieces bigger than your child’s palm or keeps the small stuff on your side of the table.
Crayons need their own warning. The federal small-parts rule for products meant for children under 3 (16 CFR 1501) lists crayons, chalk, paper products, modeling clay and finger paints as exempt. Those items aren’t checked against the small-parts test, so a snapped crayon end gets no size check at all. Toss broken nubs as they happen, and cap every marker before it leaves your hand.
Paint and crayon labels often say “Conforms to ASTM D-4236.” Under federal labeling rules for art materials (16 CFR 1500.14), that statement goes with a label whose formula has been reviewed by a toxicologist for chronic health hazards. It’s a labeling rule, not a promise that the product is food-safe or meant for a toddler to eat. Pick washable paints and crayons, and read the warnings on the box.
Our own printable activity book carries a similar note. Its guide asks adults to keep small cards and attachment dots away from children who put things in their mouths. It also says the pages are printed activities, not safety-tested toys. If you’d like to know what to do if a child chokes, the AAP page suggests a certified CPR and first aid course.
No-glue toddler crafts for 18 months and up
No-glue crafts are the place to start with a younger toddler, because nothing wet or sticky goes near the mouth. Each one takes a few minutes to set up. If your child is closer to 3 and wants scissors and pretend play instead, our activities for 3 year olds start with snipping paper strips and building pretend food.
Sticky wall collage
A sticky wall is a sheet of contact paper taped to the wall, sticky side out, at your toddler’s chest height. Peel the backing and tape all four edges with painter’s tape so it doesn’t curl. Set out torn paper, tissue squares and fabric scraps, each bigger than your child’s palm.
Your toddler presses pieces on, pulls them off and moves them. One child can work alone, while two will crowd each other at a small sheet. When the wall is full or interest fades, lay a second sheet of contact paper over it, sticky side down, and you have a keepsake.
The catch: Dust and pet hair stick to it too. Put it up right before you play, not the night before.
Dot sticker art
Removable dot stickers from the office aisle make a first sticker craft. Draw a big circle, a wavy line or a simple house on paper. Then show your child how to put a dot on the line, or anywhere at all.
Peeling is the hard part. Before you start, pull away the waste sticker frame around the dots so each dot stands up off the sheet. The craft is finished when the sheet of dots runs out.
The catch: Dots are small. Do this one sitting together, and put the leftover sheet up high afterward.
Paint in a bag
Paint in a bag gives a young toddler real paint with nothing to clean up. Squeeze two or three colors of washable paint into a zip-top freezer bag. Slide a piece of cardstock inside too if you want to keep the result. Seal the bag, tape over the zipper, then tape the whole bag flat to the table.
Your child pushes, pats and smears the colors around through the plastic. When they’ve had enough, open the bag, slide the card out and let it dry flat.
The catch: A zipper alone can pop open under a determined fist. Tape it shut, and put the bag away as soon as the craft ends.
Water painting
Water painting works outside on a fence or sidewalk, or inside on dark construction paper. Give your toddler a wide paintbrush and an inch of water in a heavy cup. The wet strokes show up dark and then dry away.
It ends on its own when the picture disappears, so there’s nothing to save and nothing to wash. A child who loves it can do it again tomorrow with the same paper.
The catch: The cup will tip. Use only as much water as you’d be happy to mop up.
Tearing and gluing crafts for 2-year-olds
Tearing and gluing add one new skill each, and the order matters. A child who can tear paper is ready for a glue stick, which is far easier for small hands than a bottle of liquid glue. Plan on sitting right beside your child for all three of these.
Torn paper shape
Draw a big, simple shape on cardstock, such as an apple, a sun or a fish. Hand over old magazine pages, which tear much more easily than construction paper. Show the tearing move: pinch the paper with both hands, then pull one hand toward you and the other away.
You rub glue stick inside the shape, a small patch at a time. Your toddler presses torn pieces onto the sticky patch, and the craft is done when the shape is covered. For more ways to build a picture from paper scraps, see our collage ideas.
The catch: Glue a whole shape at once and it dries before the pieces arrive. Work in patches the size of your hand.
Tissue paper sun catcher
Cut the middle out of a paper plate to make a frame. Stick a sheet of contact paper to the back, sticky side facing up through the hole. Your toddler drops tissue paper squares onto the sticky window.
When the window is full, press a second sheet of contact paper over the top and trim the edges. Tape it to a window, where the light comes through the colors.
The catch: Tissue clings to damp fingers. Dry your child’s hands first and the squares will go where they’re placed.
Paper plate jellyfish
Your toddler colors a paper plate with chunky crayons. Cut it in half, then let your child pick crepe paper strips for the tentacles. You tape them along the cut edge, because tape is fiddly at this age.
Hang the jellyfish from a doorframe, out of reach, and the craft is finished. It’s a good one for siblings, since an older child can draw the face while the toddler colors.
The catch: Toddlers peel tape and chew it. Tape the strips on the back of the plate, where they’re harder to pick at.
Painting and stamping crafts toddlers can do
Painting and stamping are the messiest crafts here, so they need the most setup. Cover the table, put an old T-shirt on your child, and keep a pack of wipes open within reach. Pour paint in a thin layer on a paper plate, because a deep puddle turns every print into a blob.
Handprint keepsake
A handprint is the one craft that works even for a 1-year-old, because you do most of it. Brush washable paint onto your child’s palm and fingers, then press the hand flat onto cardstock. Press gently on the back of the hand so every finger prints.
Write the name and date beside it while the paint dries, and it’s finished. Wipe the hand right away, before it reaches a face.
The catch: Toddlers curl their fingers the moment paint touches them. Do one hand only, and have a second sheet ready for a retry.
Sponge stamping
Cut kitchen sponges into big, simple shapes, like a heart, a square or a circle. Show your child how to dab a sponge in the paint and press it onto paper.
Two or three shapes are plenty for one session. It ends when the paper is full, or when the stamping turns into smearing, which is fine too.
The catch: Wet sponges slide. Squeeze out the extra water before the sponge touches the paint.
Cardboard tube stamps
The end of a toilet paper tube prints a perfect circle. Pinch one end into a heart or a petal shape for more variety. Dip, press and repeat, and a page of circles can turn into flowers, bubbles or balloons drawn on paper instead of real ones.
The catch: Tubes go soggy after a few dips. Keep two or three spares ready so the craft doesn’t stall halfway.
Bubble wrap prints
Tape a square of bubble wrap to the table, bubbles up. Your child paints it with a brush, or simply pats paint on with a hand. Then lay a sheet of paper over the top, press, and peel it back to show the dotted print.
You’ll get two or three prints before the paint runs thin. The craft ends with a good last print drying on a baking sheet.
The catch: Torn bubble wrap is a small piece of plastic. Keep it taped flat and throw it out as soon as you’re done.
Printable cut-and-paste crafts for 2½ to 3
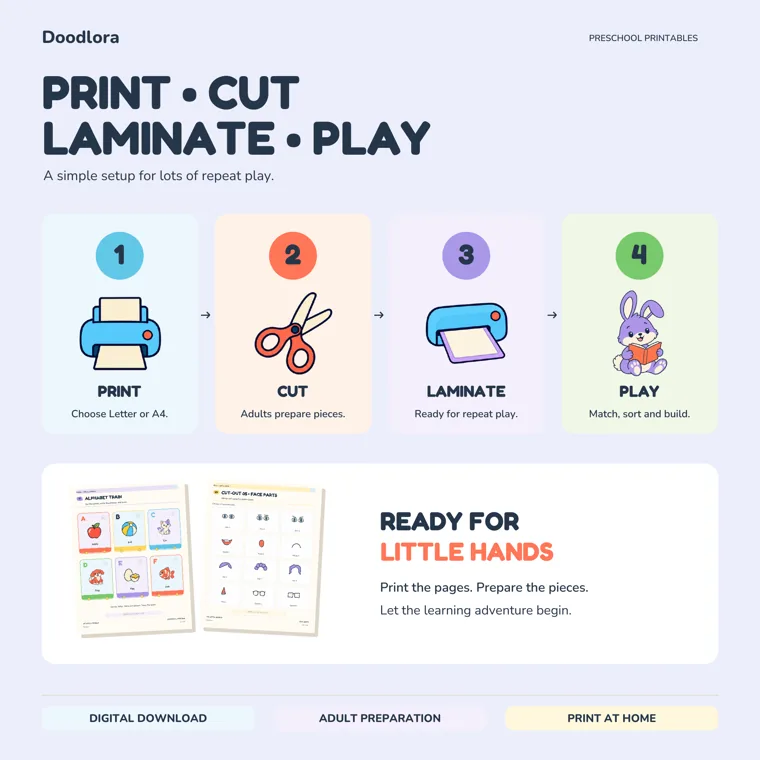
Printable cut-and-paste pages suit a child who already uses a glue stick and wants a picture that looks finished. You do all the cutting at this age. Print at actual size (100 percent), because Fit to Page shrinks the pieces, and they won’t line up with the outline they belong on.
Build-a-picture page
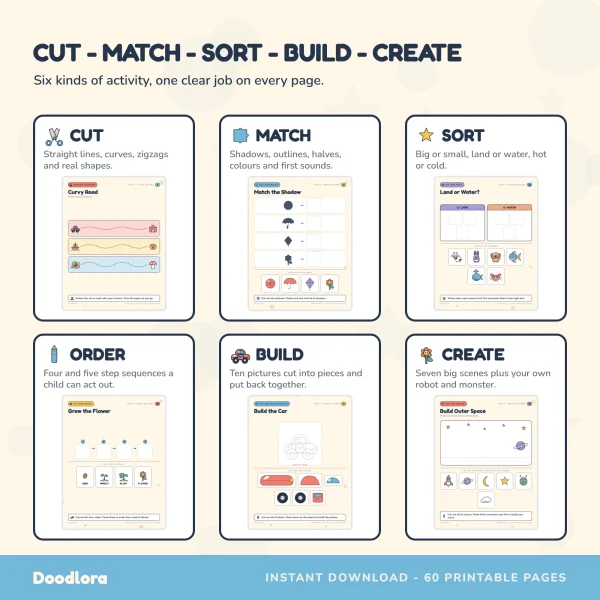
A build-a-picture page has an outline to fill and a few pieces to cut and paste on top. The easiest one in our preschool cut and paste worksheets is Build the Apple on page 9. It has three pieces: two apple halves and a leaf with its stem.
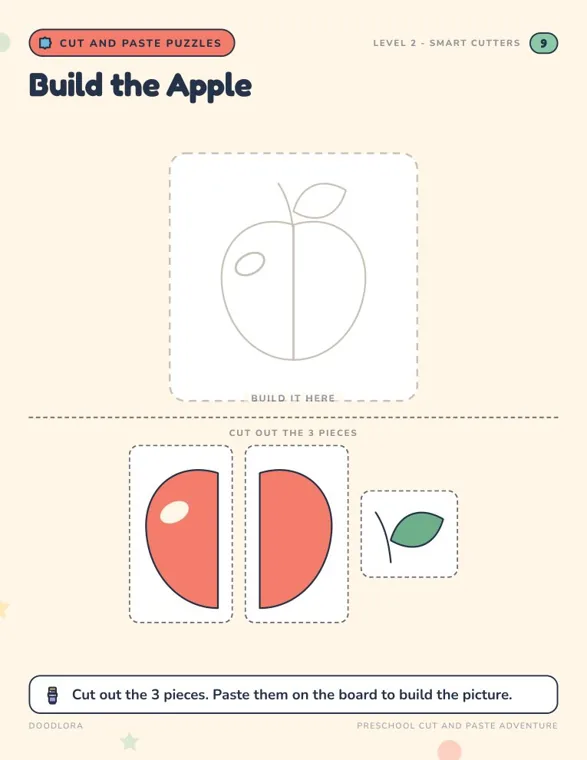
Cut the pieces out, then lay them on the table in the wrong places. Your toddler slides each one onto its outline, and you glue it down together. The book’s printing guide says to cut every piece out first, lay them all out, and only then start pasting. It also recommends a glue stick over liquid glue, which soaks through and curls the page.
The catch: The book is marked for ages 3 to 5, and its cutting pages are written for the child. With a 2½-year-old, skip the scissor pages and use only the build-and-paste ones, with you as the cutter.
Glue-down face
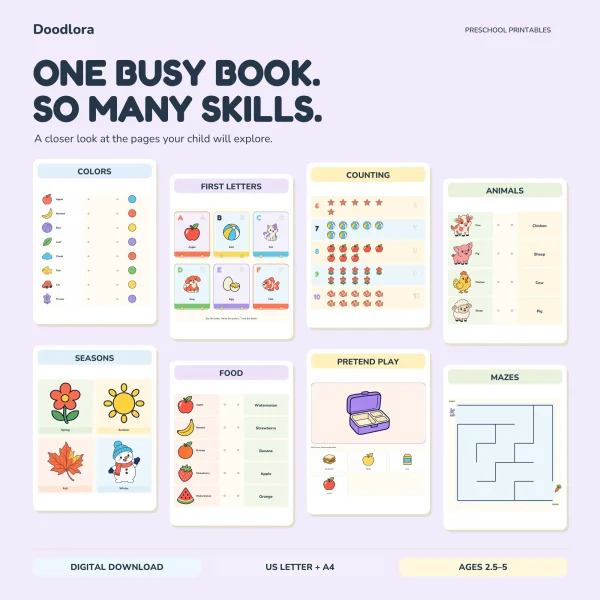
Our preschool activity book, marked for ages 2.5 to 5, has a Build My Face page on page 41. It shows a blank face, with eyes, a nose, a mouth, ears and hair to cut out below. The book means it as a laminated mat to play with again and again. For a craft, print a spare copy and glue the pieces down instead.
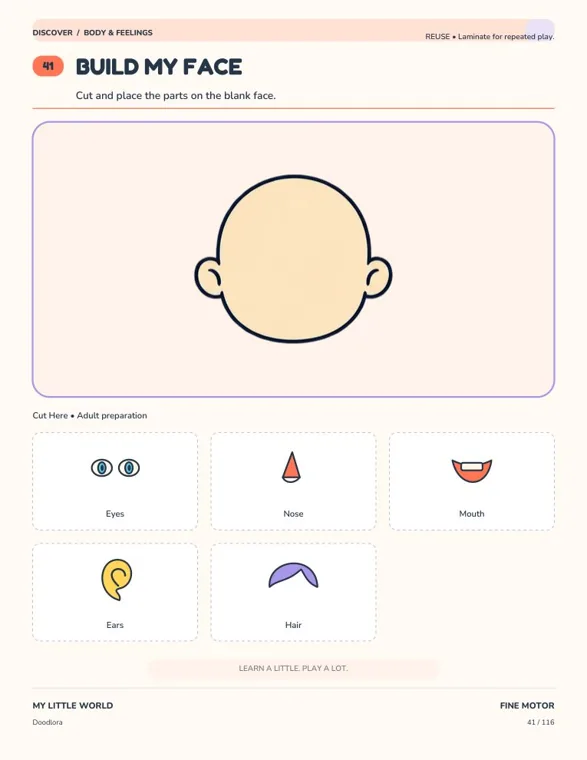
For more choice, the cut-out sheet on page 103 adds three kinds of eyes, three mouths and three hairstyles, plus a nose and two pairs of glasses. The book’s guide asks adults to cut each card along its own dashed border. Let your toddler choose, then glue together, and end by asking who the face is.
The catch: Those cards are small. The guide’s warning about children who put objects in their mouths applies here, so hand over one piece at a time.
Cut-and-paste scene
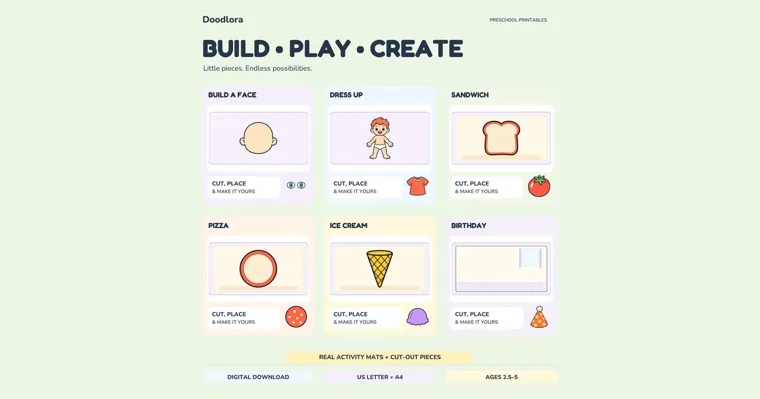
A scene page gives your toddler a background and a set of pieces with no right answer. The cut-and-paste book has seven: a garden, an ocean, a farm, a dinosaur world, outer space, a birthday party and a magical park. Each comes with six pieces, and the page says there is no wrong way to build it.
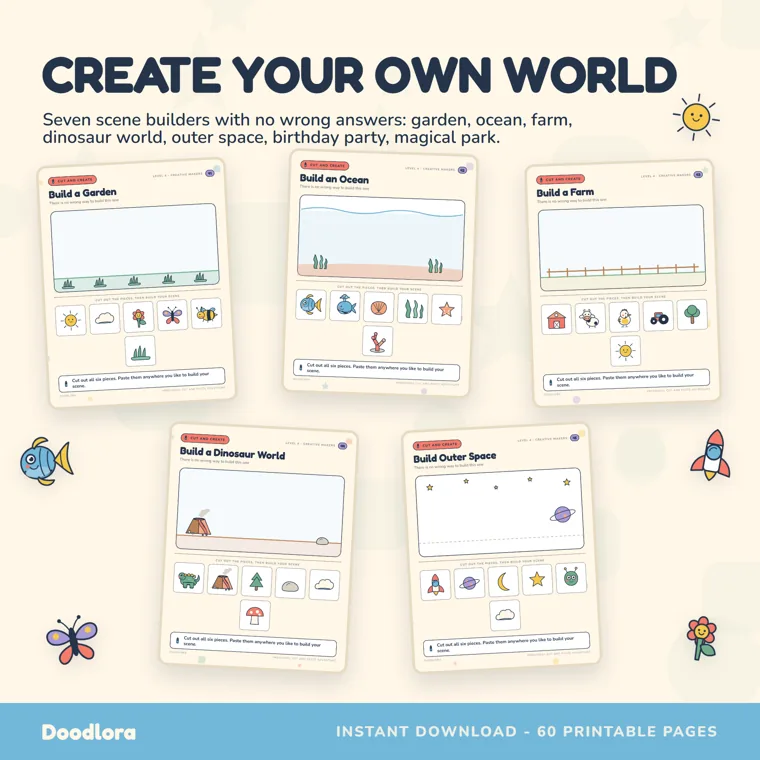
Cut the six pieces out, then let your child stick them wherever they like. The scene is finished when the last piece goes on. Ask what’s happening in the picture, and write the answer on the back.
The catch: Six pieces at once can overwhelm a young toddler. Hand them over two at a time.
Running a toddler craft session: setup, time and cleanup
A toddler craft session goes better when everything is ready before your child sits down. A high chair tray or a low table works well. Cover it with an old tablecloth or a shower curtain, and set out only the supplies for that one craft. Keep the wipes and a damp cloth on your side.
Pick a time when your child isn’t hungry or tired, such as mid-morning. Show the one action, like pressing, tearing or dabbing, then let your child take over. Expect anywhere from 5 to 15 minutes. If the glue goes in the mouth or the paint goes on the wall, the craft is over for today, and that’s fine.
End the same way every time. Wash hands together, let your child “help” put the lids on, and slide wet art onto a baking sheet to dry. Keep a few favorites and photograph the rest. On a stuck-inside day, our rainy day activities have more ideas for older siblings, and you’ll find all our printables at Doodlora Studio.
For the printable crafts, plain printer paper is fine for gluing, while cardstock holds up better to paint. Our guide to printing coloring pages covers paper weights and printer settings. For crayon choices by age, see our coloring tips.
Printables from this article
Related articles
Kids Activity Books
Letter M Craft Ideas: Monkey, Mouse & Mushroom for Preschool
Twelve letter M crafts grouped by who is at the table, from a foil-print moon for one toddler to monkeys swinging on a paper-chain vine for a whole class, with ages, minutes, supplies, steps and where each one tends to go wrong.
Kids Activity Books
Letter R Crafts for Preschool: Raccoon, Rabbit & Rainbow
Eleven letter R crafts grouped by what the child is into, from a sticky tissue rainbow for 2-year-olds to a raccoon shadow puppet, with ages, minutes, supplies, steps and the usual slip.
Kids Activity Books
Letter D Crafts: Dinosaur, Dog & Donut Ideas for Preschool
Eleven letter D crafts sorted by age, from a play dough D for 2-year-olds to a fuse bead dinosaur footprint, with supplies, times, steps and the snag in each one.