Paper Flower Crafts: 14 Easy Craft Flowers by Age
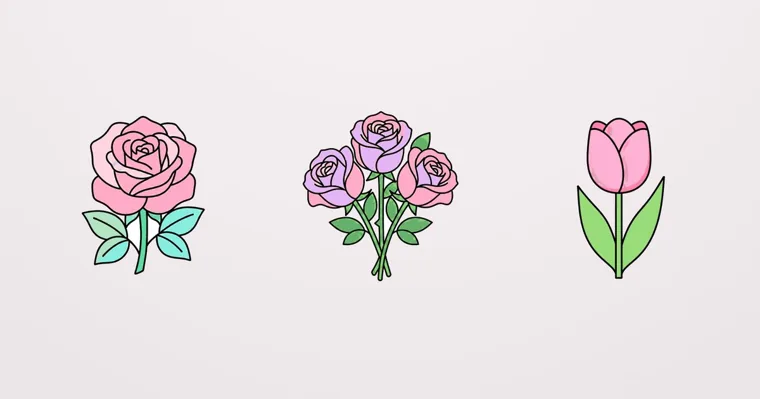
Paper flower crafts work best when the method matches the hands doing it. A three-year-old can glue a cupcake liner to a sheet of paper and call it a daisy in ten minutes. An eight-year-old can roll a spiral rose from a circle of construction paper. A teenager or adult with an hour to spare can stretch crepe paper into petals that cup like a real rose. If nobody’s keen on cutting freehand, print flowers instead, color them, cut them out and arrange them in a paper vase.
Use the table to pick one, then jump to its section. Ages and times are planning guides for a first attempt, not measured results; a second flower always goes faster.
| Craft flower | Good for ages | Time for one | You need | Watch out for |
|---|---|---|---|---|
| Cupcake liner flower | 3–5 | 10 min | Paper baking cups, glue stick, paper | Foil liners don’t hold glue well |
| Paper strip loop flower | 3–6 | 15 min | Paper strips, glue, a paper circle | Loops pop open until the glue grabs |
| Coffee filter flower | 3–8 | 20 min plus drying | Coffee filters, washable markers, water, pipe cleaner | Permanent markers won’t spread |
| Spiral paper rose | 6–10 | 15 min | Paper, a bowl to trace, scissors, glue | Rolling from the wrong end |
| Accordion fan flower | 6–10 | 25 min | Three strips of paper, glue | The ring springs apart before the glue sets |
| Origami tulip | 6 and up | 15 min | Two paper squares, tape | Thick paper won’t hold a crisp fold |
| Tissue paper flower | 7 and up | 20 min | Tissue paper, pipe cleaner, scissors | Pulling layers too fast tears them |
| Cut-out flowers from a coloring page | 8 to adult | 30–60 min | A printed flower page, colored pencils, scissors | Cutting off the leaves that hold a flower together |
| Printed clipart flowers | 8 to adult | 20 min | Flower clipart, cardstock, foam dots | Black outlines vanish on dark paper |
| Flower-shaped bookmarks | 10 to adult | 15 min per sheet | Printed sheet on cardstock, scissors | Cutting into the gaps between petals |
| Crepe paper rose | 12 to adult | 45–90 min | Crepe paper, floral wire, floral tape | Cutting petals across the grain |
| Quilled flowers | 10 to adult | 30–60 min | Quilling strips, a slotted tool or toothpick, glue | Too much glue shows as shiny spots |
| Printed vase bouquet | 6 to adult | 45 min | A vase page plus any flowers above | Gluing everything before checking the layout |
| Paper flower garland | 6 to adult, groups | 1 hour | String, flowers, tape or a hole punch | Flowers flipping around on the string |
Quick paper flowers for preschoolers (ages 3–5, 10–20 minutes)
These three need no fine cutting. An adult pre-cuts anything with a curve, since little hands won’t steer scissors around one yet, and the child does the gluing, coloring and arranging, which is the part most of them enjoy anyway. Plan one flower per child and a second one for anyone who finishes early. For more cut-and-glue projects at this age, see the kids’ section of our collage ideas.
1. Cupcake liner flower
A paper baking cup already looks like a flower when you press it flat, so it’s the fastest craft flower on the list. You need plain paper liners, a glue stick, a sheet of paper and a green crayon or a strip of green paper.
- Press a liner flat on the table with the palm of your hand.
- Rub glue stick on the paper where the flower goes, then press the flattened liner onto it.
- Glue a smaller liner or a circle of colored paper in the middle.
- Draw a stem and two leaves, or glue on a green strip.
It’s finished when the flower has a center and a stem and the glue has gripped. Foil or wax-coated liners resist a glue stick, so buy plain paper ones for this. Mini liners make good centers.
2. Paper strip loop flower
Loops of paper standing up from the page give small children a flower that feels three-dimensional. Cut six strips about 1 inch wide and 6 inches long, plus one 2-inch circle for the center.
- Bend one strip so its two ends meet, without folding a crease, and glue the ends together to make a teardrop loop.
- Make five more loops the same way.
- Glue the pointed ends of all six loops in a ring on a sheet of paper.
- Glue the circle on top of the point where they meet.
The flower is done when all six loops are standing and the center hides the joins. Loops pop open until the glue grabs, so have the child hold each end for a slow count of ten. White school glue holds better than a glue stick on the strip ends.
3. Coffee filter flower
Watercolor-style petals appear on their own when washable marker meets water, which makes this one feel like magic to a preschooler. You need basket-style coffee filters, washable markers, a spray bottle or a small cup of water with a paintbrush, and a pipe cleaner.
- Flatten a filter and scribble color all over it with washable markers; circles and stripes both work.
- Lay it on a tray and mist it with water until the colors start to run together.
- Let it dry flat. This takes an hour or longer, so plan it before snack time or do it the day before.
- Pinch the dry filter up from the center, twist the end of a pipe cleaner around the pinch, and fluff the edges.
It’s finished when the filter is dry and fluffed into a cup shape. Permanent markers won’t spread at all. A soaked filter tears, too. Mist it; don’t dunk it. Three filters stacked before pinching make a fuller flower.
Paper flowers for school-age kids (ages 6–10, 15–40 minutes)
Children this age can cut along a drawn line and follow a short sequence. Each flower below has one step where things usually go wrong, so it’s worth reading that note before you start.
4. Spiral paper rose
A rose rolled from a paper spiral is the craft most kids remember from school, and you’ll only need one sheet of paper. Use construction paper or thin cardstock, a bowl about 5 inches across to trace, scissors and white glue.
- Trace the bowl and cut out the circle.
- Starting at the edge, cut a spiral toward the middle, about 3/4 inch wide, like peeling an apple in one long strip. Stop when you reach a center about 1 inch across and leave that round piece attached.
- Pick up the outside end of the strip and roll it tightly toward the center.
- Loosen your grip so the roll relaxes into petals, then put a dot of glue on the round center and press the rolled spiral down onto it.
The rose is finished when it sits on its round base without unrolling. Rolling from the center outward leaves the base on top. That’s the usual mistake, so always start from the outside end. A wavy spiral line gives a softer, more ruffled rose than a smooth one.
5. Accordion fan flower
Three fan-folded strips glued edge to edge make a round flower with sharp, pleated petals. You need three strips of paper about 2 inches wide and 11 inches long (cut lengthwise from letter paper), glue and a small circle for the center.
- Fold each strip back and forth in narrow, even pleats, like a paper fan.
- Fold each pleated strip in half and glue the two inner edges together, so each one becomes a half-circle fan.
- Glue the three fans side by side until the ends meet in a full circle.
- Glue the circle on the front to cover the middle.
It’s done when the circle lies flat by itself. The ring springs apart before the glue sets, so press it under a heavy book for a few minutes. Patterned scrapbook paper gives a striped look without any coloring.
6. Origami tulip
A simple folded tulip needs no glue and teaches two basic folds. Use two squares of thin paper, one in a flower color and one green, about 6 inches each; origami paper folds most crisply.
- For the flower, fold the colored square in half along the diagonal to make a triangle, and turn it so the long folded edge is at the bottom.
- Fold the left bottom corner up so its tip sits a little to the left of the top point and leans outward. Fold the right corner the same way. Those two flaps are the tulip petals.
- Turn the flower over and fold the bottom tip up a little to square off the base.
- For the stem, fold the green square along one diagonal and open it again. Fold two sides in to that crease to make a kite, then fold the long edges in to the crease once more to make a narrow spike. Fold it in half along its length.
- Tape the flower on top of the stem.
The tulip is finished when the head sits on the stem without flopping. Thick construction paper won’t hold a crisp fold, so save it for the spiral rose. Copy paper works fine. Ten tulips on a strip of paper make a quick spring border for a classroom door.
7. Tissue paper flower
These big, fluffy flowers come from a stack of tissue folded like a fan, and they’re the ones people mean when they ask about party paper flowers. For one medium flower you need about six sheets of tissue cut into 8 x 10-inch rectangles, a pipe cleaner and scissors.
- Stack the sheets neatly.
- Fold the whole stack back and forth in pleats about 1 inch wide, starting from a short side.
- Wrap a pipe cleaner tightly around the middle of the folded strip and twist it.
- Round off both ends with scissors for soft petals, or cut them to a point for spiky ones.
- Spread the two fans apart. Then lift the top sheet on one side, peeling it gently toward the middle, and repeat with each layer on both sides.
It’s finished when every layer stands up and the flower looks round from the front. Pulling a layer fast from the tip tears it, and you can’t patch tissue. Hold the sheet near the center and lift slowly. Don’t rush this part. Mixing two colors in the stack gives a two-tone flower without any extra steps.
Printed flowers to color, cut out and arrange (ages 8 to adult)
Printing the flower first takes away the hardest part for many people: drawing petals that look right. You still get the cutting, coloring and arranging, and the results stay consistent across a whole table. These also suit an adult working at a slower pace with sharper scissors.
8. Cut-out flowers from a coloring page
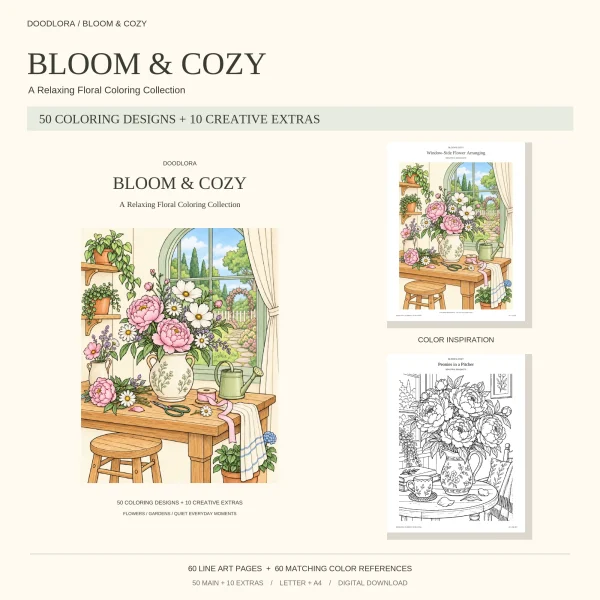
A page of separate flowers becomes a set of paper blooms once you color and cut around each one. The Pattern of Petals page in our flower coloring pages for adults has tulips, roses, peonies and daisies with leafy sprigs between them. It’s design 55, on page 109 of the US Letter book, with a colored version on page 110 if you want a palette to copy.
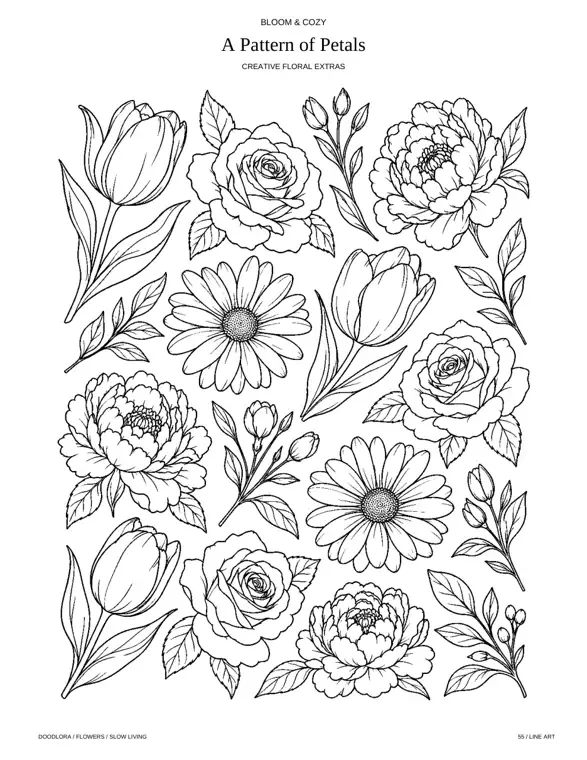
- Print the line-art page on cardstock or heavy paper at actual size.
- Color each flower completely before you cut. Colored pencils keep the edges clean.
- Cut around each flower with a thin white border, keeping its leaves attached.
- Bend the petals slightly upward along their outlines so the flower lifts off a flat surface.
It’s finished when each flower is cut out and holds its slight curve. The common slip is snipping off a leaf that holds a stem to its bloom. If you’d rather cut and glue than color, print the colored page instead. Our guide to printing coloring pages covers paper weight and printer settings.
9. Printed clipart flowers
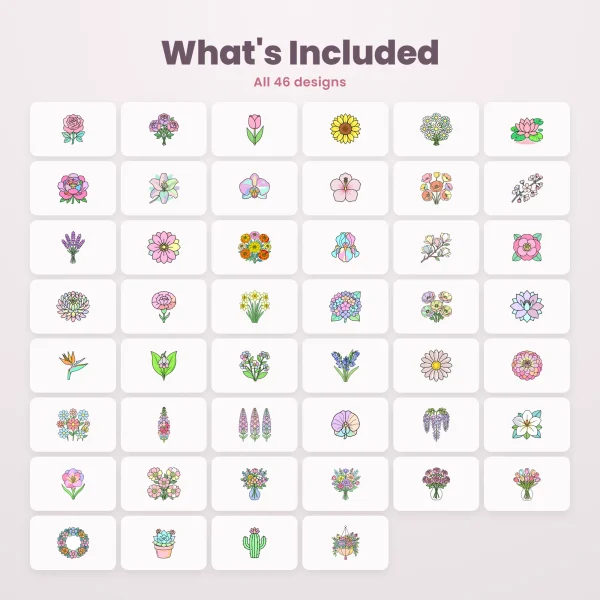
Flower clipart printed on cardstock gives you ready-colored blooms in a single print run. The floral clipart set has 46 flowers and bouquets, each as a transparent PNG 2400 pixels square and as an SVG, from a single rose to wisteria, a cactus and a floral wreath.
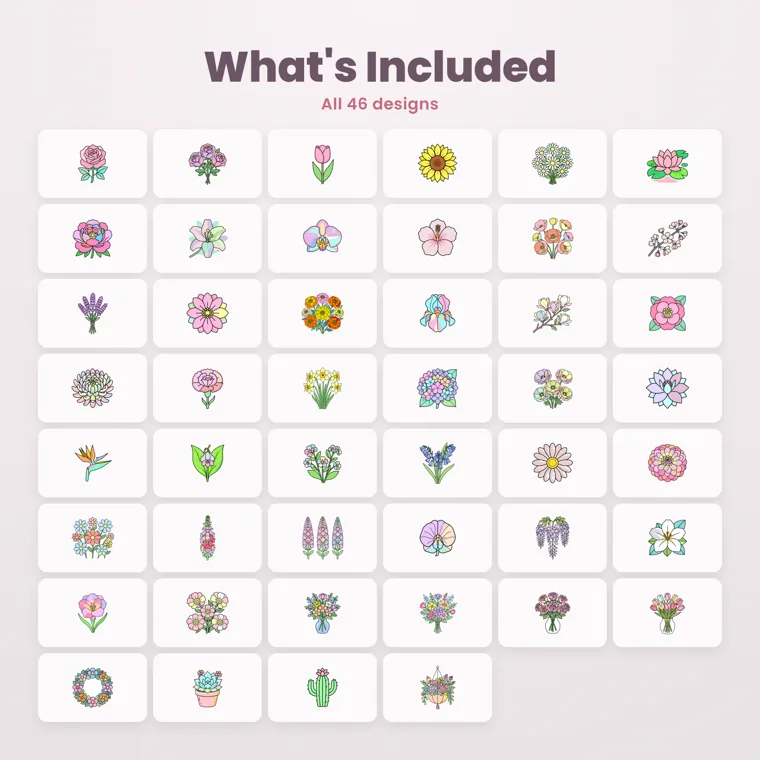
- Place several flowers on one page in any document or design program, each about 2 to 3 inches tall.
- Print on white cardstock.
- Cut around each flower with a narrow white edge.
- Stick each one onto a card, a gift tag or a jar label with foam dots, so it stands slightly off the surface.
The flower is done when it’s mounted and sits evenly on its foam dots. Black outlines disappear into dark paper, so keep the background white, cream or pastel. For sizing a flower to an exact print width, see how to use clipart.
10. Flower-shaped bookmarks
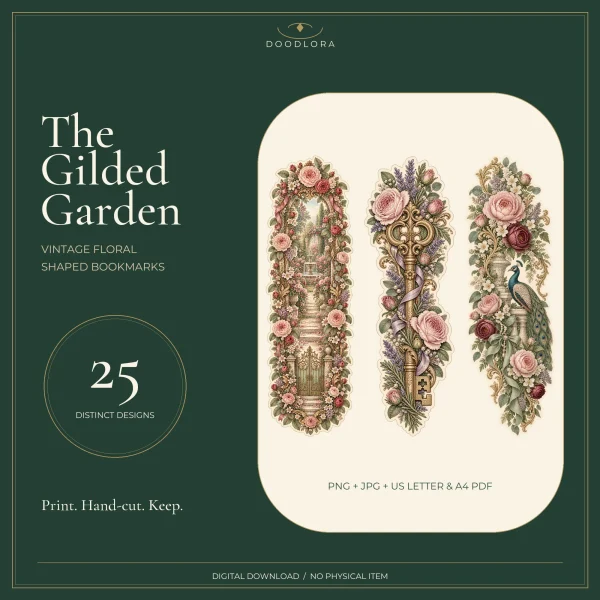
A bookmark cut to the outline of its bouquet is a paper flower you’ll actually use. The vintage garden flower bookmarks come as 25 designs on five US Letter sheets and five A4 sheets, five bookmarks to a sheet. Each fits within 2 x 6 inches and has a dotted cut line around the outside.
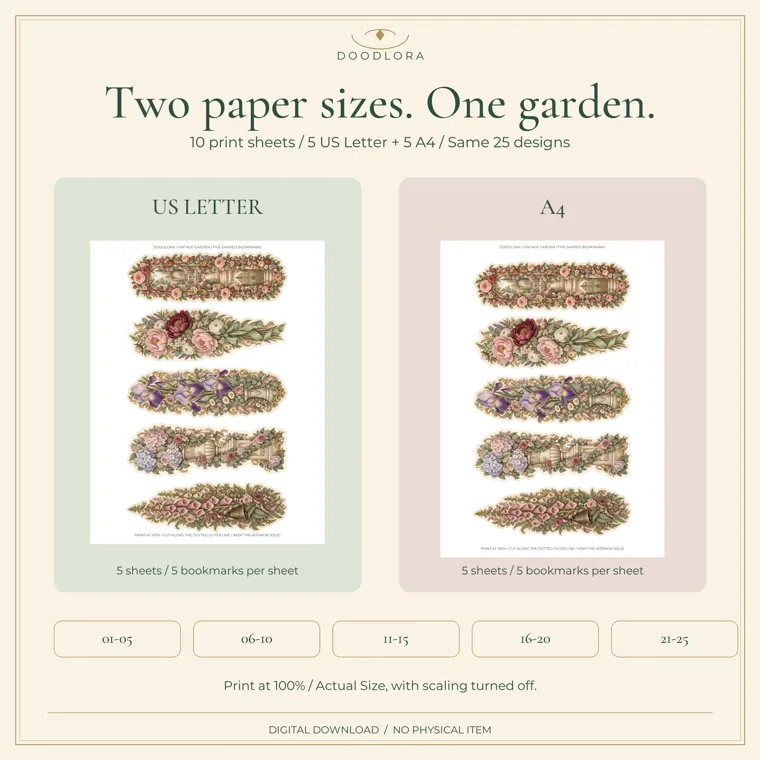
- Print the PDF sheet at 100% with scaling turned off, on cardstock.
- Let the ink dry before you cut.
- Cut along the dotted outer line and keep the inside in one piece.
It’s finished when all five bookmarks are cut and none has a nick inside the line. The gaps between petals are already filled in with cream paper; don’t cut into them, or a stem can tear off. The PNG and JPG files don’t have the dotted line, so use the PDF sheets when you want a cutting guide.
Slower paper flowers for teens and adults (45 minutes and up)
These two take patience and give the most lifelike or most delicate results. Both are good company for a podcast or a long conversation.
11. Crepe paper rose
Crepe paper stretches, so petals can be shaped into cups the way real petals curve, and once a dozen of them are wrapped around a bud the rose holds its shape on a wire stem in a vase or a bouquet. You’ll need crepe paper in a petal color and green, floral wire, floral tape, scissors and tacky glue.
- Cut a strip of crepe paper and cut petal shapes from it, with the paper’s fine ridges (the grain) running from the base of each petal to its tip. Plan on about 12 petals for a full rose.
- Hold each petal at the middle with both thumbs and gently stretch outward to cup it. Curl the top edge back over a pencil or skewer.
- Roll a small piece of crepe paper into a tight bud and fix it to the top of the floral wire with glue.
- Glue the petals around the bud one at a time, overlapping each one halfway over the last, smallest petals first.
- Cut a few green leaf-shaped pieces for the base. Then stretch floral tape as you wrap it down the wire, so its wax grips.
The rose is done when the petals sit firmly around the bud and the tape covers the wire from base to end. Petals cut across the grain refuse to stretch into a cup, so check the ridges before cutting. Floral tape won’t stick unless you stretch it as you wrap.
12. Quilled flowers
Quilling is the craft of rolling, shaping and gluing narrow strips of paper into designs, and flowers are one of its easiest starting shapes. Quilling strips are sold in widths such as 1/8, 1/4 and 3/8 inch; the narrow 1/8-inch strips make neat small petals. You’ll need strips, a slotted quilling tool or a toothpick, white glue and a toothpick for applying it.
- Roll one strip tightly around the tool, slide it off, and glue the end down to make a tight coil for the center.
- Roll a second strip, then let it loosen into a larger, open coil before gluing the end. This is a loose coil.
- Pinch one side of the loose coil to a point to make a teardrop petal.
- Make six teardrops and glue their points around the center coil.
The flower is finished when the petals are evenly spaced and the glue is dry. Too much glue dries as shiny spots on the paper; pick up a tiny dot on the end of a toothpick instead. Use the same strip length for every petal. That’s how the teardrops match. Glue the finished flower to a gift tag or a small frame.
Putting paper flowers together
Single flowers are satisfying, but a bouquet or garland turns a craft session into something for a wall, a table or a party. Both of these ideas use any mix of the flowers above.
13. Printed vase bouquet
A vase drawn on a page gives every stray flower a place to go. Design 51 in the same flower coloring book, Design Your Own Vase on page 101 of the US Letter file, has a large empty vase on a table. If you don’t have the book, draw one on cardstock.
- Color the vase, or leave it white and decorate it with patterns.
- Lay the flowers above the rim before gluing: cut-out coloring page flowers, clipart flowers, a spiral rose or a few coffee filter blooms.
- Move them around until the tallest flowers are in the middle and the smaller ones fan out to the sides.
- Glue the flowers from the back of the arrangement forward.
It’s done when every flower is glued and the stems disappear behind the vase rim. Gluing before you’ve checked the layout is the usual regret, and it’s hard to undo once white glue has soaked into the page and the paper underneath has started to wrinkle. Take a phone photo of the arrangement you like, then glue to match it.
14. Paper flower garland
A string of paper flowers decorates a classroom, a birthday table or a baby shower, and a group can make it together. Give each person a different flower from this list and you’ll string them up at the end.
- Make flowers in two or three styles, all roughly the same size. Plan on about one flower per 8 inches of string.
- Punch a hole near the top of each flat flower, or tape the back of each fluffy one directly to the string.
- Space them along the string and add a small piece of tape on the back to stop them sliding.
The garland is finished when the flowers stay put and face forward. Flat flowers flip around on a single hole, so punch two holes side by side and thread the string through both. A mix of fluffy tissue flowers and flat printed ones keeps the garland light enough to hang with tape.
Printables from this article
Related articles
Clipart & SVG Cut Files
How to Draw a Truck: Easy Pickup, Big Rig and Cartoon
Split a pickup into three parts before you draw a single wheel: a bed, a cab and a hood. Keep the roof about 2.2 wheels tall and the bed rail level with the hood, and the truck looks right even before the details go on.
Clipart & SVG Cut Files
How to Draw a Train: Steam Engine, Cars and Tracks
Split the page into a 10-square grid, lay a long boiler tube across the middle, set a box cab at the back and a tall stack at the front, hang two big driving wheels under the cab end, then couple cars behind and run the rails to a vanishing point.
Clipart & SVG Cut Files
Hawk vs Falcon: Wings, Size, Hunting Style and Eagles
A falcon has long, narrow wings that taper to sharp points and flies on steady, quick wingbeats; a hawk has broader wings with rounded tips and either soars in slow circles or flaps hard and glides. Falcons kill with a notched beak and hawks with their talons, and eagles are the largest, heaviest-billed members of the hawk family.