How to Draw a Train: Steam Engine, Cars and Tracks
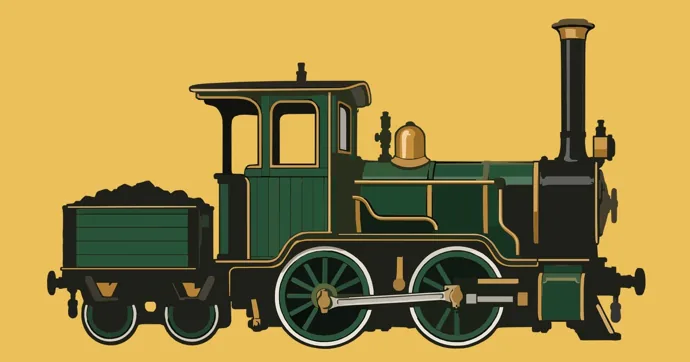
A steam train is three shapes stacked on wheels: a long tube lying on its side, a box at the back end of it and a tall funnel at the front. Get those three in the right sizes and the engine reads as a train even before a single wheel spoke goes in. The sizes are easy to hold onto if you split the length of the engine into 10 equal squares. On that grid the boiler tube is 6 squares long and 1.5 squares thick, the cab is 2 squares wide, the two big driving wheels are 2 squares across, and the top of the stack reaches about 7 squares above the rails.
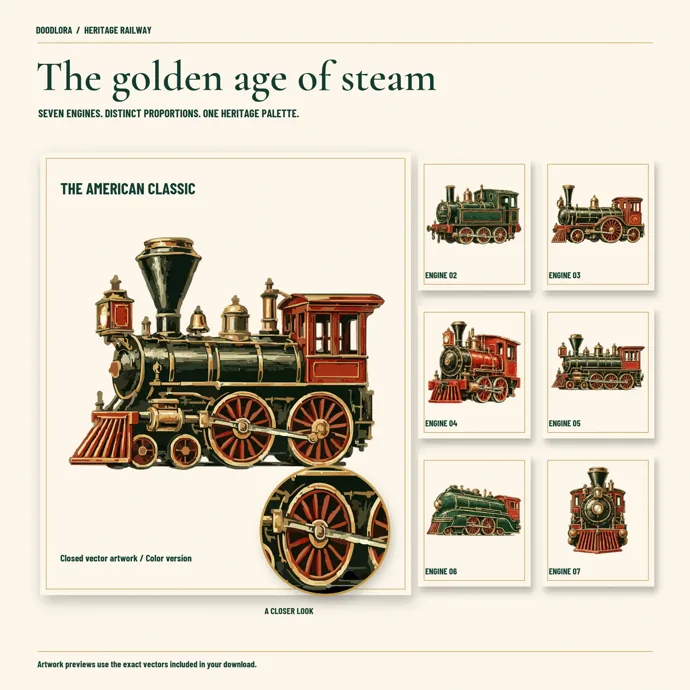
Those numbers come from measuring the American Classic engine in our train clipart. We cut its length into 10 equal parts and read off where each part starts and stops, then rounded to the nearest half square so the figures are easy to draw. The main tutorial below follows that engine from the side in 10 steps, which by our planning estimate takes 30 to 40 minutes in pencil for a child of about 8 with an adult reading the steps out. After it come coaches and freight cars to couple behind, tracks that run away into the distance, a modern train and a cartoon engine, then simpler versions by age.
Set up a 10-square grid first
The grid does the measuring so you don’t have to. Proportion is the whole difference between a train and a bus, and it’s the thing beginners lose first, usually by drawing the boiler and then discovering there’s no room left for the cab. The same squared-paper approach works for other long vehicles too, and the fire truck guide uses a similar side-view setup with a ground line.
Turn a sheet of letter paper (8.5 × 11 in) sideways and draw light pencil lines 1 inch apart: 10 squares across and 8 squares up, which leaves half an inch at each side and a quarter inch at the top and bottom. The bottom line of the grid is the rail the engine stands on. Count squares from the left edge for the front of the engine and from that bottom line for height, because in these steps the engine faces left.
Pencil the grid very lightly. Every grid line has to come out with the eraser at the end, and a hard-pressed line leaves a groove that shows through crayon. A sharp HB or No. 2 pencil, a ruler, a good eraser and a black fine-tip pen for the final outline are all the drawing takes. Colored pencils or markers come last.
Here is the whole engine on the grid, so you can check any step against it:
| Part | Left to right (squares) | Height above the rail (squares) |
|---|---|---|
| Cowcatcher | 0 to 2 | 0 to about 1.8 |
| Headlamp | 1 to 2 | 4.3 to 6 |
| Boiler | 1.5 to 7.5 | 2.5 to 4 |
| Stack | base about 0.7 wide around square 3, top 2.2 to 4.2 | 4 to 7.3 |
| Small front wheels | centers at 2.4 and 3.7 | 0.8 across |
| Big driving wheels | centers at 5.5 and 8 | 2 across |
| Cab | 7.5 to 9.5, roof edge out to 9.8 | 2.5 to 5.5 |
How to draw a steam train from the side in 10 steps
Each step adds one part, and every part hangs off something already on the page. Keep the pencil light until step 10.
Step 1: Lay the boiler across the middle
Draw a long rectangle from square 1.5 to square 7.5, with its bottom at height 2.5 and its top at height 4. That’s the boiler, the barrel where the water turns into steam. It’s four times as long as it is thick, and if it comes out fatter than that the engine starts to look like a tank truck.
Step 2: Round off the front
At the front end of the boiler, draw a slightly bulging curve that pushes about a third of a square past the rectangle, then erase the straight front edge. That bulge is the smokebox door. A round boiler front is the detail that tells the eye this tube is a steam engine and not a box.
Step 3: Stand the cab on the back
Draw a tall box from square 7.5 to 9.5, running from height 2.5 up to 5.5. Add a roof line along the top that sticks out a little past the back of the cab, to about 9.8. Then put two square windows side by side in the upper half of the cab. The cab is the crew’s shelter, so the windows go roughly at head height.
Step 4: Run the footplate underneath
Rule a straight line along the bottom of the boiler and the cab at height 2.5, and carry it forward to square 1. Thicken it into a thin strip. This is the platform everything else sits on, and it keeps the wheels from having to touch the boiler.
Step 5: Hang the two big driving wheels
Draw two circles 2 squares across, one centered at square 5.5 and one at square 8, each with its center 1 square up so the bottom just touches the rail line. They sit under the back half of the engine, with most of the second wheel under the cab. Trace around a coin or a bottle cap that matches 2 squares if your circles keep wobbling.
Step 6: Add the small front wheels
Under the front half, draw two small circles about 0.8 squares across, centered at squares 2.4 and 3.7. They sit on the same rail line as the big ones. The size jump between the small pair and the big pair is what makes this kind of engine look old-fashioned, so keep the front wheels small.
Step 7: Put the cowcatcher on the nose
From the very front of the rail line at square 0, draw a slanted line up and back to square 2 at about height 1.8, then drop straight down to the rail. Fill the triangle-ish wedge with slanted bars. Railways call this the pilot, and nearly everyone else calls it the cowcatcher.
Step 8: Raise the stack, the dome and the bell
The stack goes on top of the boiler near the front. Start it narrow, about two-thirds of a square wide at the base around square 3, and widen it upward like a funnel until it spans squares 2.2 to 4.2 at height 7. Cap it with a flat rim. Then sit two rounded bumps on top of the boiler: a small bell at about square 4 and a bigger dome at about square 5.2, topping out between height 5 and 5.5. A boxy headlamp on a short post at the very front, from square 1 to 2 and height 4.3 to 6, finishes the top line.
Step 9: Join the wheels with rods
Draw a short box at about square 2.5 to 3.6 and height 1.3 to 2.2, just above the small front wheels. That’s the cylinder. Run a straight rod from it back to the center of the first big wheel, then a second rod from that center to the center of the second big wheel. Add a small hub circle on each wheel and 10 to 14 spokes from the hub to the rim. The rod is what makes the wheels look connected to the engine instead of stuck on.
Step 10: Ink, erase and check the outline
Go over the lines you want to keep with the black pen, wait a minute for the ink to dry, then erase the whole grid. Before you color, check the engine as a silhouette. Squint at it, or hold it up to a window from the back of the paper. The shape alone should still say “steam train”: funnel at the front, box at the back, big wheels at the back, small wheels at the front.
How to draw the cars behind the engine
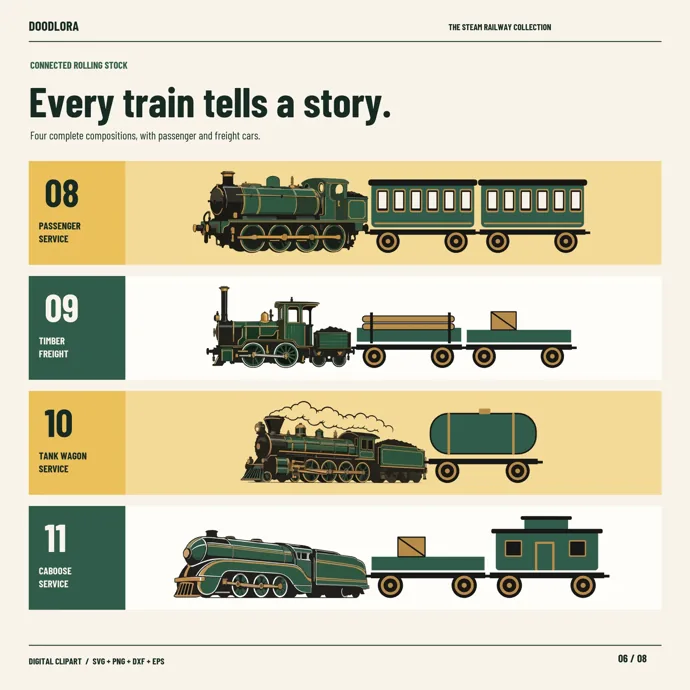
Cars are much simpler than the engine, and the trick is matching them to it. Consistency matters more than detail here. Keep every car’s roof level with the cab roof, at height 5.5 on the grid, and the whole train lines up into one long shape. In our steam engine clipart, the passenger train labeled 08 shows the same rule: both coaches top out at the height of the engine’s cab.
A passenger coach on the same grid is a long box about 6 squares long, from height 1.5 up to 5.5, with a slightly curved roof strip on top. Space five or six windows evenly along the upper half. Put one small wheel, about 1 square across, near each end of the coach, not in the middle.
Freight cars change only the box on top of the wheels. A boxcar is the coach without windows and with a sliding door drawn as a rectangle in the middle. A flatcar is just the floor strip with a load on it, like a pile of logs drawn as rounded rectangles stacked two high. A tank car is a long capsule shape lying on the floor. A caboose, the little car at the very end of an old freight train, is a short box with a smaller box sitting on its roof.
Leave about half a square between cars and join them with a short bar at the height of the floor. That gap is the coupling, and without it the cars run together into one long bus. A full train of an engine and two coaches is about 23 squares long, which won’t fit on one sheet at 1-inch squares. Either make the squares half an inch, or tape two sheets end to end.
How to draw train tracks, flat and in perspective
Tracks seen from the side are the easiest part of the drawing. Rule a line under the wheels for the rail, a second line just below it, and short upright marks underneath for the ends of the ties. Space the ties evenly, about half a square apart, and the train is on the ground.
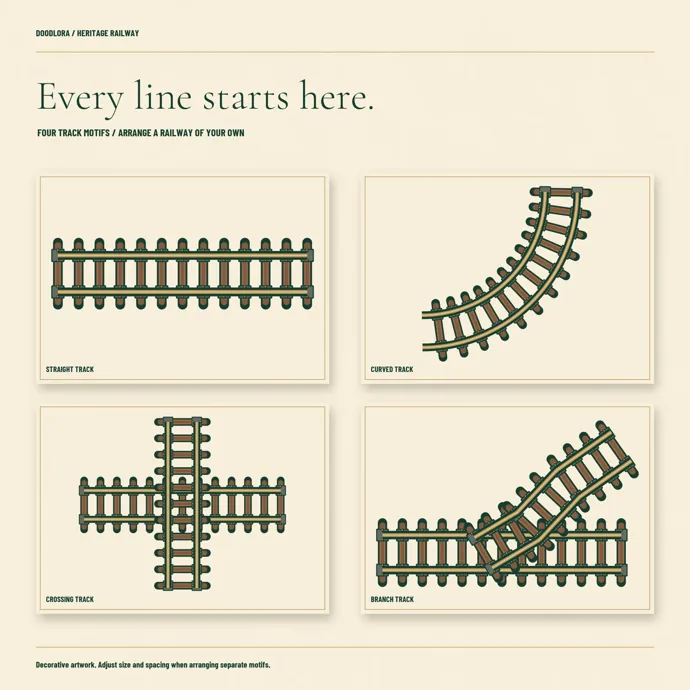
Tracks seen from above or running away from you take a little more care. On a real track, the ties are laid at right angles to the rails and keep the two rails a fixed distance apart. So in a drawing, the rails must stay the same distance apart along their whole length, and every tie must cross both rails squarely. A curved track keeps the same rule: bend both rails together and turn each tie so it still points straight across.
Tracks that run into the distance (one-point perspective)
Straight railroad tracks are the standard example of one-point perspective. Understanding this one principle also unlocks roads, hallways and fences. Two rails that are really parallel look as if they meet at a single spot on the horizon, the vanishing point. Here’s how to draw it:
- Rule a level horizon line about a third of the way down the page. This line stands for the viewer’s eye level.
- Mark one dot on it, the vanishing point. Put it slightly off center so the picture doesn’t feel split in half.
- At the bottom edge of the page, mark two points about 4 inches apart for the rails. Rule a straight line from each one to the vanishing point.
- Draw the ties as level lines straight across between the rails, each one stopping where it meets the rails. Start with a long one near the bottom edge.
- Space the next tie a little closer than the last one, and keep shrinking the gap as you go up. Near the horizon the ties should be packed so tightly they almost merge into one line.
- Let the ties stick out slightly past each rail, and make that overhang shrink too.
The common slip is spacing the ties evenly all the way up, which makes the track look like a ladder leaning on a wall. A train on this track is drawn as a box seen from the front. Draw the front face as a flat rectangle, then run the top and bottom edges of the sides back toward the same vanishing point. Our railroad clipart has three engine fronts, a steam front, a diesel front and a railcar front, to copy the front face from.
How to draw a modern train
A modern passenger train drops almost everything that made the steam engine tricky. There’s no stack, no dome and no big wheel. The streamlined outline is mostly an exercise in simplification. Measured the same way, the streamliner in our train clipart is a long box about 10 squares long and 4 squares tall, so roughly two and a half times as long as it is tall.
- Draw a long box 10 squares by 4.
- Round off the front top corner with a big curve that starts on the roof about 3 squares back and sweeps down to the nose at about height 2.
- Draw a band of windows along the upper half. Make the front windshield a slanted pair following the curve of the nose.
- Add a skirt along the bottom, a strip that hides most of the wheels.
- Peek two small wheels out below the skirt near each end, a pair at the front and a pair at the back.
- Run one or two long stripes down the whole side. Stripes that follow the nose curve make it look fast.
The giveaway on a modern train is the wheels. Big wheels spread along the length belong to steam, and a modern train looks wrong with them. Keep them small, low and grouped near the ends.
How to draw a cartoon train
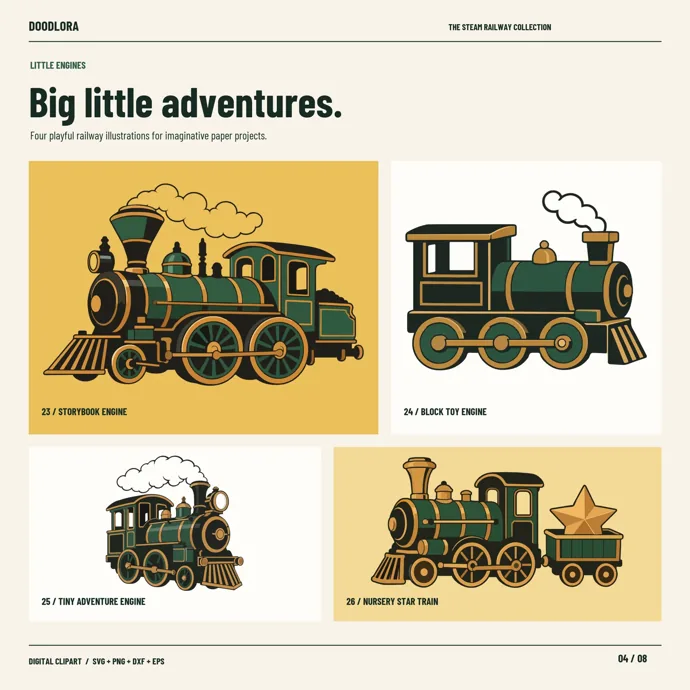
A cartoon engine keeps the same three parts and changes the sizes. Make the boiler shorter and fatter, about 4 squares long and 2 tall. Make the cab a big square with one large window. Make the stack short and straight, with a puffy cloud of smoke coming off it. Then give it three wheels, all the same size and big, each about a fifth of the engine’s length across.
For a face, the round front of the boiler is the obvious place. Two dots for eyes and a curve for a smile go on the smokebox door. Keep the face low on the front circle so the stack reads as a hat.
Simpler trains by age
The grid engine above suits kids from about 8 who can follow a measurement. Younger kids still want a train, so take parts away until what’s left fits the hand.
Patience and confidence grow faster when the drawing gets finished in one sitting. Match the version to the child’s attention span, not to the grade they’re in.
Ages 3 to 4: one box, one chimney, a puff
Draw a rectangle for the body, a smaller square on one end for the cab, and a short upright rectangle on the other end for the chimney. Two circles underneath for wheels, then a scribbly cloud above the chimney. By our estimate that’s about five minutes, and an adult can draw the rail line first so the wheels have something to sit on.
Ages 5 to 6: the train with cars
Draw the same box engine, then add two or three squares in a row behind it, each with two wheels and a short line joining it to the next one. Let them color each car a different color. The thing to practice at this age is the gap between cars, so each one stays a separate box.
Ages 7 to 9: the 10-step grid engine
Use the steps above, with an adult or older sibling reading out one step at a time and checking the square numbers. If the full grid feels like too much, draw only the rail line and the boiler rectangle with a ruler and freehand the rest.
Ages 10 and up: a train on perspective track
Draw the tracks first, running to the vanishing point, then put an engine front at the bottom of the page and a smaller one far up the line. That’s 45 minutes or more, mostly in spacing the ties.
Why a train drawing looks wrong, and the fix
Most problems come down to proportion or placement. The table matches what you’ll notice on the page to its likely explanation.
| What you see | What usually caused it | The fix |
|---|---|---|
| It looks like a tanker truck | The boiler is too fat, or the wheels are all the same small size | Keep the boiler 4 times as long as it is thick, and make the back wheels much bigger than the front ones |
| It looks like a bus | No stack, or a stack shorter than the boiler is thick | The stack should stand more than twice as tall as the boiler is thick |
| The wheels float | There is no rail line, or the wheels were drawn smaller than planned | Rule the rail line first and make each wheel touch it |
| You can’t tell the front from the back | The cab and the stack ended up the same height at opposite ends | Raise the stack well above the cab roof, and put the cowcatcher and headlamp only on the front |
| The cars don’t line up | Each car was drawn at its own height | Rule one roof line from the cab roof all the way to the last car |
| The track looks like a ladder | The ties are evenly spaced as the rails narrow | Make every gap smaller than the one before it |
| The perspective rails cross | Each rail aimed at its own point | Run both rails to the same vanishing point |
Printing a reference engine to copy from
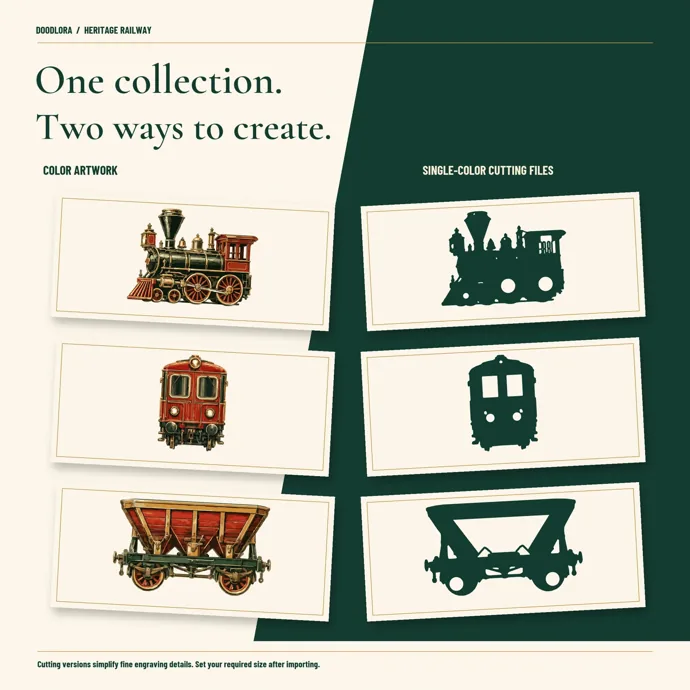
A drawing goes faster with one clean picture to look at, set beside the paper rather than under it so you draw the shape instead of tracing it. Our train clipart has the American Classic engine measured for this guide, seven steam engines in all, plus a streamliner, a metro front, freight wagons and five silhouettes. Every design comes in a color version and a single-color version, which makes a handy check for the outline in step 10.
The steam engine clipart is the set to print for coupling practice, with the four complete trains in the cars section and the four little cartoon engines. The railroad clipart has the coaches, caboose and track pieces, including the straight, curved, crossing and branch tracks shown above, plus three engine fronts for perspective drawings.
Every set comes with a personal license, which covers drawing at home and a teacher printing them for their own class. More vehicles in the same styles are in the clipart shop.
Trains sit naturally next to other vehicles. The race car guide builds a long, low silhouette from the wheels up, and the boat guide covers the water version. For a classroom unit on land, water and air, the types of transportation guide sorts them for kids.
Train drawing questions
Which way should the train face?
Either way works, but pick before step 1. In this guide the engine faces left, so the stack and cowcatcher are on the left. If you want a train coming out of the left side of the page heading right, flip every square count, measuring from the right edge instead.
How many wheels does a steam engine have?
On paper, show only the wheels on the side facing you. Real engines vary a lot, and our clipart alone has engines with two, three and four big wheels on a side. The engine in this guide has two small front wheels and two big driving wheels on the near side, which is the easiest version to get right.
How do you draw steam and smoke?
Draw a row of overlapping bumpy circles coming off the top of the stack and drifting back over the cab, getting bigger as they go. Leave them white or color them light gray, because dark smoke over a dark engine hides the stack.
How do I make a train look like it’s moving?
Tilt the smoke backward, add two or three short speed lines behind the last car, and draw the spokes on the driving wheels as a blur of curved lines instead of straight ones.
Printables from this article
Related articles
Clipart & SVG Cut Files
How to Draw a Truck: Easy Pickup, Big Rig and Cartoon
Split a pickup into three parts before you draw a single wheel: a bed, a cab and a hood. Keep the roof about 2.2 wheels tall and the bed rail level with the hood, and the truck looks right even before the details go on.
Clipart & SVG Cut Files
Hawk vs Falcon: Wings, Size, Hunting Style and Eagles
A falcon has long, narrow wings that taper to sharp points and flies on steady, quick wingbeats; a hawk has broader wings with rounded tips and either soars in slow circles or flaps hard and glides. Falcons kill with a notched beak and hawks with their talons, and eagles are the largest, heaviest-billed members of the hawk family.
Clipart & SVG Cut Files
Monarch Butterfly Migration: Routes, Life Cycle and Facts
Monarchs from east of the Rockies winter in about a dozen mountain areas in central Mexico, and monarchs from the West winter along the California coast. A long-lived fall generation flies south, and several shorter-lived generations carry the species back north.