Fine Motor Skills Activities: Toddlers to Kindergarten
The best fine motor skills activities match the grip your child already has. A 2-year-old gets the most from big, whole-hand jobs like pushing cards through a slot or pouring water. A 3- to 5-year-old is ready for pinching jobs: clothespins, tongs, scissors along a dotted line. By 5 to 7, children can handle small, exact work such as sewing with a plastic needle or placing fuse beads from a chart.
Pick by age first, then by how much time and mess you can take today. The times below are rough planning guides for one sitting, not goals. Every activity on this list needs an adult close by, and the small-piece ones need you at the table the whole time.
| Activity | Ages | About how long | What the hands practice | Watch for |
|---|---|---|---|---|
| Card posting box | 2–3 | 5–10 min | Turning the wrist, aiming | Nothing small |
| Sticker line-up | 2–3 | 10 min | Pinching and peeling | Lift the first corner |
| Play dough snakes | 2–3 | 15 min | Squeezing, rolling, poking | No tools with tiny parts |
| Pouring water | 2–3 | 10–15 min | Two hands working together | Stay at the water |
| Big paper scribbles | 2–3 | 10 min | Holding a crayon | Tape the paper down |
| Scissor lines | 3–5 | 10 min a page | Opening and closing scissors | Rounded tips only |
| Pipe cleaner stringing | 3–5 | 10 min | Threading | Beads stay big |
| Clothespin clips | 3–5 | 10 min | Pinch strength | Sore fingers, short sets |
| Tong transfer | 3–5 | 10 min | Squeeze and release | Large pom-poms only |
| Eyedropper colors | 3–5 | 15 min | Fingertip squeeze | Water on the floor |
| Button practice | 3–5 | 5–10 min | Two hands, small push | Start big |
| First cut-and-paste page | 3–5 | 15 min | Cutting, then placing | Print Actual Size |
| Cut-and-order pages | 5–7 | 15 min | Cutting corners, sequencing | Small squares |
| Burlap sewing | 5–7 | 20 min | Needle grip, in and out | Short yarn |
| Paper fan folding | 5–7 | 10 min | Creasing, both hands | Thin paper |
| Coin stacking | 5–7 | 10 min | Pincer grip, stacking | No toddlers near |
| Small fuse bead animal | 5–7 | 2 sittings | Pincer grip, chart reading | Adult irons |
| Big fuse bead cat | 6–7+ | About a week | Patience, counting | Several boards |
What fine motor skills are, in plain terms
Fine motor skill means the small muscles of the hands and fingers working with the eyes. Wikipedia’s article on fine motor skill describes it as the coordination of small muscles in movement with the eyes, hands and fingers. Gross motor skill is the big-body version: running, climbing, kicking.
The same article sketches how it changes through these years. Preschool children typically use a three-finger grasp and can cut shapes out of paper, trace lines with crayons and button clothes. Between five and seven, cuts with scissors get more precise and letters and numbers come out clearer. So the activities below get smaller and more exact as the age goes up. Each one targets a single movement, which makes it easy to see what your child is actually practicing.
Fine motor activities for toddlers (ages 2–3)
Toddlers still grab with the whole hand, and most of them still put things in their mouths. Every activity in this group uses pieces too big to swallow. Keep sessions short and stop while it’s still fun. One adult can run any of these with one or two toddlers. For a whole week of ideas at the older end of this range, our activities for 3 year olds add pretend play, kitchen jobs and active games.
Card posting box
What it practices: turning the wrist and lining an object up with a slot.
You need: a shoebox or an oatmeal canister with a lid, a craft knife for you, and old playing cards or cut squares of cardboard.
How to do it: Cut a slot in the lid a little wider than a card. Show your toddler how to push one card through, then hand over the stack. When that gets easy, turn the box so the slot runs up and down instead of side to side.
It’s done when: the stack is gone. Open the lid together, dump the cards out and start again if your child wants to.
The catch: A slot that’s too tight frustrates a 2-year-old fast. Cut it generously at first and make it narrower later.
Sticker line-up
What it practices: pinching with the thumb and pointer finger, and peeling.
You need: a sheet of large stickers and a piece of paper with a thick marker line across it.
How to do it: Draw a straight line, a zigzag or a big circle on the paper. Your toddler peels a sticker and presses it on the line, one after another, like a train.
It’s done when: the line is covered, or the sticker sheet is empty.
The catch: Peeling the first corner is the hard part. Lift the corner of each sticker slightly before you hand the sheet over, and leave it fully stuck once your child can manage it.
Play dough snakes
What it practices: squeezing, rolling with flat hands, and poking with one finger.
You need: store-bought play dough, a placemat or tray, and a few big safe items to press in, such as a large cookie cutter or a toy car.
How to do it: Roll a snake together, flat hands moving back and forth. Then poke holes in it with one finger, squeeze it into a ball, and flatten it. Pressing the toy car through the dough leaves tire tracks to look at.
It’s done when: the dough goes back in its tub with the lid on. Make putting it away part of the activity.
The catch: Keep small accessories out of the tray. Pieces from older children’s dough kits, like tiny shape cutters or beads for decorating, don’t belong with a toddler.
Pouring water
What it practices: two hands working together, one steadying and one pouring.
You need: a dishpan or the bathtub, two plastic cups or small pitchers, and a towel.
How to do it: Fill one cup partway. Your toddler pours it into the other cup, then back again. Add a funnel or a cup with a spout when plain cups get easy.
It’s done when: the water is poured back into the dishpan and the cups are lined up to dry.
The catch: Never step away, even for a moment, when a toddler is near water in a tub or a deep pan. Pouring at the kitchen sink with a stool keeps the water shallow.
Big paper scribbles
What it practices: holding a crayon and controlling where it goes.
You need: a large sheet of paper or a section of a paper grocery bag, painter’s tape, and thick crayons.
How to do it: Tape the paper to the table on all four sides so it can’t slide. Let your toddler scribble freely, then try simple prompts: up and down lines like rain, round and round like a wheel.
It’s done when: your child walks away. Write the date on the back and keep a few. You’ll see the scribbles change over months.
The catch: A fist grip is normal at this age. The CDC’s milestone list puts holding a crayon between the fingers and thumb, not in a fist, at 4 years, so there’s no need to correct a 2-year-old’s grip.
Fine motor activities for preschoolers (ages 3–5)
Preschoolers can pinch, squeeze and start using scissors. This is the age where printable pages earn their place, because a dotted line gives a child a clear target. Most of these work for one adult with up to three or four children at a table.
Scissor lines: straight, then curvy, then zigzag
What it practices: opening and closing scissors while the other hand holds and turns the paper.
You need: child-safe scissors with rounded tips, and a page of lines to cut.
How to do it: Start with straight lines. When your child can follow one to the end, move to gentle curves and then sharp zigzags. Remind them to keep the thumb on top, and to turn the paper rather than their wrist on the curves.
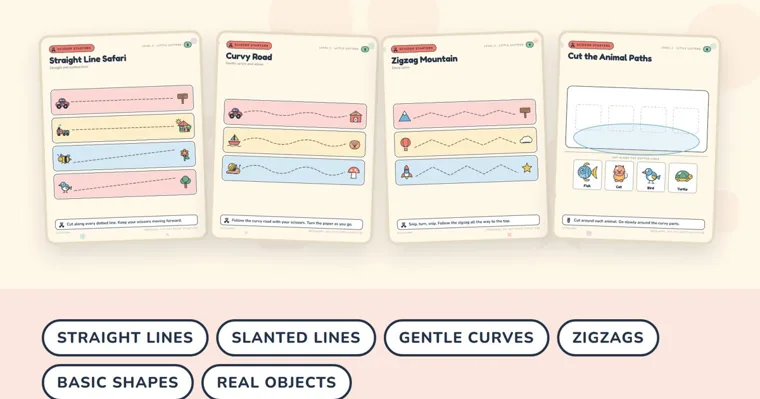
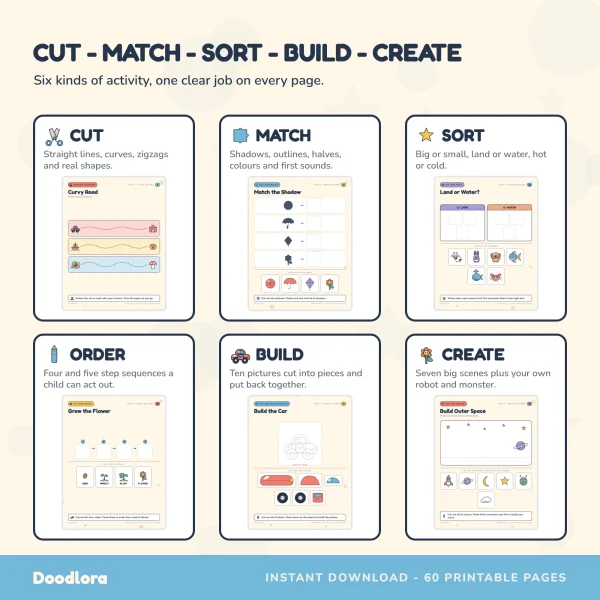
The first pages of our preschool cut and paste worksheets are set up this way. Page 2, Straight Line Safari, has straight and slanted lines. Page 3, Curvy Road, says “Turn the paper as you go.” Page 4, Zigzag Mountain, says “Snip, turn, snip.” Each line runs from a little picture to its goal, like a car to a barn, which gives a child a reason to reach the end.
It’s done when: the scissors reach the picture at the end of the line. One line done well is a good session for a young 3.
The catch: Brand-new cutters often can’t hold the paper and cut at the same time. Hold the far end of the strip for them at first. For a child who is just learning to snip, start with single snips across narrow paper strips before any of these pages.
Pipe cleaner stringing
What it practices: threading, which needs both hands and the eyes working together.
You need: pipe cleaners and large beads or dry tube pasta such as rigatoni.
How to do it: Bend a small knot at one end of the pipe cleaner so nothing slides off. Your child threads the beads or pasta on, one at a time. A pipe cleaner is stiff, so it’s easier than yarn for a first try.
It’s done when: the pipe cleaner is full. Twist the ends together into a bracelet, or bend it into a shape.
The catch: Use beads too large for a younger sibling to swallow, and sweep up dropped ones. The CDC lists stringing items together, like large beads or macaroni, as a 3-year-old milestone, so big pieces are the right size anyway.
Clothespin clips
What it practices: pinch strength in the thumb and fingers.
You need: spring clothespins and a paper plate or the rim of a box. Marker dots in a few colors on the plate rim make it a matching game.
How to do it: Your child pinches a clothespin open and clips it to the plate edge. Color the clothespins with markers to match the dots, or count them as they go on.
It’s done when: every clothespin is clipped. Taking them off again is a second round.
The catch: Stiff clothespins tire small fingers quickly. If your child switches to using two hands or gives up, test a few and keep the looser ones.
Tong transfer
What it practices: squeezing and releasing at the right moment.
You need: child-sized tongs or salad tongs, large pom-poms, and two bowls or a muffin tin.
How to do it: Put the pom-poms in one bowl. Your child moves them one by one into the other bowl, or into each cup of the muffin tin. Sorting by color makes it last longer.
It’s done when: the first bowl is empty, or every muffin cup holds one pom-pom.
The catch: Small pom-poms are a choking hazard around children under 3. Use the biggest ones you can find, and put them away before a toddler joins.
Eyedropper colors
What it practices: a fingertip squeeze that’s controlled, not all at once.
You need: a plastic eyedropper or pipette, cups of water with a drop of food coloring, an ice cube tray, and a towel underneath.
How to do it: Your child squeezes the bulb, dips the dropper in a colored cup, releases to fill it, then squeezes drops into the ice cube tray. Mixing blue and yellow drops in one cube turns it green.
It’s done when: every cube in the tray has color in it.
The catch: Most children squeeze the bulb hard and empty it in one go at first. Show “squeeze, then let go slowly” and expect a wet towel.
Button practice
What it practices: two hands working in small, exact moves.
You need: an old cardigan or shirt with large buttons, laid flat on the table.
How to do it: Start with unbuttoning, which is easier. Then button the bottom one together: one hand pushes the button halfway through, and the other hand pulls it the rest of the way.
It’s done when: one row of buttons is done. Then let your child try it on.
The catch: Small shirt buttons are much harder than coat buttons. The CDC’s lists place unbuttoning some buttons at 4 years and buttoning some at 5, so start big and expect slow progress.
First cut-and-paste page
What it practices: cutting around a shape and then placing it in a spot, which is two skills at once.
You need: a printed page, rounded-tip scissors and a glue stick.
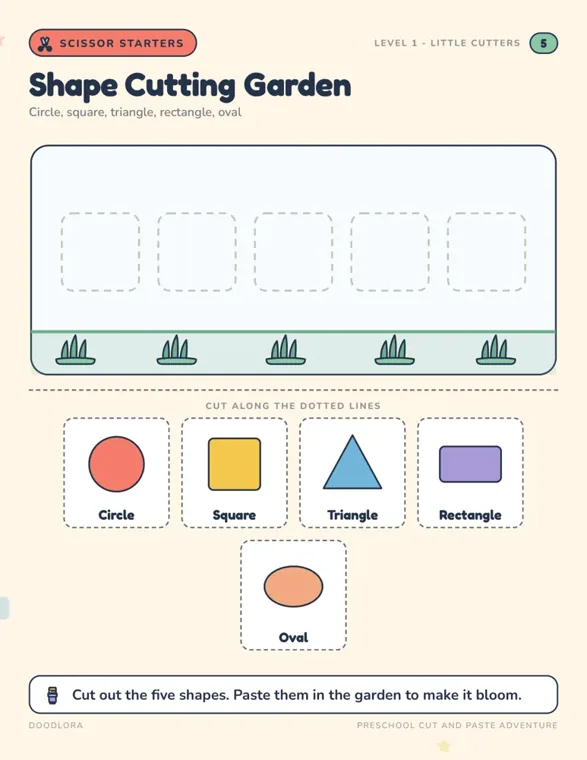
How to do it: Cut out every piece first, then lay them all out, then glue. The printing guide that comes with our cut-and-paste book recommends exactly that order, and suggests a glue stick over liquid glue, which soaks through and curls the page. Page 5, Shape Cutting Garden, is a gentle first try: five plain shapes, each in its own dashed box. After that, the build-the-picture pages (pages 9 to 18) ask a child to cut 3 to 6 pieces and assemble a picture on an outline.
It’s done when: every piece is glued in its place.
The catch: Print at Actual Size. The guide warns that Fit to Page shrinks the pieces so they no longer fit the spaces they belong in.
Fine motor activities for ages 5–7 (kindergarten and up)
Children in this group can hold a pencil with a three-finger grip and make precise cuts. The activities get smaller and take longer. Many 6- and 7-year-olds can do them alone once you’ve set them up, but the fuse bead ironing stays an adult job.
Cut-and-order pages
What it practices: cutting square corners neatly, then placing pieces in a set order.
You need: a printed sequencing page, scissors and a glue stick.
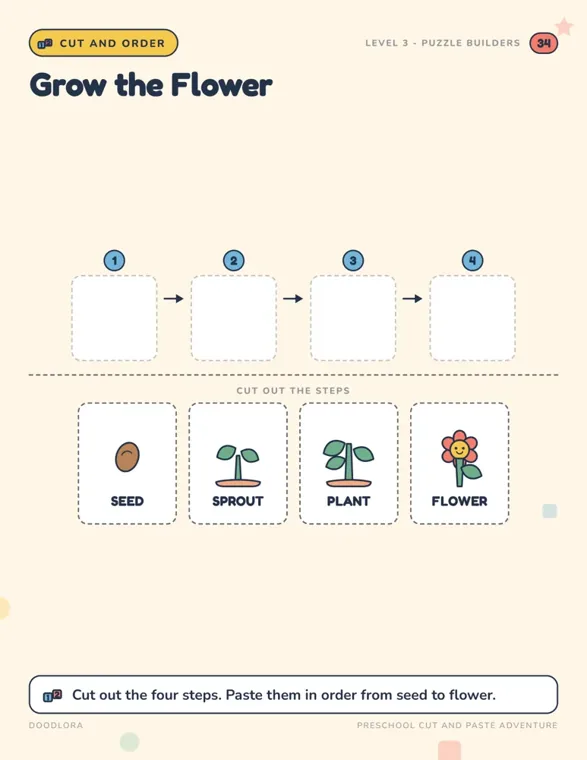
How to do it: Your child cuts out each step card along the dashed square, then pastes the cards into the numbered boxes in order. In our cut-and-paste book, pages 34 to 40 work this way, from Grow the Flower and Make a Sandwich to Wash Your Hands and Build a Snowman. The book marks itself for ages 3 to 5, but these pages still give a 5- or 6-year-old good practice with corners.
It’s done when: all the cards are pasted in order. Ask your child to tell you the steps out loud using the pictures.
The catch: Children often cut off the label along with a corner. Point out that the word is part of the card, so the cut goes around it.
Burlap sewing
What it practices: gripping a needle and pushing it in and out at a chosen spot.
You need: a square of burlap or another loose-weave fabric, an embroidery hoop if you have one, a blunt plastic yarn needle, and yarn.
How to do it: Stretch the burlap in the hoop, or tape its edges to a piece of cardboard. Thread the needle and knot the end of the yarn. Draw a simple shape on the burlap with a marker, and your child stitches along it, up and down.
It’s done when: the yarn reaches the end of the shape. You tie it off at the back.
The catch: Long yarn tangles and knots on every pull. Cut a piece no longer than your child’s arm.
Paper fan folding
What it practices: sharp creases, which need pressure and both hands working together.
You need: a sheet of printer paper, crayons, and tape or a stapler for you.
How to do it: Your child decorates one side first. Then fold a strip about an inch wide along the short edge, flip the paper over, and fold the next strip back. Keep flipping and folding until the sheet is one long pleated strip. Pinch one end and tape it, and it opens into a fan.
It’s done when: the fan opens. Let your child fan you.
The catch: Uneven first folds throw off every fold after them. Make the first fold together and let your child press it flat with a thumbnail before going on.
Coin stacking
What it practices: a precise pincer grip and placing things carefully.
You need: a handful of mixed coins and a piggy bank.
How to do it: Sort the coins by type, then build towers of each kind. Pick coins up off a flat table without sliding them to the edge. Finish by posting them one at a time into the piggy bank slot. Counting how many fit in each tower adds some math.
It’s done when: every coin is in the bank.
The catch: Coins are small enough for a young child to swallow. Do this only when there are no toddlers or babies in the room, and count the coins before and after.
Small fuse bead animal
What it practices: a precise pincer grip, plus reading a chart square by square.
You need: a square pegboard, 0.2-inch (5 mm) fuse beads in the chart’s colors, a printed pattern, an iron and ironing paper for the adult.
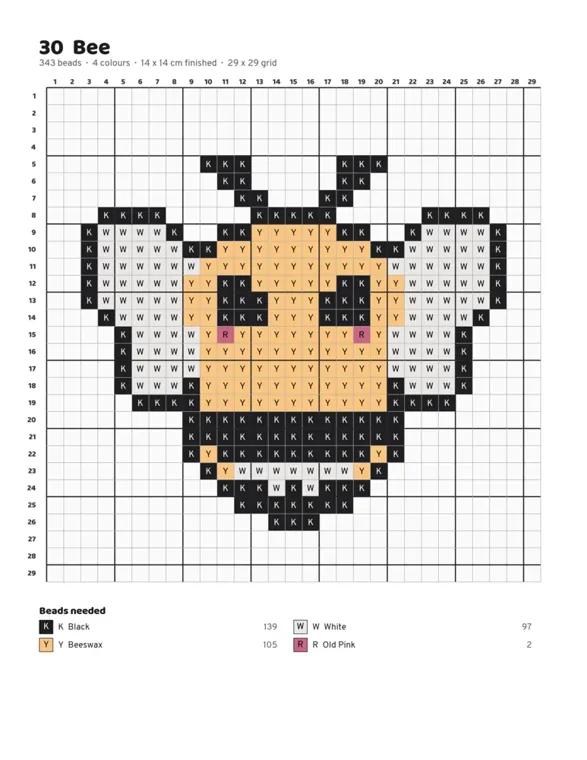
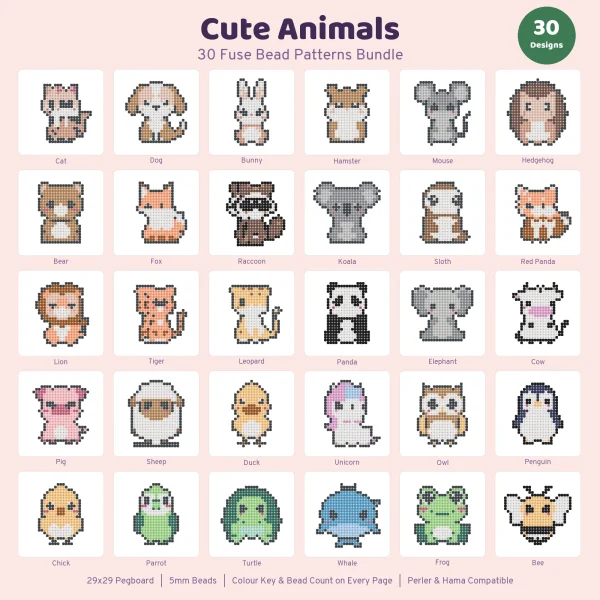
How to do it: Sort the beads by color into small dishes first. Your child places one color at a time, counting across from the numbered edge of the chart. Our cute animal fuse bead patterns are drawn on a 29 by 29 grid, so each animal fits one square pegboard. The bee on page 30 takes 343 beads in four colors and finishes about 5.5 inches (14 cm) square. Every square on the chart carries a letter for its color, so the pages work printed in black and white. The ironing steps are in our guide on how to iron fuse beads.
It’s done when: an adult has ironed it, it has cooled flat, and it lifts off the board in one piece.
The catch: Fuse beads are small parts. The Consumer Product Safety Commission’s rule at 16 CFR part 1501 bans toys intended for children under 3 if they have parts small enough to fit its small-parts test cylinder. A related rule, 16 CFR 1500.19, requires a choking-hazard warning on toys and games with small parts meant for children at least 3 but under 6. Keep the bead tub off the table, count out a dish at a time, and clear the floor before a younger child comes near. A few hundred beads is also a lot in one go. Split the work over two sittings, and park the board flat on a high shelf in between.
Big fuse bead cat
What it practices: patience and careful counting over several days. The hand work is the same as the bee, stretched across a much bigger chart.
You need: several square pegboards that link together, a lot of 0.2-inch (5 mm) beads, and a printed chart.
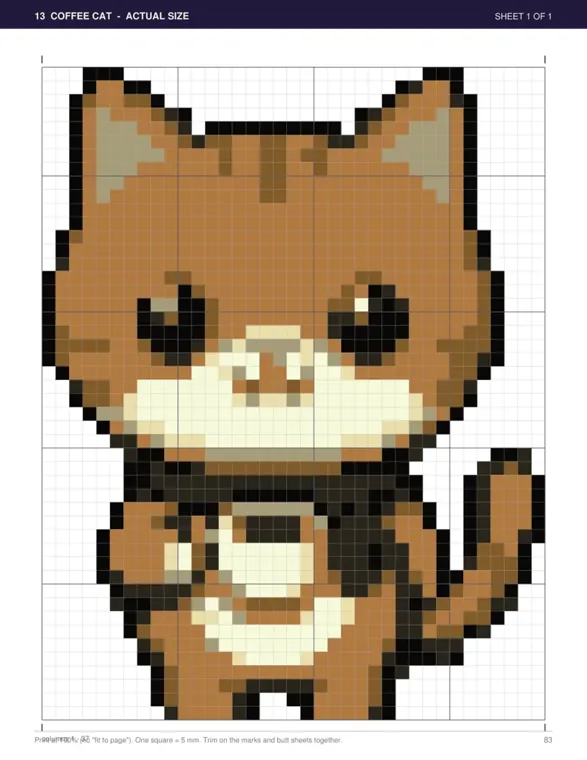
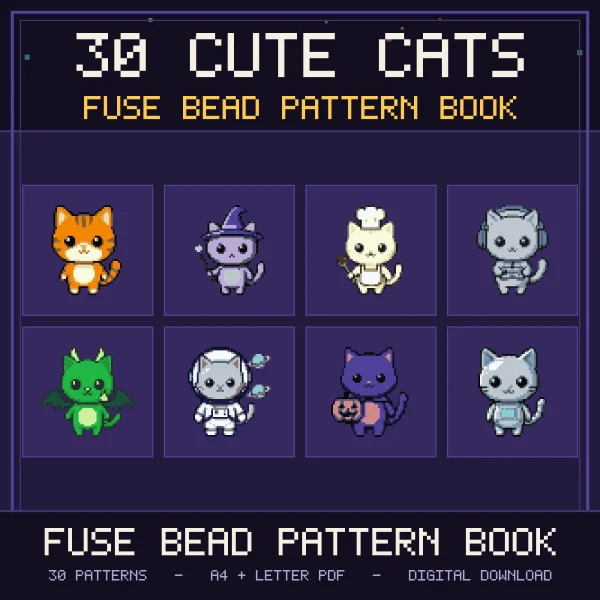
How to do it: This is a project for a patient 6- or 7-year-old, or for a parent and child working together. Our cat fuse bead patterns are much bigger than the small animals. The orange tabby on page 5 is 39 by 50 beads, uses 1,415 beads in seven colors, and finishes at about 7.7 by 9.8 inches (195 by 250 mm). That’s more than one 29 by 29 board can hold, so link boards together. At the back of the book every cat is printed again at actual size, one square to a 0.2-inch (5 mm) bead. The coffee cat’s sheet on page 83 says to print at 100%, with “fit to page” turned off. Lay that sheet beside the boards and match bead for bead. The book’s how-to page suggests working in blocks of ten, following the thick grid lines on the charts.
It’s done when: the adult has ironed both sides and the cat has cooled under a book, which the how-to page suggests so it doesn’t curl.
The catch: Over 1,000 beads is too much for one sitting at this age. Set a goal of a few rows a day and leave the boards somewhere flat where nobody will bump them. The same small-parts rules from the bee apply.
Is my child on track?
Children pick up these skills at very different speeds, and one activity that’s hard doesn’t mean much. The CDC’s milestone checklists describe what most children, 75% or more, can do by a certain age. Here are the hand-related items on them:
| By age | Hand skills on the CDC checklist |
|---|---|
| 2 years | Eats with a spoon |
| 3 years | Strings items together, like large beads or macaroni. Uses a fork |
| 4 years | Holds a crayon or pencil between fingers and thumb, not a fist. Unbuttons some buttons. Pours water with adult supervision |
| 5 years | Buttons some buttons |
The CDC’s advice is to act early when you have concerns: talk with your child’s doctor and ask about developmental screening. These activities are play and practice. They aren’t a test or a substitute for that conversation.
When a fine motor activity falls apart
A few problems come up across all of these, whatever the age.
- Your child gives up fast. Make the job smaller. Cut one line instead of four, or put out five beads instead of fifty. Finishing something small matters more than the size of the task.
- Hands get tired. Pinching, squeezing and cutting all tire small hands. Switch to a big-muscle activity, then come back. Our screen-free activities for kids include active games for in between.
- Siblings of different ages want in. Give each child the version for their age at the same table. A toddler posts cards while a 6-year-old strings beads, but only if the beads stay in the older child’s dish.
- The page isn’t working. Check the printer settings before blaming the child. Fit to Page shrinks cut-and-paste pieces, and actual-size bead sheets only line up when printed at 100%.
Printables from this article
Related articles
Kids Activity Books
Letter M Craft Ideas: Monkey, Mouse & Mushroom for Preschool
Twelve letter M crafts grouped by who is at the table, from a foil-print moon for one toddler to monkeys swinging on a paper-chain vine for a whole class, with ages, minutes, supplies, steps and where each one tends to go wrong.
Kids Activity Books
Letter R Crafts for Preschool: Raccoon, Rabbit & Rainbow
Eleven letter R crafts grouped by what the child is into, from a sticky tissue rainbow for 2-year-olds to a raccoon shadow puppet, with ages, minutes, supplies, steps and the usual slip.
Kids Activity Books
Letter D Crafts: Dinosaur, Dog & Donut Ideas for Preschool
Eleven letter D crafts sorted by age, from a play dough D for 2-year-olds to a fuse bead dinosaur footprint, with supplies, times, steps and the snag in each one.