Bug Crafts for Kids: Ladybug, Caterpillar and Dragonfly

The easiest bug crafts for 2- to 5-year-olds are a paper plate ladybug and an egg carton caterpillar. Each takes about 20 minutes of hands-on time plus paint drying, and needs only paint, glue, paper and a few pipe cleaners. Kids from 5 to 8 can build a ladybug from separate wing pieces, count the spots on a ladybug template, or make a clothespin dragonfly. Kids 8 and up, teens and adults can make bug field-guide cards or tape a dragonfly silhouette to a window.
Every time below is a planning estimate for a calm group, not a measured result. Paint drying is extra, so start the wet projects first and come back to them.
Pick a bug craft by age, time and mess
Use this table to choose before you gather anything. “Mess” means paint or glue that needs a cover on the table. A template is optional for most of these; where one helps, the section says which page to print. Print templates on card stock for anything you’ll cut and on plain copy paper for crayons, and see our guide to printing coloring pages for paper weight and why thin lines sometimes print gray.
| Craft | Ages | Hands-on time | Mess | Needs a template? |
|---|---|---|---|---|
| Paper plate ladybug | 2–5 | 20 min + drying | Paint | No |
| Egg carton caterpillar | 3–6 | 20 min + drying | Paint | No |
| Fingerprint ladybugs on a leaf | 2–5 | 10 min | Paint on fingers | No |
| Paper chain caterpillar | 4–7 | 15–20 min | Glue stick | No |
| Build-a-ladybug with wing pieces | 5–8 | 20 min | Glue stick | Yes |
| Count-the-spots ladybug | 4–6 | 10–15 min | Dot markers or stickers | Yes |
| Counting caterpillar | 4–7 | 10–15 min | Crayons | Yes |
| Caterpillar life cycle strip | 5–8 | 20 min | Glue stick | Optional |
| Clothespin dragonfly | 5–9 | 15 min | Glue or tape | No |
| Painted rock ladybugs | 5 and up | 30 min + drying | Paint | No |
| Paper firefly jar | 6 and up | 20 min | Glue | No |
| Bug field-guide cards | 8 and up | 30–45 min | Colored pencils | Yes |
| Dragonfly window silhouette | 9 and up, adults | 30 min | Craft knife or scissors | Yes |
| Dragonfly stained-glass coloring | 8 and up, adults | 30–60 min | Markers | Yes |
If you have one craft session for mixed ages, the paper plate ladybug works for the youngest and the field-guide cards keep older kids busy at the same table. Both use red, black and white paint or pencils, so you only set out one palette.
Bug crafts for toddlers and preschoolers (ages 2 to 5)
At this age the craft is mostly painting and sticking. Pick one with a single wet step, cover the table, and keep wipes within reach before the first hand goes into the paint. If any child still puts things in the mouth, draw the eyes on with a marker instead of gluing on googly eyes or pom-poms.
Paper plate ladybug
Who and how long: ages 2 to 5, one adult for every three or four kids, about 20 minutes plus drying.
You need: one paper plate per child, red paint, a black marker or black paper, a black paper circle about 3 inches across for the head, glue stick, and scissors for the adult.
How to make it: Have the child paint the back of the plate red and set it aside to dry. Cut a straight line from the edge to the center so the plate opens into two “wing cases” when you overlap or spread them. Once the paint is dry, the child glues the black head circle at the top, then presses on black paper spots or draws them with a marker. Draw a line down the middle to show where the two wing cases meet.
How it ends: Count the spots out loud together, then write the child’s name on the back.
The snag: Kids love to paint the spots while the red is still wet, and the black turns into a brown smear. Do the spots on a second day, or use cut paper spots.
Egg carton caterpillar
Who and how long: ages 3 to 6, about 20 minutes plus drying.
You need: a cardboard egg carton cut into a strip of four to six cups, green paint, two short pieces of pipe cleaner for antennae, a marker, and a pencil for poking holes.
How to make it: An adult cuts the carton into a strip and pokes two small holes in the front cup. The child paints all the cups green, then adds a face on the front cup with a marker once it’s dry. Push the two pipe-cleaner pieces through the holes and curl the tops.
How it ends: Ask how many body bumps their caterpillar has, and line all the caterpillars up on a windowsill.
The snag: Foam cartons won’t hold paint well. Use the gray cardboard kind.
Fingerprint ladybugs on a leaf
Who and how long: ages 2 to 5, about 10 minutes.
You need: a green paper leaf shape, red washable paint on a plate, a fine black marker.
How to make it: The child presses a red fingertip onto the leaf three to five times. When the prints dry, an adult or older child adds a black head, a line down the middle and dots for spots with the marker.
How it ends: Each child counts how many ladybugs are on their leaf.
The snag: Too much paint gives one big blob instead of a round print. Dab the finger once on a paper towel before each print.
Ladybug, caterpillar and dragonfly crafts for ages 5 to 8
From about kindergarten, kids can follow two or three steps on their own and cut along a thick line. These crafts are where a printed template saves time, because the shapes are already drawn and the child can spend the session cutting, counting and gluing.
Build-a-ladybug with separate wing pieces
Who and how long: ages 5 to 8, about 20 minutes. Younger kids can do it if an adult cuts the parts first.
You need: a printed ladybug body and two wing panels on card stock, a red crayon or marker, scissors, glue stick, and a brad fastener if you want the wings to open.
How to make it: Color the two wing panels red and leave the spot circles black or white. Cut out the body and both panels. Glue each panel over one side of the body so they meet down the middle, or attach both with one brad at the top so the wings swing open to show the body underneath.
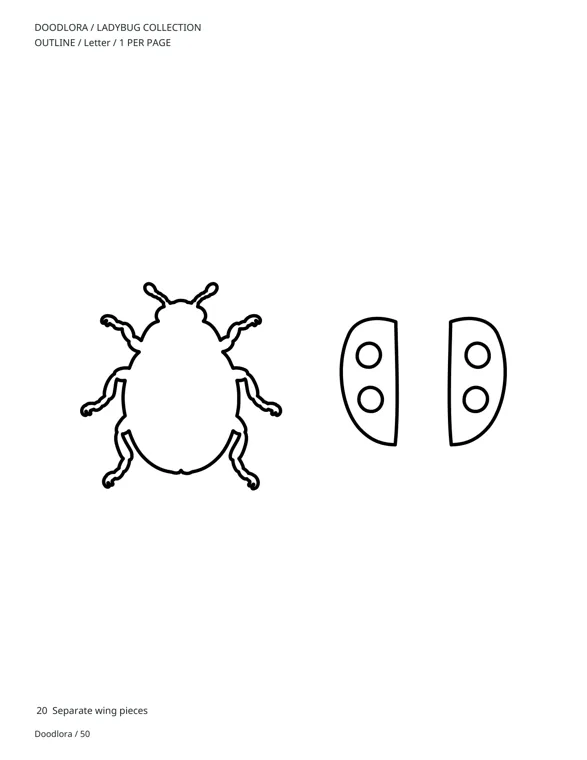
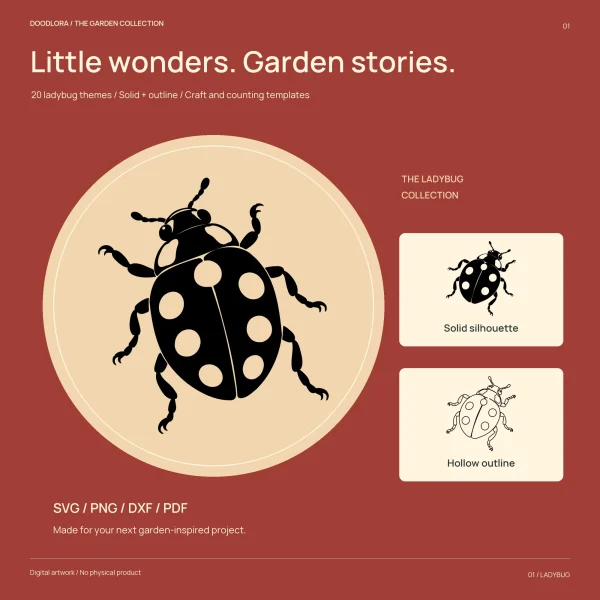
Our ladybug outlines include this as design 20, a body with two separate wing panels. The guide that comes with the set says to cut the parts and glue the panels over the body, with an adult supervising the cutting. In the outline version each panel has two spot circles, so a finished ladybug has four spots.
How it ends: Kids open and close the wings and point to where the legs attach.
The snag: The legs are thin and bend off at the tips. Let younger kids cut around the legs in a rough block instead of following every bend.
Count-the-spots ladybug
Who and how long: ages 4 to 6, about 10 to 15 minutes.
You need: a printed ladybug with empty spot circles, dot markers or round stickers, and a red crayon.
How to make it: Color the shell red around the circles. Then fill each circle with a dot marker or sticker while counting out loud. For a math twist, call out a number and have the child fill only that many.
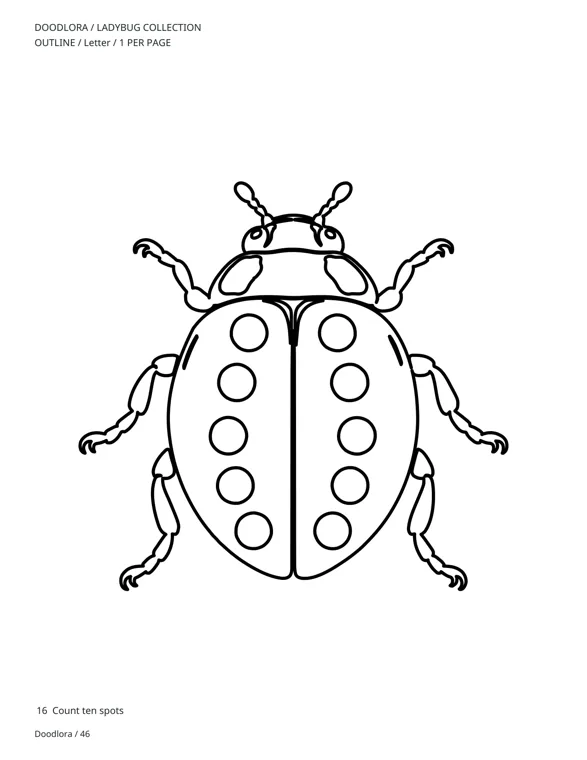
The ladybug set has a four-spot counting page and a ten-spot counting page. Start with four for preschoolers and move to ten when they can count that far. Use the outline pages (31 to 50 in the US Letter PDF), not the solid ones, because the solid pages are filled black and there’s nothing to color.
How it ends: The child counts the spots on each side, then the whole ladybug. Five and five makes ten, so this one quietly turns into an addition lesson.
The snag: Real ladybugs don’t all have the same number of spots, and kids often ask why theirs has ten. Wikipedia’s ladybug page says there are more than 6,000 described species, and the seven-spot ladybird is the most common in Europe. A ten-spot paper ladybug is a counting tool, not a real species chart.
Counting caterpillar
Who and how long: ages 4 to 7, about 10 to 15 minutes.
You need: a printed caterpillar with empty body circles, crayons, and a pencil.
How to make it: Write the numbers 1 to 10 in the circles from the tail to the head, or 1 to 5 for younger kids. Color each body segment a different color, then add legs under each bump.
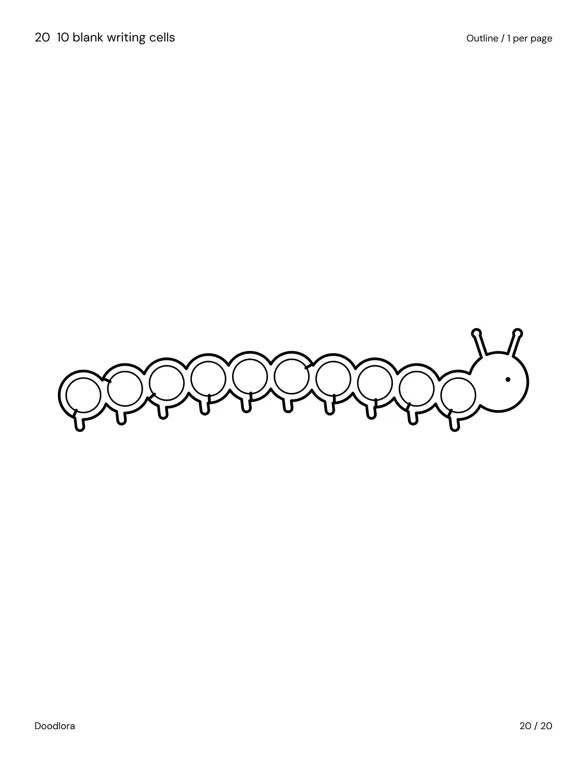
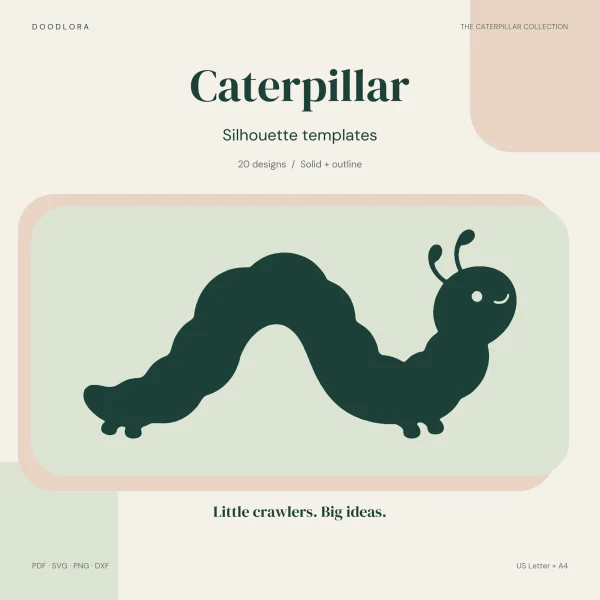
Our caterpillar silhouettes have one caterpillar with five blank circles and one with ten. The guide says the head isn’t a writing cell and the circles are for learning, not a count of real body segments. The empty circles are only in the outline files; the solid files have the body filled black.
How it ends: Read the numbers back from head to tail and see if they still go in order.
The snag: Kids often start writing at the head. Point to the tail first and say “the caterpillar starts here,” so the numbers run in the direction it crawls.
Paper chain caterpillar
Who and how long: ages 4 to 7, about 15 to 20 minutes.
You need: green and yellow paper strips about 1 by 8 inches, a glue stick or tape, a paper circle for the head, and markers.
How to make it: Loop the first strip into a ring and glue the ends. Thread the next strip through and close it, and keep going until the chain is as long as you want. Glue the head to the last ring and draw a face and two antennae.
How it ends: Measure the caterpillars against each other, or hang them from a doorway.
The snag: Glue stick needs a few seconds of holding before a ring stays shut. Tape is faster for kids who get frustrated.
Caterpillar life cycle strip
Who and how long: ages 5 to 8, about 20 minutes.
You need: a strip of card stock divided into four boxes, crayons, glue, and a leaf, a caterpillar, a pupa and an adult drawn or printed small.
How to make it: Label the boxes egg, larva, pupa and adult. Kids draw or glue the right picture in each box and add arrows between them. The caterpillar set has a ready-made version of this as design 17: egg, larva, pupa and adult joined by arrows in a loop.
What’s true: Wikipedia’s caterpillar page says caterpillars are the larval stage of butterflies and moths, and its pupa page says the pupa of a butterfly is called a chrysalis. That’s why the “pupa” box gets the hanging shape, not a cocoon.
How it ends: Kids read the strip in order, then explain where the cycle starts again.
The snag: This craft drifts into butterflies fast. Keep the caterpillar as the star: two of the four boxes are about it before it changes.
Clothespin dragonfly
Who and how long: ages 5 to 9, about 15 minutes.
You need: a wooden clip clothespin, markers or paint for the body, two pipe cleaners or two strips of wax paper or tissue paper for wings, glue, and two small dots for eyes drawn with a marker.
How to make it: Color the clothespin for the body. Twist two pipe cleaners into two loops each, or fold two tissue paper strips, and clip them in the middle so two wings stick out on each side. Draw two big eyes at the clip end.
What’s true: Dragonflies have two pairs of strong, transparent wings and a pair of large compound eyes, according to Wikipedia’s dragonfly page. That’s the reason for four wings and big eyes on the clip.
How it ends: Clip the dragonflies onto a string or a plant pot.
The snag: Kids often add only two wings. Ask them to count the wings on a picture first.
Bug crafts for kids 8 and up, teens and adults
Older kids want something that looks real or lasts. These crafts lean on detail, coloring and careful cutting.
Painted rock ladybugs
Who and how long: ages 5 and up, about 30 minutes plus drying. Older kids add more detail.
You need: smooth, roughly oval rocks, red and black acrylic paint, a white paint pen or marker, small brushes.
How to make it: Wash and dry the rocks. Paint the top red and let it dry. Paint a black head at one end and a line down the middle, then dot the spots with the end of a brush handle. Add two white eyes on the head.
What’s true: Wikipedia describes ladybugs as oval beetles with a domed back and a flat underside, and says red with black spots warns predators they taste bad. A rounded, flat-bottomed rock fits that shape well.
How it ends: Set them in a garden bed or a potted plant.
The snag: Acrylic paint on a cold rock dries slowly and smears. Paint indoors at room temperature.
Paper firefly jar
Who and how long: ages 6 and up, about 20 minutes.
You need: a clean plastic jar or a paper cylinder, yellow and black paper, glue, and a battery tea light if you want a glow.
How to make it: Cut small oval bodies from black paper and add a yellow tail end to each. Give each firefly two wing shapes. Glue them inside or on the outside of the jar, then set a battery tea light inside.
What’s true: Wikipedia’s firefly page says fireflies are soft-bodied beetles, also called lightning bugs, and that they glow mainly during twilight to attract mates.
How it ends: Turn off the lights and look at the jar together.
The snag: Use battery tea lights only. A real candle inside a paper or plastic jar is a fire risk.
Bug field-guide cards
Who and how long: ages 8 and up, teens and adults, about 30 to 45 minutes.
You need: printed bug drawings, card stock, scissors, colored pencils, and a pen.
How to make it: Cut out four bugs and glue each to its own card. On the back of each card, write the bug’s name, how many legs it has, and one fact you can check. Color the front from a photo of the real animal.
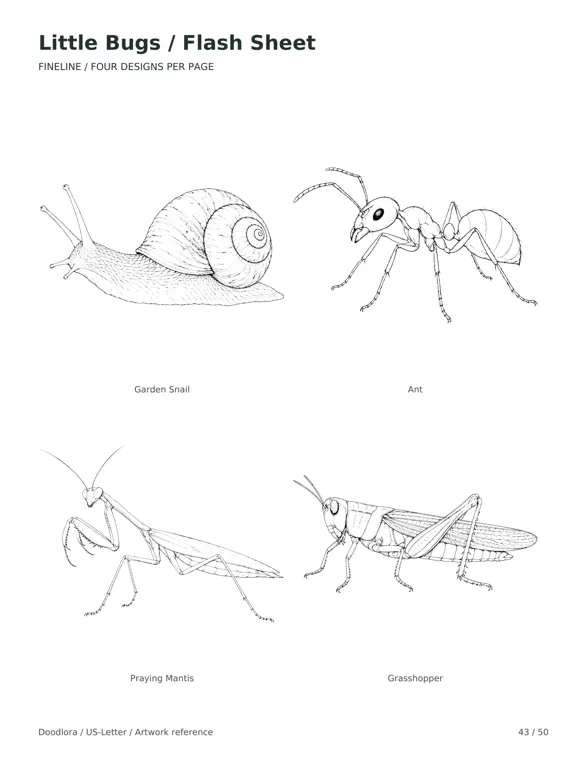
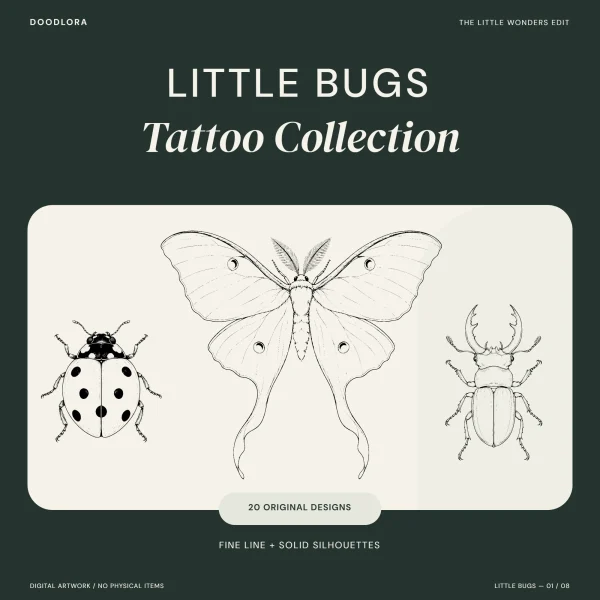
Our bug outlines have 20 different creatures drawn in fine lines with stippled shading, from a ladybug and a stag beetle to a cicada, a praying mantis and a cricket. Pages 41 to 50 of the US Letter PDF are flash sheets with four bugs per page, which is the right size for cards. The guide says to keep a fine-line drawing at least 3 inches wide on paper so the small details still show.
What’s true: Wikipedia’s insect page says insects have a three-part body (head, thorax and abdomen), three pairs of jointed legs, compound eyes and a pair of antennae. It also says spiders are sometimes confused with insects.
How it ends: Kids swap cards and quiz each other on the facts on the back.
The snag: The garden snail on page 43 isn’t an insect, and the set’s own guide says so. That makes it a good test card: ask which of the four doesn’t fit, and why.
Dragonfly window silhouette
Who and how long: ages 9 and up with supervision, and adults, about 30 minutes.
You need: a printed dragonfly silhouette, black card stock, a craft knife and cutting mat for adults or sharp scissors for kids, and removable tape.
How to make it: Print the solid dragonfly at a large size. Tape it over black card stock and cut around the outer edge. Tape the cut shape to a window so the light comes in around it.
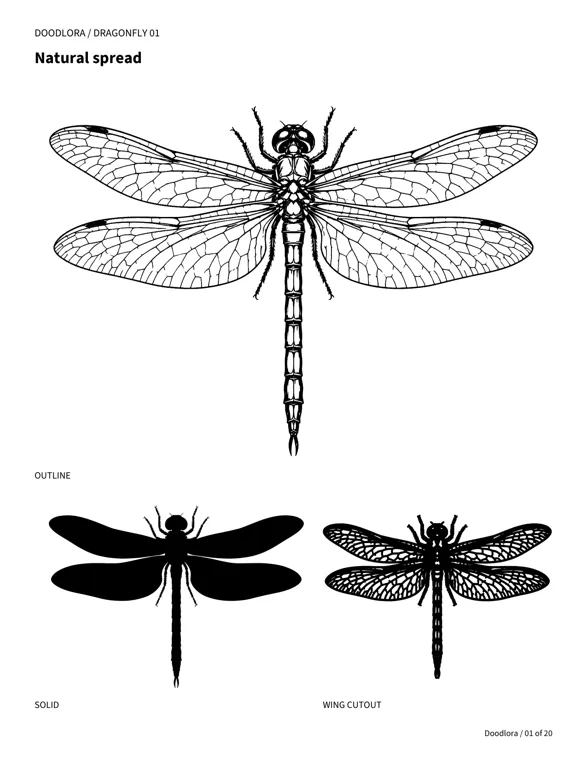
Our dragonfly silhouettes print one design per page, with the large outline on top and the solid version underneath. Four designs (01, 05, 07 and 10) also come as a wing cutout, a single black shape with the wing cells opened up. The set’s guide says the small cutout images in the PDF are reference previews; for a real cutout, use the SVG or DXF file at 8 inches wide or larger and test your paper first.
What’s true: Wikipedia’s dragonfly page says most dragonflies hold their wings flat and away from the body, while damselflies fold their wings along the body at rest. Tape your silhouette with the wings spread flat, and it reads as a dragonfly right away.
How it ends: Ask kids to spot whether a real one outside is a dragonfly or a damselfly by how it holds its wings.
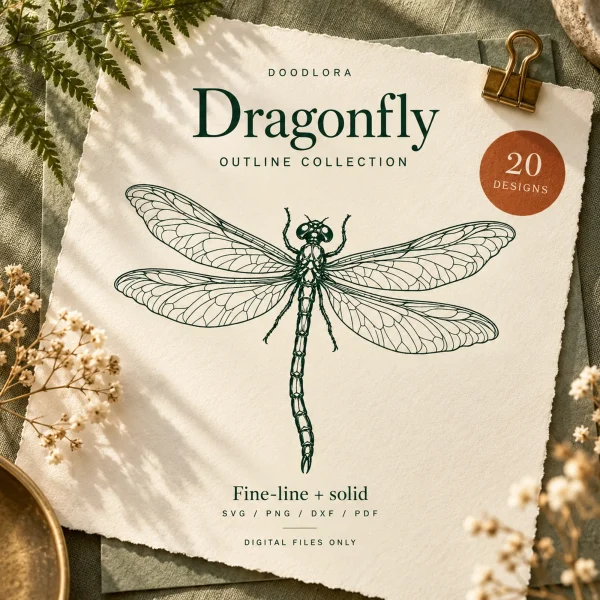
The snag: The fine-line outline isn’t a stencil. The guide says it’s made of many separate lines and dots and sends it to printing, coloring or plotting instead.
Dragonfly stained-glass coloring
Who and how long: ages 8 and up, teens and adults, about 30 to 60 minutes.
You need: a printed dragonfly outline with wing veins, fine markers or colored pencils.
How to make it: Color each wing cell a different shade, light near the body and darker at the tips, like a stained-glass window. Leave the veins white or trace them in black.
How it ends: Frame it or hang it beside the window silhouette.
The snag: The cells are small. Use fine-tip markers, and take breaks so hands don’t cramp.
Turn bug crafts into a quick bug lesson
Every craft above gets better with one true fact. These come from Wikipedia’s pages on insects, ladybugs, caterpillars, dragonflies and fireflies, so you can check them yourself:
| Bug | One fact to share | Craft it fits |
|---|---|---|
| Any insect | Three body parts (head, thorax, abdomen) and six legs | Field-guide cards |
| Ladybug | Called ladybugs in North America and ladybirds in the UK; most eat insects like aphids | Paper plate ladybug, rock ladybugs |
| Ladybug | Develops from larva to pupa to adult | Count-the-spots ladybug |
| Caterpillar | The larval stage of butterflies and moths; most eat plants, often leaves | Egg carton caterpillar, life cycle strip |
| Dragonfly | Spends most of its life as a nymph under water | Clothespin dragonfly |
| Firefly | A beetle, also called a lightning bug | Paper firefly jar |
One word catches kids out. Wikipedia’s insect page says entomologists reserve “bugs” for the true bugs, such as cicadas and shield bugs. In everyday talk, “bug” covers ladybugs, caterpillars and dragonflies too, and that’s how this craft list uses it.
Running a bug craft session with a group
Before kids arrive. Pick two crafts: one wet and one dry. Start the wet one first so it can dry while kids do the dry one. Cut any templates ahead of time for kids under 5.
Stations. For six or more kids, set a painting station and a cutting-and-gluing station. Rotate halfway through. One adult at the paint station is enough for three or four preschoolers.
Going outside. A bug craft pairs well with a short bug walk. Our nature scavenger hunt ideas include a pill bug and an insect on a bloom on the lists, and a look-only rule for things that should stay where they are.
Ending. Leave five minutes at the end for kids to show their bug and say one fact. Collect wet crafts on a tray, not in backpacks.
Printing the bug templates
Print at Actual Size or 100%, not “Fit to page,” or the sizes shift. Use card stock for anything you’ll cut and glue, and plain copy paper for coloring. Use outline pages for coloring and counting, and the solid pages for silhouettes and stencils.
The ladybug set’s PDF runs a cover page, then solid pages, then outline pages, with four-per-page and six-per-page sheets for each. The caterpillar set comes as separate PDFs for one, four or six per page; the four-up and six-up files repeat the same caterpillar on a page, which is handy when a whole class makes the same one.
Printables from this article
Related articles
Outlines & Stencils
How to Draw a Mallard Duck: Drake, Hen and Flying Poses
A swimming mallard drake in ten pencil steps, the changes that turn it into a hen, a flying pose, a pair on the water and the color marks that make the bird read as a mallard.
Outlines & Stencils
Turtle Crafts for Kids: Paper Plate and Sea Turtle Ideas
Twelve turtle crafts sorted by age, each with time, materials, steps and the snag to watch for, plus how to use a printed turtle outline as a cutting template.
Outlines & Stencils
Bird Crafts for Kids and Adults: Owl, Nest and Feeder Ideas
Thirteen bird crafts grouped by who is making them, from a toddler's handprint bird to a framed papercut and a cold-weather pinecone feeder, each with ages, time, supplies, steps and the snag to plan for.