DIY Christmas Ornaments: Paper, Fuse Bead & Salt Dough

The best DIY Christmas ornaments for your house depend on two things: how old the makers are and how long they’ll sit still. A three-year-old can finish a colored paper star in 20 minutes. A ten-year-old can spend three evenings on a fuse bead snowman. Salt dough needs a grown-up for the dough itself, and a printed bookmark turns into a tall tag ornament in half an hour.
The 12 ornaments below are grouped by age, with the time, the supplies and the one step that usually goes wrong for each. Ages and times are our planning estimates, not measurements, so stretch them for slow colorers and big groups.
| Ornament | Good for ages | Time | What you need | Watch for |
|---|---|---|---|---|
| Coloring-page cutouts | 3 and up | 20–30 min | Printed pages, cardstock, glue stick, ribbon | Print the page smaller first |
| Craft-stick stars | 3 and up | 15 min, plus drying | Craft sticks, white glue, paint or markers | Glue needs an hour or more before hanging |
| Yarn-wrapped cardboard trees | 4 and up | 20–30 min | Cereal-box cardboard, yarn, tape | Cut deep notches so the yarn holds |
| Pipe cleaner candy canes | 4 and up | 10–15 min | Pipe cleaners, red and white pony beads | Beads are a choking risk for toddlers |
| Paper strip balls | 6 and up | 20 min | Six paper strips, a brad or stapler | Strips must be the same length |
| Pleated paper fans | 6 and up | 15–20 min | Patterned paper, glue | Crease each fold hard |
| Filled plastic ornaments | 5 and up | 15 min | Clear plastic fillable balls, paper scraps | Skip glass balls with kids |
| Mini fuse bead snowman or tree | 8 and up | 1–2 sessions | Mini beads, mini pegboard, iron | Regular beads make a piece twice as big |
| Fuse bead lantern or cocoa mug | 8 and up | 1–2 sessions | Beads, pegboards, ribbon | The handle opening is your hanging loop |
| Painted salt dough shapes | Adults make, kids paint | 2 days | Flour, salt, water, oven, paint | Kids shouldn’t handle the raw dough |
| Bookmark tag ornaments | 10 and up | 30 min | Printed bookmarks, cardstock, hole punch | The back prints blank |
| A boxed set of six bead ornaments | Teens and adults | A week of evenings | Mini beads, pegboards, a small box | Pick designs in the same scale |
If you also want Christmas crafts that aren’t ornaments, such as paper snowflakes and a paper chain countdown, see our Christmas activities for kids.
Easy Christmas ornaments for toddlers and preschoolers
Children from about 3 to 5 do best with ornaments that are mostly coloring, sticking and threading, with an adult doing the cutting. Plan 15 to 30 minutes at the table and stop while they’re still having fun. Put a strip of masking tape with each child’s name on the back of every ornament before it goes to dry, because six identical stars are impossible to sort later.
1. Coloring-page cutout ornaments
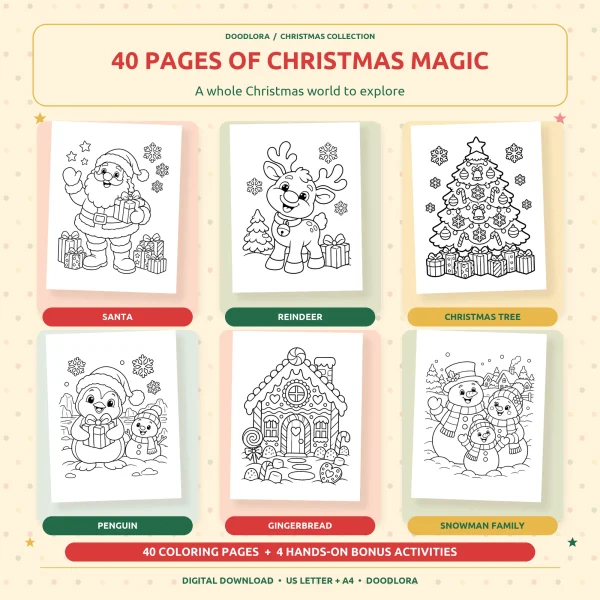
A coloring page cut around its outline makes a flat ornament that a preschooler can color alone. Our Christmas coloring pages have 40 pictures with thick black outlines, one picture per page, plus four bonus pages at the end. Page 22, a kitten batting a hanging ornament on the tree, and page 38, a big star with Santa’s sleigh inside it, both cut out into clean shapes.
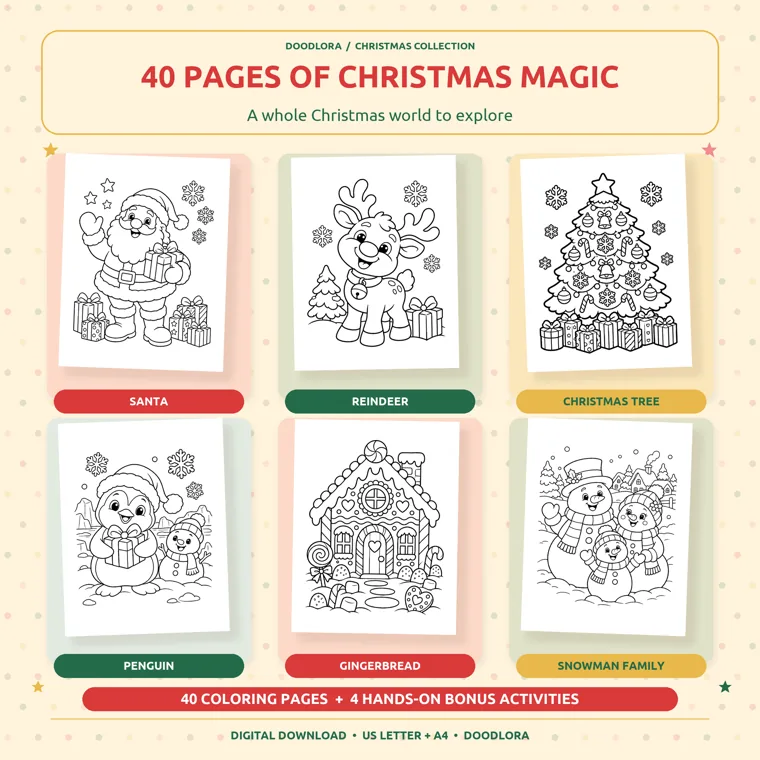
Each picture fills a whole Letter page, which is far too big for a branch. In your printer’s settings, choose two or four pages per sheet, and each picture comes out at a hanging size. Color with crayons or markers, glue the page onto cardstock so it doesn’t curl, and let an adult cut around the outer line. Finish with a hole punch at the top and a loop of ribbon.
Kids under about 4 color better on the full-size page. Let them color it big, then print a smaller copy of the same picture for the ornament and let them fill that one in more loosely.
2. Craft-stick stars
Three craft sticks glued into a triangle, and a second triangle glued upside down on top, make a six-point star. A preschooler can paint or color the sticks in about 15 minutes. White school glue is enough, but the joints need at least an hour, and better overnight, before the star can hang without slipping apart. Lay the stars flat on wax paper to dry.
The common snag is glue on the table instead of the joints. Put a small dot of glue on each stick end and press for a slow count of ten. Glitter glue on the finished star is the part kids remember, so leave it for last.
3. Yarn-wrapped cardboard trees
Cut a triangle about 4 inches tall from a cereal box and snip shallow notches along both long sides. Tape one end of green yarn to the back and let the child wrap it back and forth, catching the notches so the yarn stays put. Most 4- and 5-year-olds can wrap one tree in 20 to 30 minutes.
Shallow notches are where this goes wrong. The yarn slides off and the tree unravels. Cut the notches about a quarter inch deep, and tape the loose end on the back when the child is done.
4. Pipe cleaner candy canes
Thread red and white pony beads onto a pipe cleaner, alternating colors, then bend the top into a hook. A child of 4 or 5 can make one in 10 to 15 minutes, and the hook hangs straight on a branch with no ribbon.
Pony beads are small enough to choke on. The American Academy of Pediatrics’ HealthyChildren site lists toys with small parts among common choking risks and notes that many incidents happen when older siblings hand small objects to a younger child. Do this one at a table that toddlers can’t reach, and count the beads back into the container at the end.
Paper Christmas ornaments for school-age kids
From about 6 to 10, kids can measure, cut and fold on their own, so paper ornaments can take more steps. Plan 15 to 30 minutes each. A stack of patterned scrapbook paper or old wrapping paper makes these look finished without any coloring.
5. Paper strip balls
Cut six strips of paper the same size, about 1 inch by 8 inches. Stack them, push a brad or staple through both ends, then fan the strips out around the center so they form a ball. A child can make one in about 20 minutes.
Uneven strips make a lopsided ball, so measure and cut all six from the same sheet in one go. Tie the ribbon through the top fastener before you spread the strips, because it’s awkward to reach afterward.
6. Pleated paper fans
Fold a 6-by-6 inch square of patterned paper back and forth into narrow pleats, like a paper fan. Pinch it in the middle, fold it in half and glue the two inner edges together. Do the same with a second square and glue the two halves into a full circle. One takes 15 to 20 minutes.
Soft creases make a floppy fan. Have kids run a thumbnail or a ruler edge along each fold.
7. Filled plastic ornaments
Clear fillable ornament balls snap open into two halves. Kids can fill them with shredded paper, curled ribbon scraps, a tiny photo, or cut pieces of a colored page. This takes about 15 minutes and suits kids from 5 up.
Buy the plastic kind for children. Glass ones shatter on the first drop, and the thin edges are sharp. Close the halves over a tray, since dropped scraps go everywhere.
Fuse bead Christmas ornaments
Fuse beads make ornaments that last for years, but they come with a size problem most patterns don’t warn you about. Bead patterns are measured in beads, and regular beads are about 0.2 inch (5 mm) apart on the pegboard. That turns even a small design into a piece wider than your hand.
Our winter fuse bead patterns list sizes for both regular beads and mini beads (about 0.1 inch, 2.6 mm), and the gap is large:
| Design | Beads | Colors | With regular beads | With mini beads |
|---|---|---|---|---|
| Snowy Fir Tree | 1,123 | 7 | about 7.1 × 9.4 in | about 3.7 × 4.9 in |
| Little Snowman | 1,192 | 9 | about 8.3 × 9.4 in | about 4.3 × 4.9 in |
A 9-inch piece weighs down a branch and looks more like a wall hanging than an ornament. For a tree, use mini beads. Keep regular beads for a door, a window or the top of a gift.
The pattern guide says the beads are small parts not for children under 3, children should be supervised, and an adult should handle the iron. For the ironing itself, follow your bead brand’s instructions and our step-by-step guide on how to iron fuse beads.
8. A mini bead snowman, fir tree or mitten
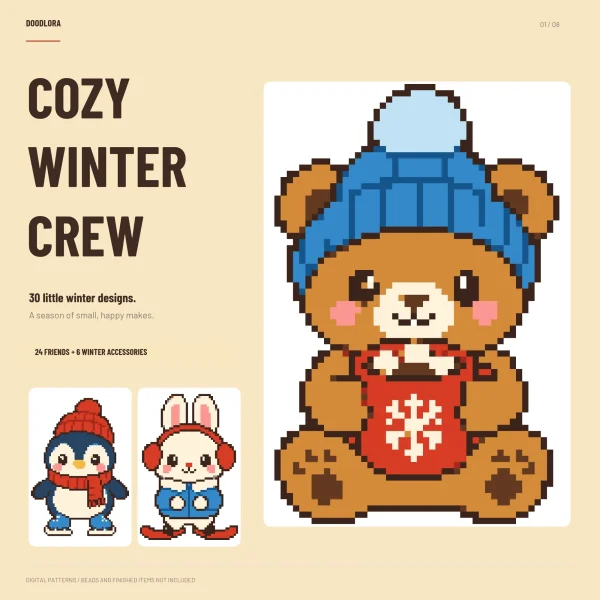
The winter set has six accessory designs that work as ornaments: a snow globe, a hot cocoa mug, a blue mitten, a red pompom beanie, a snowman in a top hat and a snowy fir tree. The rest of the 30 designs are animals, which are bigger and busier.
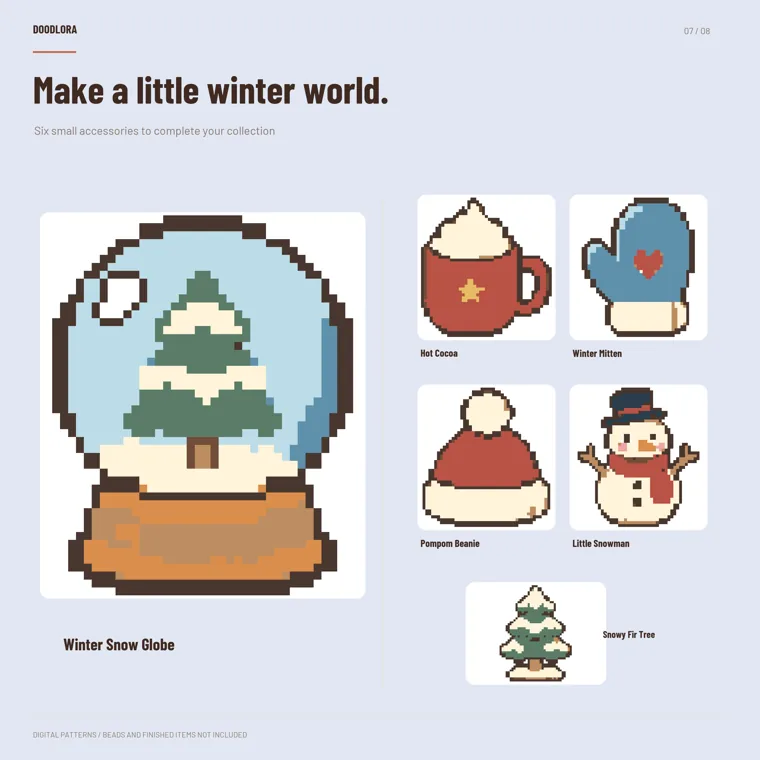
Start with the fir tree. It has the fewest beads in the set and only seven colors. At mini size it fits on one Letter page as an actual-size template, so a child of 8 or older can lay beads straight onto a pegboard set over the print. Plan two sessions of about an hour: one for the top half, one for the bottom half and the ironing.
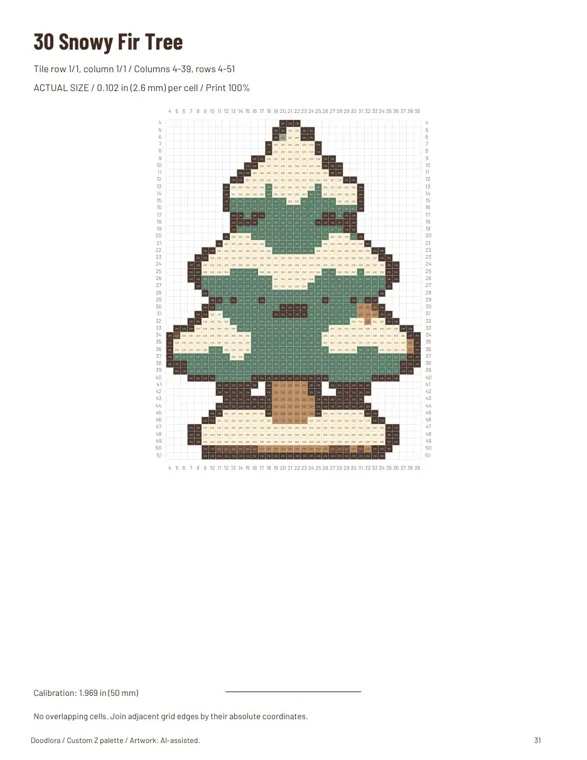
Two printing mistakes ruin a template. First, the reading charts in the download are enlarged for easy reading, so print the “Actual-Size” file for your bead size instead. Second, print at 100% and measure the calibration line at the bottom of the page: it should be 1.969 inches (50 mm). If it’s shorter, your printer shrank the page and the beads won’t line up with the grid.
The color codes are the set’s own codes, not a bead brand’s numbers. Match each one by eye to the beads you have before you start.
9. A fuse bead lantern or cocoa mug with a built-in loop
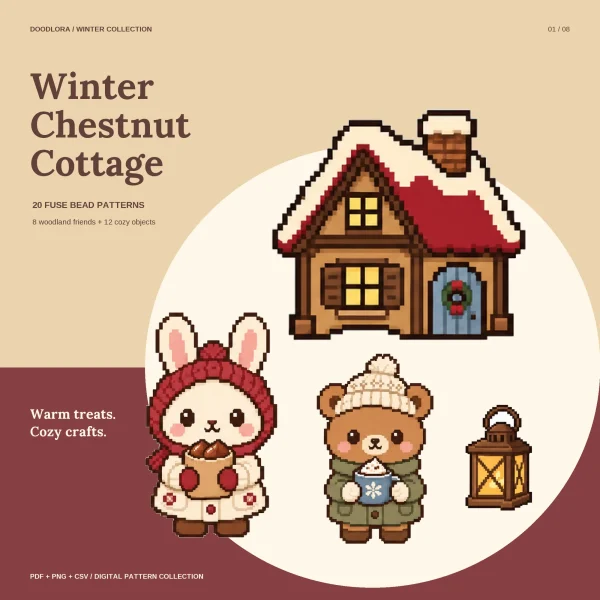
Hanging a fuse bead ornament usually means planning a hole before you iron, as covered in our fuse bead keychain guide. Some designs already have one. In our winter cottage fuse bead patterns, the guide notes that the openings in the mug, the basket and the lantern are empty pegs. That means the cocoa mug’s handle and the lantern’s ring stay open after ironing, and a ribbon goes straight through.
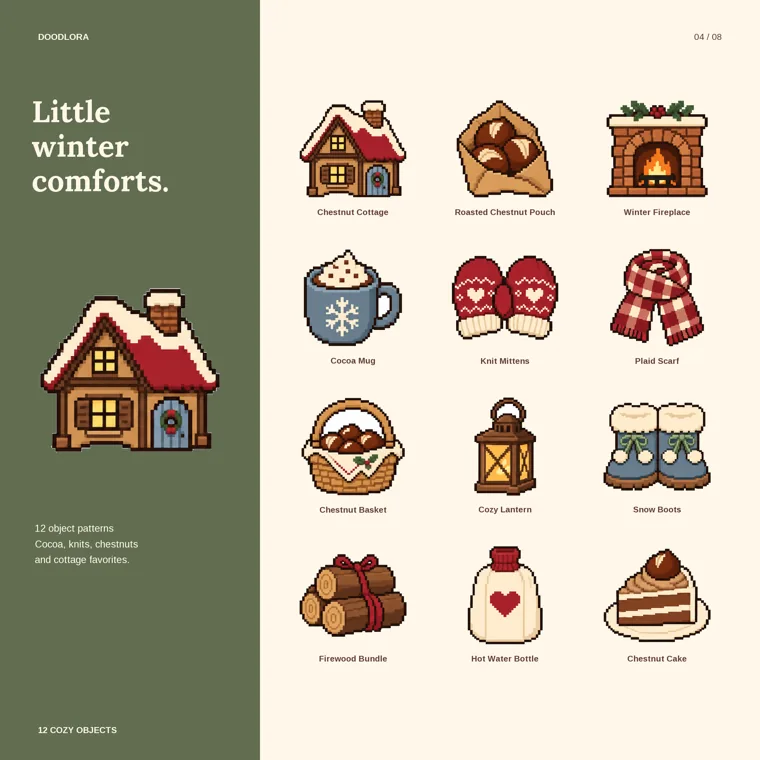
The 12 objects run from 757 beads (the Cozy Lantern) to 1,189 (the cottage). The lantern is 29 beads wide and 43 tall, and the Cocoa Mug is 37 by 37. With mini beads, that’s roughly 3 by 4.4 inches for the lantern and under 4 inches square for the mug. With regular beads, both come out about twice as large.
These charts are numbered reading charts, not placement templates. Kids copy each row from the page onto the pegboard rather than laying beads on top of the print, which suits children of 9 or 10 who can count along a row. Each design also has its own color key, so code 05 on the mug isn’t the same color as code 05 on the lantern.
Salt dough ornaments: the grown-up handles the dough
Salt dough is a plain mix of flour, salt and water, and it’s often used for Christmas decorations. Most craft lists hand the dough straight to the kids. The FDA says not to. Its flour safety guidance points out that flour is a raw food that hasn’t been treated to kill bacteria. It also says not to let children use raw dough for crafts or play clay, because they may put their hands in their mouths after handling it. The same guidance warns against trying to heat-treat flour at home.
10. Painted salt dough shapes
Split the job in two. On day one, an adult mixes the dough, rolls it out, cuts shapes with cookie cutters, pokes a hanging hole with a straw and bakes them following the recipe’s oven time. Once the pieces are baked hard and cooled, the kids take over on day two and paint them with acrylic paint. A coat of clear varnish on top keeps the paint from rubbing off. Painting takes 20 to 30 minutes, and kids from about 4 can do it.
Salt dough is dense and heavy, so roll it thin and keep the shapes small, or they’ll bend the branch. If you have a dog, hang these high. Wikipedia’s salt dough article notes that eating it can cause salt poisoning in pets, and a cookie-shaped ornament at nose height is a real temptation.
Want a handprint keepsake? Have the child press a hand onto paper with paint instead. Pressing a hand into raw dough is exactly the contact the FDA advises against.
Christmas ornaments teens and adults can make as gifts
Older makers can take on ornaments with more cutting, more beads and a bit of finishing, and they make good small gifts. Plan from half an hour for a tag ornament to a week of evenings for a full bead set.
11. Christmas tree bookmark tag ornaments
A tall, narrow tag looks right hanging from a branch, and our Christmas tree bookmarks are already that shape: 12 painted Christmas trees, each 2 by 6 inches, every one decorated differently. The US Letter file fits designs 1 to 5 on the first sheet, 6 to 10 on the second and the last two on a third.
Print at 100% on cardstock, let the ink dry, and cut on the trim marks. The artwork runs right to the edge, so cut exactly on the marks to avoid a white sliver. The bookmarks are printed on one side only, and the back comes out blank. For an ornament seen from both sides, print the same tree twice and glue the copies back to back. Punch a hole above the star, add a ribbon, and write the recipient’s name on a small paper tag tied to the ribbon. One ornament takes about 30 minutes, most of it waiting for glue.
These also double as gift toppers. Tie one to a wrapped present, and after Christmas it goes on the tree or into a book.
12. A boxed set of six fuse bead ornaments
The six winter accessories (item 8) are drawn to the same scale, so a matching set of all six in mini beads makes a gift that looks planned. The snow globe, mug, mitten, beanie, snowman and fir tree take between 1,123 and 1,483 beads each. That’s a week of evenings for one adult, or a weekend for two people sharing pegboards.
Put the set in a small box with tissue between the pieces, and add a ribbon loop to each one before you box them. Write the date on the bottom of the box. Handmade ornaments get kept, and in ten years someone will want to know which Christmas they came from.
Running an ornament table for a class or a party
For a group of 10 to 25 children, give one 45-minute block to one ornament, not a choice of four. Coloring-page cutouts (item 1) or craft-stick stars (item 2) work best. Every child finishes, and there’s nothing hot or small to manage.
Prepare the night before. Print the pages at two or four per sheet and glue them onto cardstock ahead of time. Cut ribbon into 8-inch pieces, and write each child’s name on a paper bag for carrying the ornament home. For the first 30 minutes, kids color. For the next 10, adults cut and punch while kids pick a ribbon color. In the last 5 minutes, everything goes into the bags. Wet glue doesn’t travel well, so skip glitter glue at a party unless the ornaments can stay overnight.
Keep fuse beads, pony beads and salt dough out of group sessions with mixed ages. Beads end up on the floor where small siblings can reach them, and the iron and oven need one adult each.
Hanging, gifting and storing homemade ornaments
- Weight decides the branch. Paper, craft-stick and mini bead ornaments go anywhere. Regular-bead pieces and salt dough belong on the thick inner branches near the trunk.
- Ribbon loops are safer than metal hooks where children help decorate. Loops don’t fall out and won’t scratch small hands.
- Store flat and dry. Lay paper, salt dough and bead ornaments flat in a box with tissue paper between them, so nothing bends under the weight of the pile.
- Label as you pack. A name and year on the back of each ornament saves an argument every December.
When a DIY ornament doesn’t go to plan
- The paper ornament curls. It wasn’t backed. Glue it onto cardstock, put it under a heavy book overnight, then cut it out.
- The fuse bead template doesn’t match the pegboard. The page was scaled. Reprint at 100% and check the 1.969-inch calibration line before building.
- The bead ornament is too big for the tree. It was made with regular beads. Hang it on a door or wreath instead, and switch to mini beads for the next one.
- A child asks to squish the salt dough. Hand them a ball of modeling clay instead of the flour dough you’re baking, and keep the raw dough on the adult side of the table.
- The bookmark tag looks plain from behind. Print a second copy and glue the two back to back.
- The star falls apart on the branch. The glue wasn’t dry. Leave craft-stick ornaments overnight before hanging.
Printables from this article

Related articles
Fuse Bead Patterns
Pony Bead Animals: Keychain Ideas and How to Lace Them
How pony bead animal keychains are laced on one folded cord: what beads and cord to buy, how to start on a keychain ring, read a row recipe, widen and narrow rows with clear support beads, tie off the last row, and run it with kids at a party or in a classroom.
Fuse Bead Patterns
How to Make Kandi Bracelets: Singles, Cuffs and Trading
What kandi is and where PLUR and the trading handshake come from, what beads and cord to buy, how to string and knot a single, how to build a flat peyote cuff and a multi-stitch cuff, and how to read a row-by-row kandi pattern.
Fuse Bead Patterns
Crafts for Kids 6-12: Ideas for 8 and 10 Year Olds
Sixteen crafts for school-age kids, split into one-sitting projects for younger kids and longer builds for 9 to 12, with supplies, time, stopping points and common mistakes.