Hand Craft Butterfly Ideas: Handprint, Life Cycle, Preschool
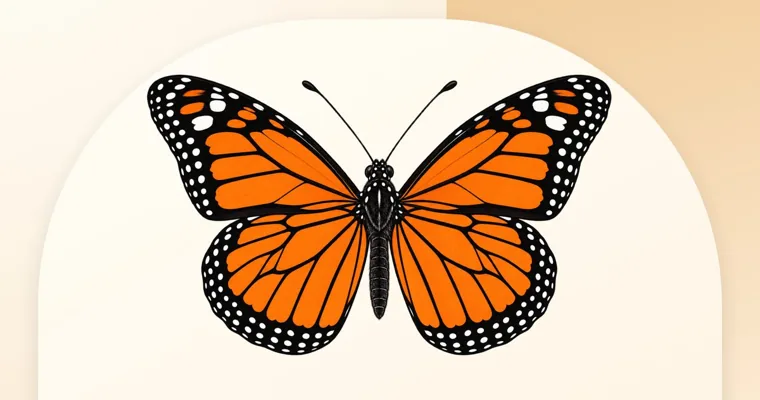
The quickest hand craft butterfly is a handprint butterfly: two painted hands pressed side by side become the wings, and a two-year-old can finish one in about 10 minutes. Preschoolers can add a fold-and-press paint butterfly or a four-stage life cycle plate. Kids from about six can cut a matching butterfly from folded paper. Teens and adults can take on a cut paper stencil or a fuse bead butterfly two feet wide.
The table sorts all 12 by age, time and mess. Treat the ages and minutes as a starting guess for an ordinary table of kids, not a timer.
| Craft | Ages | Time | Main supplies | Mess |
|---|---|---|---|---|
| Handprint butterfly | 2–5 | 10 min + drying | Washable paint, heavy paper | Paint |
| Fold-and-press paint butterfly | 3–6 | 15 min + drying | Butterfly outline, paint | Paint |
| Coffee filter butterfly | 3–7 | 15 min + drying | Coffee filters, markers, clothespin | Damp |
| Tissue paper suncatcher butterfly | 3–7 | 20 min | Contact paper, tissue paper | Low |
| Butterfly life cycle plate | 4–7 | 25–30 min | Paper plate, brown tissue, small butterfly | Low |
| Monarch on milkweed coloring | 5 to adult | 30 min | Monarch outline, orange pencils or markers | None |
| Fold-and-cut butterfly | 6–10 | 20 min | Half-butterfly template, colored paper | None |
| Pleated paper butterfly | 6–10 | 15 min | Two paper squares, pipe cleaner | None |
| Butterfly garland | 7–12 | 45 min | Size trio template, cardstock, string | Low |
| Paper butterfly wall | 10 to adult | 1 hour for about 30 | Cardstock, removable adhesive | None |
| Cut paper butterfly stencil | 12 to adult | 1–2 hours | Stencil print, cardstock, craft knife | Paint |
| Fuse bead butterfly wall piece | 10 to adult | Several sessions | Bead chart, linked pegboards, iron | Low |
Butterfly crafts for toddlers and preschoolers (ages 2 to 5)
Butterfly wings are a gift for little kids, because whatever lands on one wing can be copied onto the other. Each craft below has one main action, such as pressing, coloring or sticking, and a clear finish.
Draw the eyes and antennae with a marker for anyone under 3. Federal toy rules treat small parts as a choking hazard for children under 3 years (36 months) of age (16 CFR Part 1501). A loose googly eye or a bead is that kind of part.
Handprint butterfly
A handprint butterfly works with one child at a time, with an adult holding the paint. Allow about 10 minutes, then leave it to dry.
You need washable paint in two colors, a paper plate for the paint, a sheet of heavy paper and a damp cloth. Brush a thin coat across the child’s palm and fingers. Press the left hand on the paper with the fingers spread and pointing up and out. Wipe, paint the right hand and press it beside the first, so the two thumbs nearly touch in the middle. The two palms form the wings.
Once the paint dries, draw a long oval body down the gap between the thumbs and add two curled antennae. It’s done when the body goes on. The snag is a thick coat of paint, which slides when the hand presses down and blurs the fingers. Brush thin, press once and lift straight up.
Fold-and-press paint butterfly
This one teaches symmetry without a single word about it. Two to six preschoolers can share one table, and the painting takes about 15 minutes.
You need a printed butterfly outline per child, washable tempera paint in squeeze bottles or small cups, and plastic spoons. A full-page outline with big, rounded wings gives the most room. Before the kids sit down, fold each sheet in half along the butterfly’s body and open it flat again.
Let each child drop four or five blobs of paint on one wing only. Fold the sheet closed along the crease, press and rub with a flat hand, then peel it open. The second wing now mirrors the first. It’s finished when it opens. The snag is paint on both wings: the colors mix into brown when the sheet folds. Mark the “paint side” with a crayon dot first.
Coffee filter butterfly
A coffee filter butterfly suits a group, because each child needs only a filter and markers. Allow 15 minutes plus drying.
You need round paper coffee filters, washable markers, a spray bottle of water, a tray and a wooden clothespin per child. Kids scribble color all over a flat filter. Set it on the tray and mist it two or three times until the colors spread. Once it’s dry, pinch the filter through the middle and clip the clothespin over the pinch, so the two sides fan out as wings.
Draw a face on the clothespin, and it’s done. The snag is the spray: a soaked filter tears when you lift it. Mist from about a foot away and stop as soon as the colors start to run.
Tissue paper suncatcher butterfly
A suncatcher is the quietest craft in this group, with no paint at all. It takes about 20 minutes, and two or three kids can share one sheet.
You need clear contact paper, squares of colored tissue paper about an inch across, painter’s tape and scissors. Peel the backing off one sheet of contact paper and tape it sticky side up to the table. The kids press tissue squares all over it, overlapping is fine. Cover it with a second sheet of contact paper, sticky side down.
Lay a printed butterfly outline on top, trace around it with a marker and cut along the line. Tape the butterfly to a sunny window. It’s finished when it’s hanging. The snag is tissue that misses the middle, which leaves a clear hole in a wing. Have the kids fill the center first, then work out.
Scissor practice comes before any of the cut paper butterflies later on. A snipping table with paper strips is one of the activities for 3-year-olds that builds that skill.
Butterfly life cycle crafts for preschool and kindergarten
A butterfly craft for preschool often doubles as a science lesson, since butterflies change shape so completely. Most butterflies have a four-stage life cycle: egg, larva (caterpillar), pupa (chrysalis) and adult. The caterpillar feeds on the plant where the egg was laid, then forms a chrysalis, and the adult climbs out and spreads its wings to dry. Both crafts below follow that order.
Butterfly life cycle plate
A life cycle plate works for a small group or a whole class, with about 25 to 30 minutes.
You need a paper plate per child, a marker, green paper, a small piece of brown tissue paper, washable ink or paint for thumbprints, glue and one small paper butterfly. Before the lesson, draw lines that split each plate into four parts. Number them 1 to 4 clockwise, with an arrow from each part to the next.
- Egg: glue a green paper leaf in part 1 and draw two or three small dots on it.
- Caterpillar: press a row of five thumbprints in part 2, then add a face and legs with a marker.
- Chrysalis: twist the brown tissue into a short teardrop and glue it in part 3, hanging from a drawn twig.
- Butterfly: glue the small butterfly in part 4, gluing only the body so the wings can lift.
The plate is done when all four parts are full. Children can then point and retell the cycle in order. The snag is order: preschoolers often glue the butterfly first because it’s the fun piece. Hand out one part’s supplies at a time.
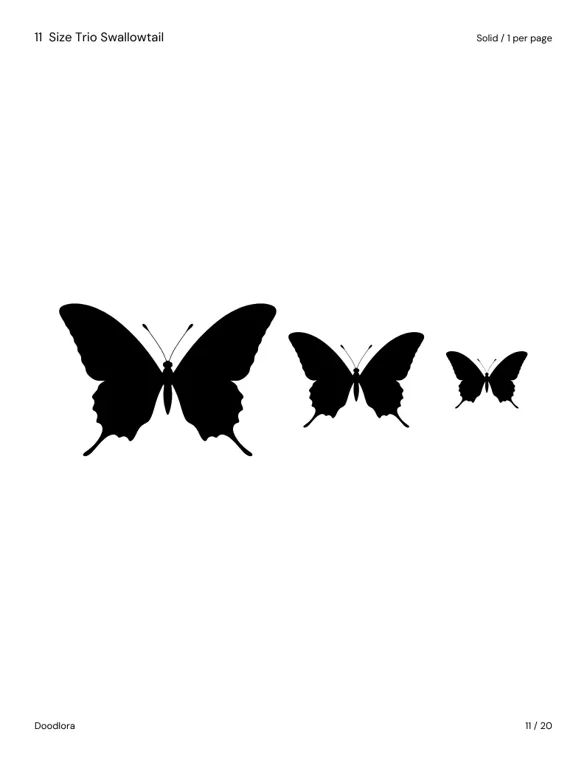
The small butterflies come from a size trio template. Our butterfly outline collection has four designs, 11 to 14, that print a large, medium and small butterfly on one page. Trace the small one onto colored paper, and a class set of wings goes quickly.
Monarch on milkweed coloring
The monarch is one of the most familiar North American butterflies, which makes it a good subject for a slower coloring session. Plan about 30 minutes for ages 5 and up.
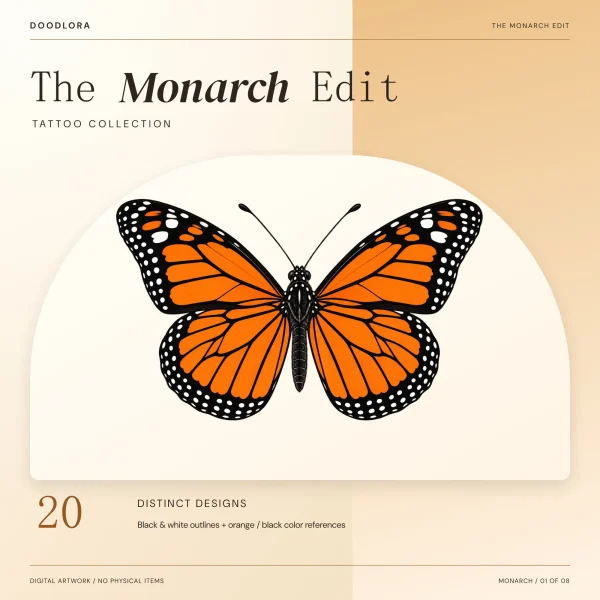
Milkweed is the main host plant for monarch caterpillars, so a page with both teaches something while kids color. Our monarch butterfly outlines include design 07, Milkweed Moment, a monarch perched on a milkweed flower cluster. In the US Letter PDF, the black outline is page 7 and its orange-and-black color reference is page 27.
Print both pages and set the color page beside the outline as a guide. The snag is detail: these are fine, tattoo-style lines, with rows of tiny white dots along the wing edges. Give five- and six-year-olds markers and tell them to fill the big orange panels only. Older kids and adults can layer colored pencils and leave the dots white, working the orange from light to dark the way the colored pencil blending steps describe.
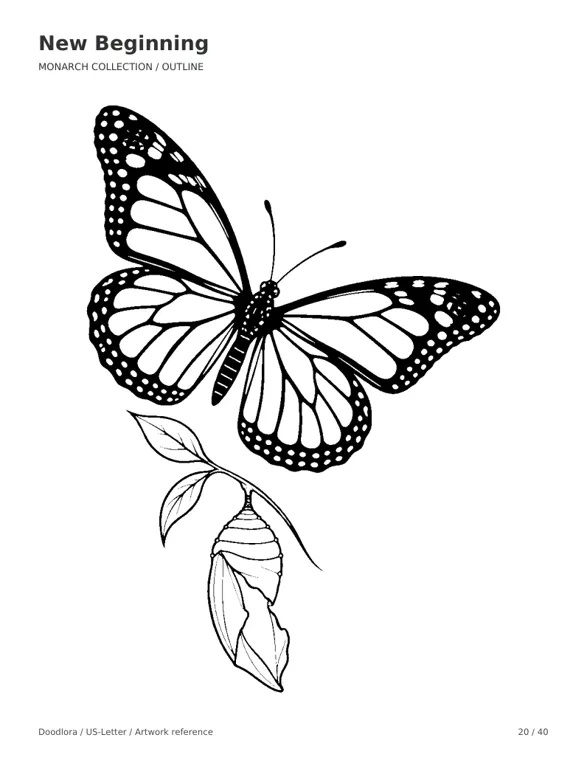
Design 20, New Beginning, puts a monarch and a hanging chrysalis on the same page. Kindergartners can color it after the life cycle plate and name the two stages they see.
Butterfly crafts for school-age kids (ages 6 to 10)
Kids from about six can handle scissors along a curve, and that opens up cut paper butterflies. These three crafts need careful cutting or folding, so plan 15 to 45 minutes and a table without paint.
Fold-and-cut butterfly
A fold-and-cut butterfly gives a perfectly matched pair of wings from one cut. Allow about 20 minutes, for any number of kids with their own scissors.
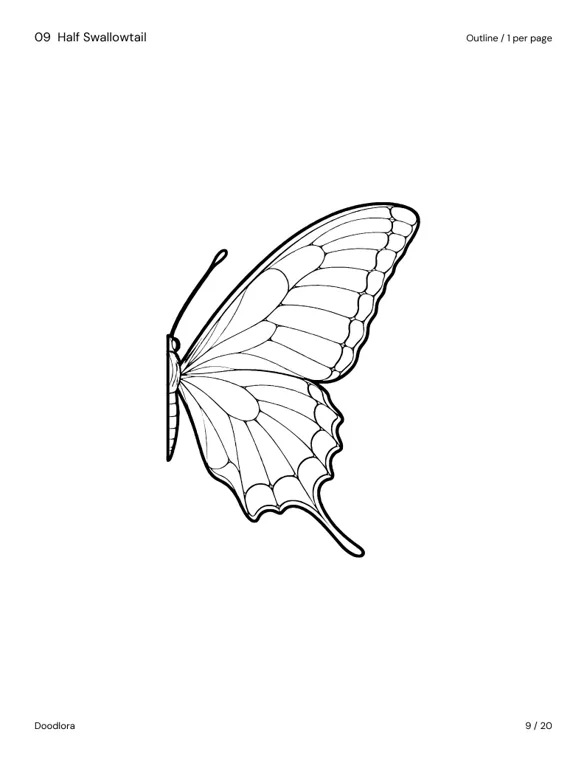
You need a half-butterfly template, colored paper, a pencil and scissors. Our outline collection has two half designs, 09 Half Swallowtail and 10 Half Rounded. Each is one forewing and hindwing with a straight edge down the middle of the body.
- Cut out the printed half butterfly.
- Fold a sheet of colored paper in half.
- Lay the template’s straight body edge exactly on the fold and trace around the wings.
- Cut along the traced line through both layers, but don’t cut along the fold.
- Open the paper to a full butterfly about 7 inches across.
The snag is the fold edge. A child who trims the fold cuts the butterfly into two loose halves. Have them say “the fold stays” before they start cutting. The swallowtail’s thin tails also tear easily, so younger cutters do better with design 10.
Pleated paper butterfly
A pleated butterfly needs only folding and a twist, so it’s a good filler for a spare 15 minutes.
You need two squares of paper per butterfly, one about 6 inches and one about 4 inches, plus one pipe cleaner. Patterned scrapbook paper works well. Plain paper works too if the kids color it first.
- Accordion-fold the large square from one edge to the opposite edge, in pleats about half an inch wide.
- Pleat the small square the same way.
- Stack the small pleated strip on top of the large one.
- Pinch both in the middle and wrap the pipe cleaner around the pinch twice.
- Twist the pipe cleaner ends together, then curl them into antennae.
Fan out the pleats and the butterfly is finished. The snag is pleat width: wide pleats make stiff wings that won’t open. Keep them narrow, and color the paper before folding, since you can’t reach inside the pleats afterward.
Butterfly garland
A butterfly garland suits a pair of kids or a small group, with about 45 minutes, and makes a good spring classroom decoration.
You need a printed size trio page, cardstock in several colors, scissors, a pencil, tape and a long piece of string or yarn. The size trio pages in our outline set put a large, medium and small butterfly side by side. Cut the three printed shapes out to use as tracing templates. Then trace and cut butterflies from the cardstock, as many as the string needs.
Fold each cardstock butterfly gently down the body so the wings tilt up. Tape the folded body to the string every few inches, mixing the three sizes. It’s done when the string is full. The snag is the small butterfly, whose tight curves are hard for six-year-olds. Give the small ones to the older cutters, or cut them yourself.
Butterfly crafts for older kids, teens and adults
Older crafters can take on projects measured in hours, with fine cutting or a lot of small parts. Each of these three makes something that can hang on a wall.
Paper butterfly wall
A paper butterfly wall is a group of 3D paper butterflies that seem to fly up a wall or around a mirror. Allow about an hour to cut 30 or so.
You need cardstock in one or two colors, the size trio pages as templates, scissors, a pencil and removable mounting putty or poster strips. Trace and cut butterflies in all three sizes. Fold each one in half along the body, then open it to a slight V.
Attach each butterfly through the body only, so the wings stand away from the wall. Start with the large ones low and let the small ones trail upward in a loose curve. It’s done when the curve reads from across the room. The snag is the adhesive: some tapes pull paint off a wall. Test one piece on a hidden spot first.
Cut paper butterfly stencil
A cut paper stencil is a fine-knife project for teens and adults, and one butterfly takes about 1 to 2 hours. Paint it onto paper, a notebook cover or a plain tote bag.
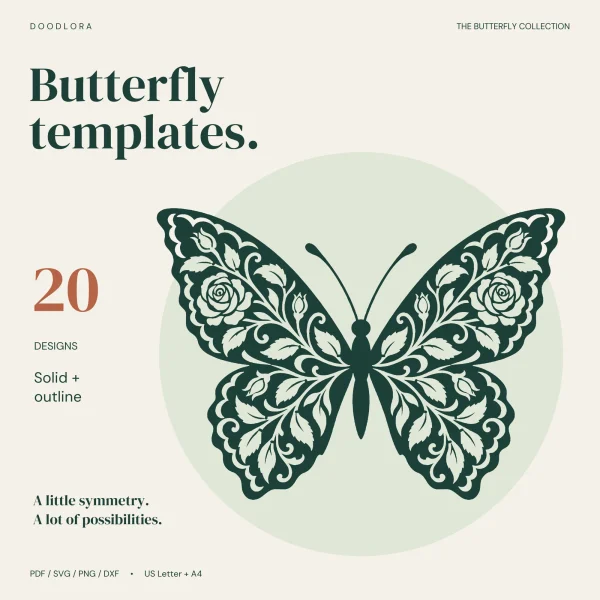
Three designs in our outline collection are bridge stencils: 15 Rose Vine, 16 Iris Scroll and 17 Fern Lace. In the solid version, white areas are the openings to cut out, and the black areas hold the stencil together.
- Print the solid page full size, at 1 per page.
- Glue the print flat onto cardstock or a manila folder.
- Cut out each white area with a craft knife on a cutting mat. Do the small openings first, while the sheet is still stiff.
- Tape the stencil flat over your surface and dab paint through it with a sponge, working inward from the edges.
- Lift it straight up while the paint is wet.
The snag is the bridges, the thin black strips between openings. Cut one by mistake and a flower petal comes loose. The file notes say detailed stencil designs need a larger size, so don’t use the four- or six-per-page versions for this. Keep the knife moving away from the hand that holds the sheet.
Fuse bead butterfly wall piece
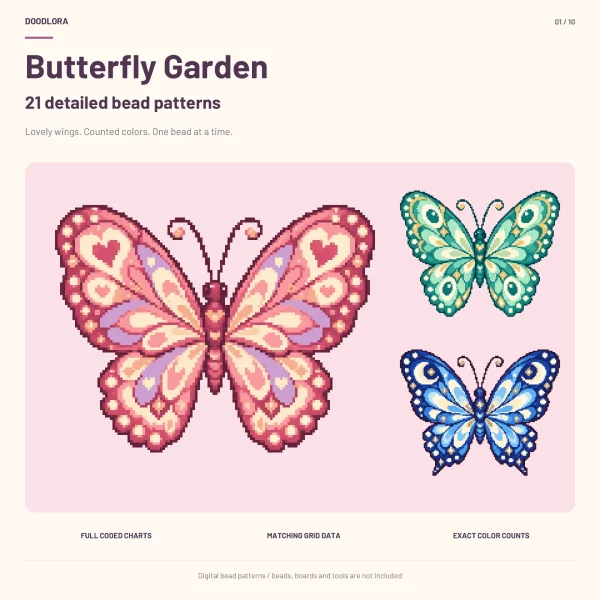
A fuse bead butterfly from our butterfly fuse bead patterns is a long project. Each of the 21 butterflies is 128 beads from wingtip to wingtip and uses between 5,691 and 8,482 beads in 24 colors. On the 0.197-inch (5 mm) grid that comes to about 25 inches (64 cm) across, so plan on several sessions.
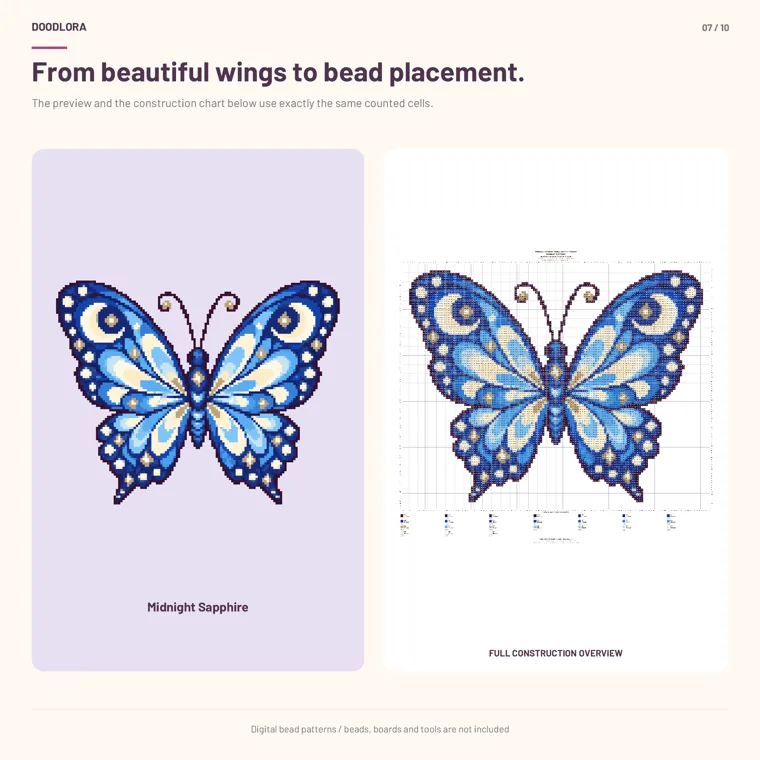
The placement PDFs split each butterfly into tiles that print at true bead size. On that grid, each tile covers 32 by 32 cells. A butterfly takes 20 tiles, or 15 for the three shorter designs. On the 0.102-inch (2.6 mm) mini-bead grid, every butterfly fits on 6 tiles of 64 by 64 cells. Build on linked pegboards large enough for the whole chart.
Two snags are worth knowing before you buy beads. The color codes, P01 to P24, are local to each pattern, so P05 in one butterfly can be a different color in the next. Match each code to your own beads by the swatch and HEX value in the key.
The second snag is scale. Print the first page and one tile before anything else, and measure the 1.969-inch (50 mm) test line, because a printer set to “fit” shrinks the grid. The pattern files haven’t been test-built, so that first tile is your board check. For the fusing itself, an adult should handle the iron, and our guide to ironing large fuse bead pieces covers joined boards.
Printing butterfly templates: which page for which craft
Most of the crafts above start from a printed butterfly, so the page choice matters more than the paper. Our outline collection has 20 designs. Each comes as a solid black shape for tracing and cutting, and as a detailed outline for coloring and painting.
The 12 PDFs cover US Letter and A4, both versions, and three layouts: 1, 4 or 6 butterflies per page. Every PDF has 20 pages, and the page number matches the design number. A full-page butterfly is about 7 inches across. The six-per-page sheets give each child a smaller butterfly about 3 inches wide, enough for a garland or the life cycle plate.
| Craft | Design numbers | Version and layout |
|---|---|---|
| Fold-and-press paint, suncatcher | 01–05 open wings | Outline, 1 per page |
| Fold-and-cut | 09–10 half butterflies | Outline or solid, 1 per page |
| Life cycle plate, garland, wall | 11–14 size trios | Solid, 1 per page |
| Cut paper stencil | 15–17 bridge stencils | Solid, 1 per page |
| Class sets for coloring | Any | Outline, 4 or 6 per page |
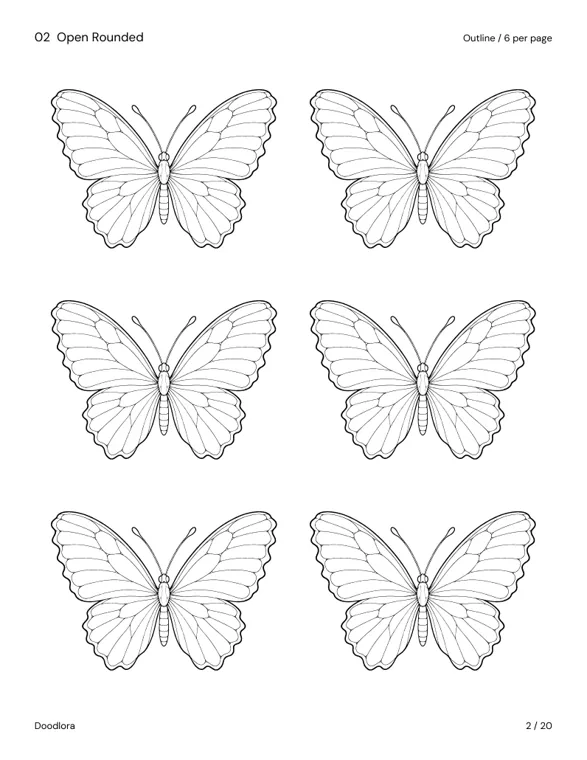
Print at Actual Size or 100% so the butterflies don’t shrink. The other print settings that matter, and which paper survives wet paint, are covered in how to print coloring pages.
Printables from this article
Related articles
Outlines & Stencils
How to Draw a Mallard Duck: Drake, Hen and Flying Poses
A swimming mallard drake in ten pencil steps, the changes that turn it into a hen, a flying pose, a pair on the water and the color marks that make the bird read as a mallard.
Outlines & Stencils
Turtle Crafts for Kids: Paper Plate and Sea Turtle Ideas
Twelve turtle crafts sorted by age, each with time, materials, steps and the snag to watch for, plus how to use a printed turtle outline as a cutting template.
Outlines & Stencils
Bird Crafts for Kids and Adults: Owl, Nest and Feeder Ideas
Thirteen bird crafts grouped by who is making them, from a toddler's handprint bird to a framed papercut and a cold-weather pinecone feeder, each with ages, time, supplies, steps and the snag to plan for.