How to Draw a Rocket Ship: 8 Easy Steps, Shuttle & Craft
To draw a rocket ship, start with a tall body that’s rounded at the top and flat at the bottom, then add a curved line for the nose cone, a round window, two fins that sweep down past the base, and a small engine nozzle with flames. Draw a faint center line first, because a rocket is symmetrical and a lopsided body is the mistake that shows most.
The eight steps below make an upright cartoon rocket in about 10 to 15 minutes of pencil work. After that, you can tip the same rocket on its side so it looks like it’s flying, draw a space shuttle on its orange tank, color the finished picture, and wrap it around a cardboard tube to make a rocket ship craft for the shelf.
Paper, pencils and a coin for the window
Sketching happens in pencil, because the guide line has to come off later, so keep an eraser close. The outline you keep gets traced in a black marker or fine-tip pen, and the color can come from whatever the child likes best. Turn a sheet of copy paper so it’s tall rather than wide, since an upright rocket fills a portrait page best. A ruler helps with the center line, and a coin or a bottle cap gives you a clean circle for the window.
Here’s how the steps tend to fit different ages. These are our planning suggestions, not test results, so adjust them to the child in front of you.
| Age | What to draw | Help needed |
|---|---|---|
| 4 to 5 | Steps 1 to 4 and 6, skip the middle fin and draw one big flame | A grown-up draws each step first on a separate sheet |
| 6 to 8 | All eight steps | Someone reads the step out and waits |
| 9 and up | All eight steps, then the sideways rocket or the shuttle stack | Little or none |
Children who already know a few space facts often want the Moon or Saturn in the picture too, so leave some room at the top of the page for Step 8.
How to draw a rocket ship in 8 steps
Step 1: Draw a center line and the body
Draw a light vertical line down the middle of the page, leaving a hand’s width of space at the bottom for the fins and flames. Around that line, draw a tall shape like a stretched egg: round at the top, straight down both sides and cut off flat near the bottom. Keep it about three times as tall as it is wide. A body that’s too wide looks like a bottle, and one that’s too thin leaves no room for the window.
Step 2: Mark off the nose cone
About a quarter of the way down from the tip, draw a line across the body that curves gently downward. Everything above that line is the nose cone. The curve matters, because it makes the body look round rather than flat like a cardboard cutout.
Step 3: Add the round window
Trace your coin in the upper middle of the body, just below the nose cone line, and center it on your guide line. Draw a second circle just inside the first to make the window frame. The window should be roughly half as wide as the body. If it’s much smaller, it disappears once the rocket is colored.
Step 4: Sweep two fins down from the sides
Start each fin about two-thirds of the way down the body. Draw a line that curves out and down, ending a little below the flat bottom, then bring a short line back in to meet the body at the base. Repeat on the other side, matching the first fin by checking its distance from the center line. Fins that start too high make the rocket look like a dart.
NASA’s guide to rocket parts says fins “provide stability during the flight,” which is why real rockets carry them low on the frame and not near the nose.
Step 5: Draw the middle fin seen edge-on
A rocket with three or four fins has one that points straight at you. Draw it as a thin strip running down the center line, from the lower body to the same level as the tips of the side fins. Younger children can leave this step out. The rocket still reads clearly with two fins.
Step 6: Hang the engine nozzle under the base
Under the flat bottom, draw a short shape that’s narrower at the top and wider at the bottom, like a small upside-down bucket. Keep its top edge narrower than the body, so it looks attached instead of stuck on. If your rocket sits on a launch pad, stop here and draw the ground under the fins.
Step 7: Add flames below the nozzle
Draw three teardrop flames coming out of the nozzle, with the middle one the longest. Give their edges a little wobble instead of straight lines, because flames that are smooth and stiff look like icicles. Draw a smaller flame shape inside the middle one so you have an inner area for yellow and an outer area for orange.
Step 8: Add details, then ink and erase
Add two bands around the body, one at the nose cone line and one just above the fins, each drawn as a curve that matches the curve from Step 2. A small rectangle on the side makes a hatch, and a row of dots along a band makes rivets. Once every part is in place, trace the keepers in marker. Rubbing too soon smears fresh ink, so give it a minute before the eraser takes out the center line and the leftover sketch. Finish with a few stars, a planet or a crescent moon around the rocket.
Common rocket drawing mistakes and quick fixes
- The body leans. This happens when the center line gets skipped. Redraw the line, then check that both sides are the same distance from it at the top, middle and bottom.
- The fins don’t match. Draw the second fin by measuring from the center line, not by eye. A child can fold the finished drawing down the center line and hold it up to a window to see whether the fins line up.
- The window touches the edge. Leave a gap of body color all the way around the frame, or the window looks like a hole.
- The bands curve the wrong way. On an upright rocket seen from slightly below, every band curves the same way as the nose cone line. A band that curves upward makes the rocket look twisted.
- The flames are as wide as the rocket. Start the flames inside the nozzle, then let them spread out a little as they get longer.
Turn the rocket on its side so it’s flying
An upright rocket looks like it’s waiting on the pad. A rocket that’s lying almost flat, with its nose pointing up and to one side, looks like it’s already in space. Turn your paper sideways and draw the same parts along a slanted center line instead of a vertical one.
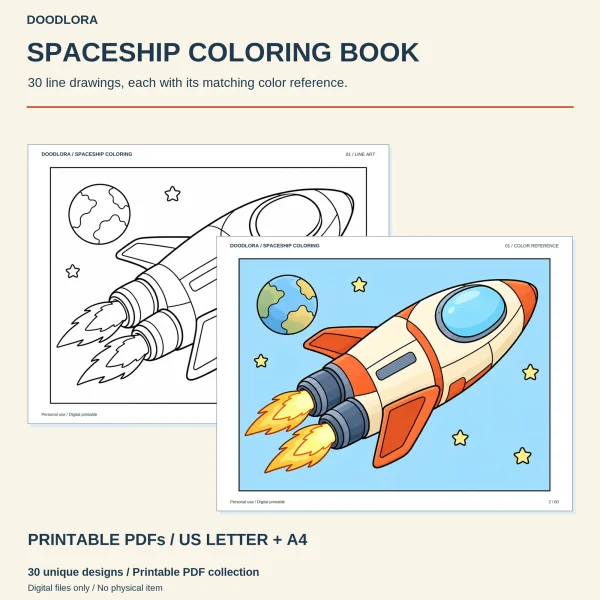
On the sideways version, the round window stretches into an oval, and only the near fin and the far fin’s tip are visible. Two smaller engines side by side at the back look better than one, because the eye reads them as depth. The cartoon rocket below is design 02 in our spaceship pack, shown from the left side. It has a pointed nose with two bands, a big oval window, a small hatch, two swept fins and two engines at the back.
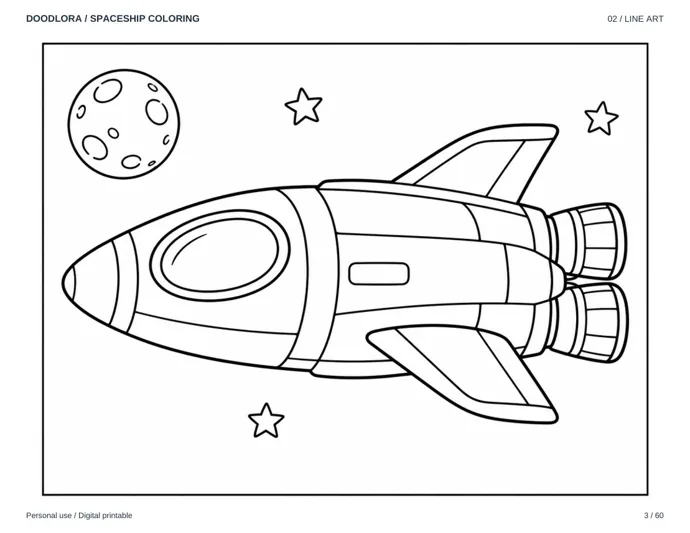
Notice that the back fin on that page is drawn smaller and set behind the body. Drawing the far side smaller is the easiest way to make a flat drawing look like it has depth.
How to draw a space shuttle
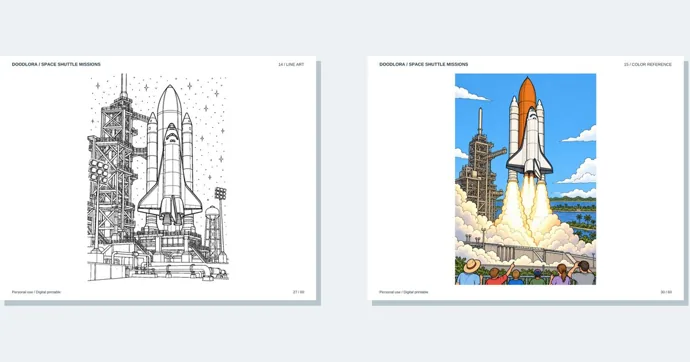
A space shuttle is a different shape from a cartoon rocket, and children who know it will spot a wrong part right away. At launch it had three pieces. The orbiter was the winged part that carried the crew. It rode on a huge external tank, which Wikipedia describes as “covered in orange spray-on foam,” and two tall solid rocket boosters stood on either side of the tank. Three main engines sat at the back of the orbiter.
The front view of the whole stack is the easiest way to draw it:
- Draw the external tank as a tall, wide tube with a pointed, rounded top. It’s the biggest part, so it goes in the middle and takes up most of the page height.
- On each side of the tank, draw a booster as a much thinner tube with a pointed top. The boosters are shorter than the tank, so their tips should sit below the top of the tank.
- In front of the tank, draw the orbiter as a narrow body with a rounded nose, about halfway up the tank. Add a few small window shapes near the nose.
- At the bottom of the orbiter, spread two delta wings out to the sides like a wide triangle. Its tail fin points straight at you, so draw it as a thin line down the middle.
- Draw three small engine bells at the base of the orbiter, and nozzles under both boosters.
To color it the way the real one looked, make the tank orange, the boosters white, and the top of the orbiter white. Its underside was covered in black heat-protection tiles, so if you draw the shuttle from below or gliding in to land, color its belly black.
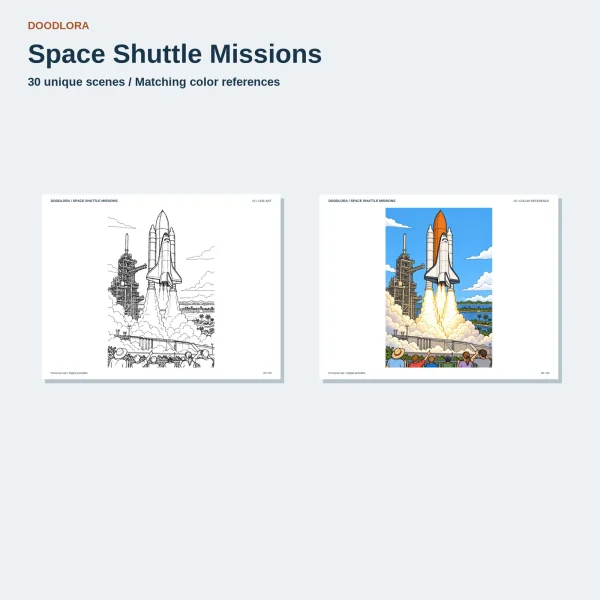
Our space shuttle pack is a good reference for this view because it shows the hardware from many angles across one mission. On design 11 the orbiter hangs from a crane next to the tank and both boosters, so you can see how the three pieces fit together before they’re joined.
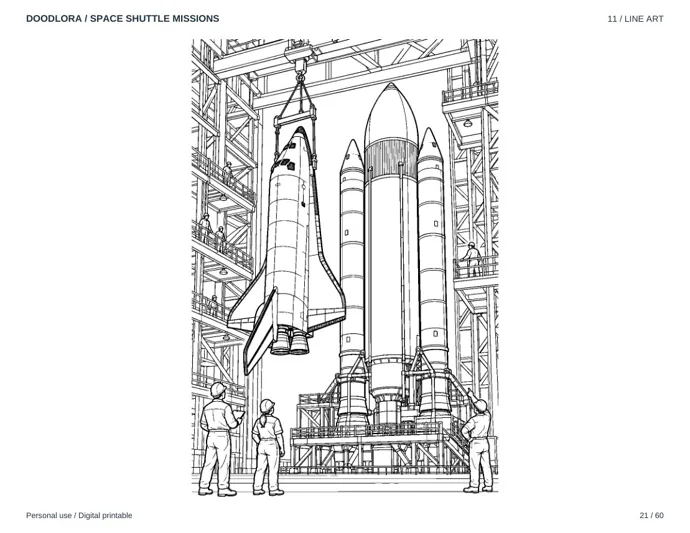
The shuttle pages are finely lined, with a lot of small spaces. That makes them better references for older kids and adults than tracing pages for preschoolers. The drawings carry no logos, names or flags, so a child can add their own mission name.
Coloring the finished rocket
Pick two main colors for the body and one for the fins and bands. A cream or white body with red or orange stripes looks like a classic toy rocket, and it lets the window and flames stand out. Color the window light blue, and leave a white streak across it so it looks like glass. Give the nozzle a medium gray rather than black, so its outline doesn’t get lost.
For the flames, color the inner shape yellow and the outer one orange, then add a little red only at the tips. With colored pencils, go over each area lightly first and press harder only for the darker edges. Our coloring tips cover that light-to-dark layering, plus what to do when color slips past a line.
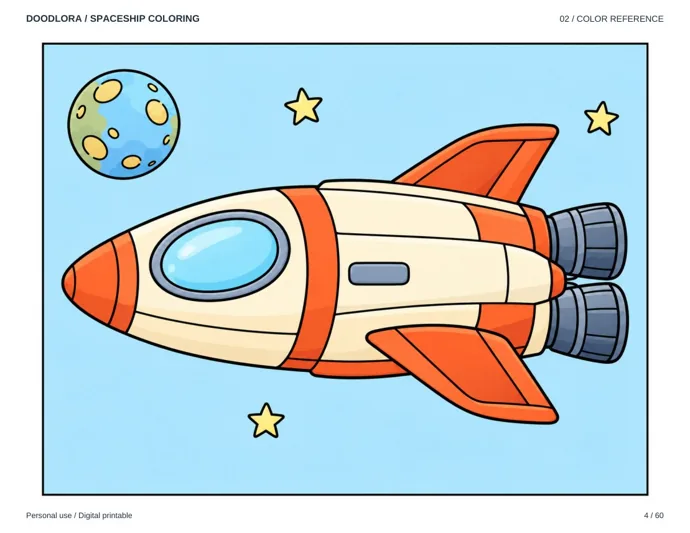
A dark background makes the rocket glow, but filling a whole page with black crayon takes a long time and smudges. Light blue or navy colored pencil is faster and still reads as sky.
Using spaceship coloring pages as drawing references
Copying a clean line drawing teaches a child where each part of a rocket goes. Keep a printed ship within arm’s reach and copy it in the order a builder would: body outline, window, fins, then engines. Children who aren’t ready to copy can trace the outline on a window first, then draw it again freehand beside the traced copy.
Our spaceship pack has five cartoon ships, each drawn from six angles, which makes 30 designs. Its US Letter book has 60 pages because each line drawing is followed by its color version, so every line drawing is on an odd page. The ship names are printed only in the separate 15-page matched-pairs guide.
| To practice | Ship in the guide | Line art pages in the Letter book |
|---|---|---|
| A classic rocket | Comet Scout, designs 01 to 06 | 1, 3, 5, 7, 9, 11 |
| A winged shuttle | Delta Shuttle, designs 07 to 12 | 13, 15, 17, 19, 21, 23 |
| A lander with legs | Lunar Hopper, designs 19 to 24 | 37, 39, 41, 43, 45, 47 |
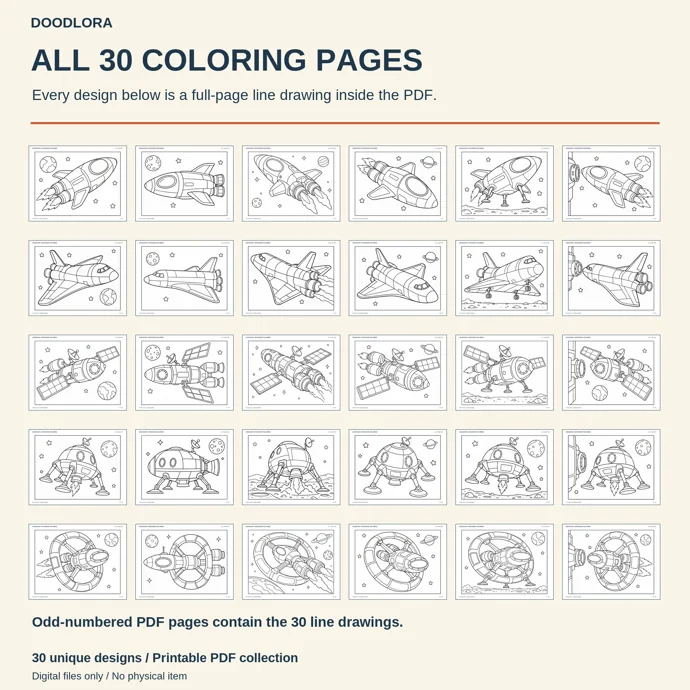
The six views are the same for every ship: forward cruise, left profile, rear engine view, banking from above, low angle hover and docking approach. That makes the pack handy for a child who has mastered the side view and wants to try the harder angles next. To print only the drawings, choose the odd pages in your print dialog, set landscape and Actual Size, and print one test page first. The guide to printing coloring pages explains those settings in more detail.
A note for teachers: the personal license on both packs lets you print these pages for the children in your own class, whether you teach in a room or online. It stops at selling the printouts or sending the files to anyone outside your class or school.
Make a rocket ship craft from your drawing
Once the drawing is done, a cardboard tube can turn it into a rocket that stands on the shelf. This craft is for display and pretend play. It doesn’t launch, and nothing about it needs to.
Ages and time: 4 and up with a grown-up handling the cutting, about 30 minutes plus drying time.
Materials: one empty paper towel or toilet paper tube, a sheet of paper, a piece of card stock or a cereal box, a glue stick or white school glue, tape, scissors, and a few strips of red, orange and yellow tissue paper.
- Cut the paper so it wraps once around the tube with a small overlap. Lay it flat and draw Steps 3 and 8 on it: the window, the bands and the hatch. Color it.
- Glue the paper around the tube with the window facing front.
- For the nose cone, trace a saucer on the card stock and cut out the circle. Cut one straight slit from the edge to the center, slide the cut edges over each other to make a cone, and tape it. Tape the cone to the top of the tube.
- Draw the fin shape from Step 4 on the card stock three times, adding a small tab along the straight edge of each one. Cut them out, fold the tabs, and glue the tabs to the bottom of the tube so the fins reach just past the end. Three fins spaced evenly let the rocket stand up.
- Tape the tissue strips inside the bottom of the tube so they hang down like flames.
Let the glue dry before the rocket stands on its fins. A glue stick dries fastest. White glue holds the fins better but takes longer to set. The nose cone slit is the fiddly cut, so a grown-up should do it for younger children.
Running a rocket drawing session with a group
For a group, draw each step large on a whiteboard or an easel pad and wait until everyone has finished before moving on. Eight steps take about 20 minutes this way, plus coloring time. Hand out the paper tall, not wide, before you start. Turning a sheet halfway through means starting over.
Children finish at different speeds, so give early finishers a job that doesn’t need you: add stars, draw a second planet, or design a mission patch in the corner. To wrap up, have each child name their rocket and write the name on the body band. With kindergartners, stop after Step 6 and let them add flames during coloring. Fewer steps keeps the group together.
Stuck on a fin or a flame? Short answers
What’s the easiest rocket to draw for a young child?
A body, a window, two fins and a single flame. That’s Steps 1, 3, 4 and a simplified Step 7. It still looks like a rocket, and a four-year-old can manage it with a grown-up demonstrating each shape.
Why do rockets have fins?
According to NASA’s beginner’s guide, fins are attached “at the bottom of the frame to provide stability during the flight.” That’s also why fins in a drawing belong near the base, not up by the window.
Can a drawing show the rocket in flight instead of on the pad?
Tilt it so the nose points up and to one side, make the flames long and wavy, and add a few curved lines trailing behind the engines. Stars drawn as short streaks instead of points add to the effect.
Can I draw a rocket ship without a nose cone line?
Yes. The line is what makes the top look rounded, though. Without it, color the tip a different color from the body to get the same effect.
Is a space shuttle harder to draw than a rocket?
A little, because it has three separate parts that overlap. Draw the tank first, then the boosters, then the orbiter in front. Working back to front keeps the overlapping lines from tangling.
Printables from this article
Related articles
Printable Coloring Pages
Is a Tomato a Fruit? Is Corn a Vegetable? Cucumbers Too
A tomato is a fruit in botany because it grows from the flower and holds the seeds, and a vegetable in the kitchen; the Supreme Court took the kitchen side in Nix v. Hedden in 1893, for the tariff only.
Printable Coloring Pages
How to Draw Food: Cute Fruit, Desserts and Snacks
Every cute food starts as a plain shape. Ink one bold outline, add the single detail that names it, color it warm with a white shine spot, and put a face on last if you want one.
Printable Coloring Pages
Types of Sushi: Nigiri vs Sashimi, Rolls and Sushi for Kids
Sushi is vinegared rice plus a topping or filling, and the shape gives each type its name: nigiri, maki, uramaki, temaki, gunkan, chirashi, inari and oshizushi. Sashimi is sliced fish with no rice. Here's how to spot each one, what to order first and which pieces have no raw fish.