How to Meal Plan: Meal Planning and Prep for Beginners
Meal planning means deciding this week’s meals before you shop, so the grocery trip, the cooking and the leftovers all follow one list. When you’re done, you have four or five dinners matched to the nights you can actually cook, a grocery list sorted by store section, a night set aside for leftovers and two backup meals for the evenings that fall apart. The first plan takes the longest, around 30 to 45 minutes by our estimate. After a few weeks, most of it is copying what worked.
All you need is a calendar, a pen, a page to write on and ten minutes in front of your fridge.
What you need before you start
- The week’s calendar. Work shifts, practices, late meetings, guests and any night you’ll eat out.
- A list of meals your household already eats. Ten is plenty. Write them from memory, not from a cookbook.
- A look at what you have. Open the fridge, freezer and pantry, and note anything that needs using soon.
- A page for the plan and a page for the list. A notebook works. So does a printed planner with the days already laid out, such as our printable meal planner.
Pick one planning day and keep it, ideally the day before you shop. Sunday is common because the week hasn’t started yet, but any day works if it comes before the grocery run.
Step 1: Read the week before you pick any food
Start with the calendar, not the recipes. Go night by night and give each one a label: a cooking night, a quick night (20 minutes or less), a leftovers night or an out night.
A household of four with soccer on Tuesday and a late shift on Thursday might end up with three cooking nights, two quick nights, one leftovers night and one pizza night. That shape matters more than the menu. A beginner’s plan usually breaks because it puts a long recipe on a night nobody is home before 7.
Also note who is eating. If one person is away for three days, or you’re hosting on Saturday, the amounts change before the meals do.
Step 2: Decide how many meals you’re really planning
For the first month, plan dinners only. Breakfast and lunch can repeat two or three standbys all week, such as oatmeal, eggs, sandwiches or last night’s leftovers.
Then plan four or five dinners for a seven-night week and leave the rest open. The open nights catch leftovers, a surprise invitation or a night when nobody is hungry. Filling all seven slots in week one sounds organized, but it usually means food goes bad when plans change on Wednesday.
Once dinners feel automatic, add lunches, then breakfasts if you want them.
Step 3: Pick dinners with a simple rotation
Begin with the ten meals your household already likes. Each week, pick most of the dinners from that list and allow one new recipe at most. A new recipe on a busy weeknight is the most common way a first plan collapses.
A rotation makes choosing faster. Two ways that work:
- By main ingredient. One chicken night, one bean or egg night, one pasta night, one fish night, one soup night.
- By theme. Taco Tuesday, a sheet-pan night, a breakfast-for-dinner night, a soup and sandwich night.
Before you finalize, look at your “use it soon” list from the fridge check. If there’s half a bag of spinach and a pack of tortillas, Monday’s dinner can use both. Shopping your own kitchen first is the cheapest step in the whole process.
Put the longest recipe on the night with the most free time, and the quickest on your busiest night. If a meal makes enough for two nights, write the second night in now as leftovers.
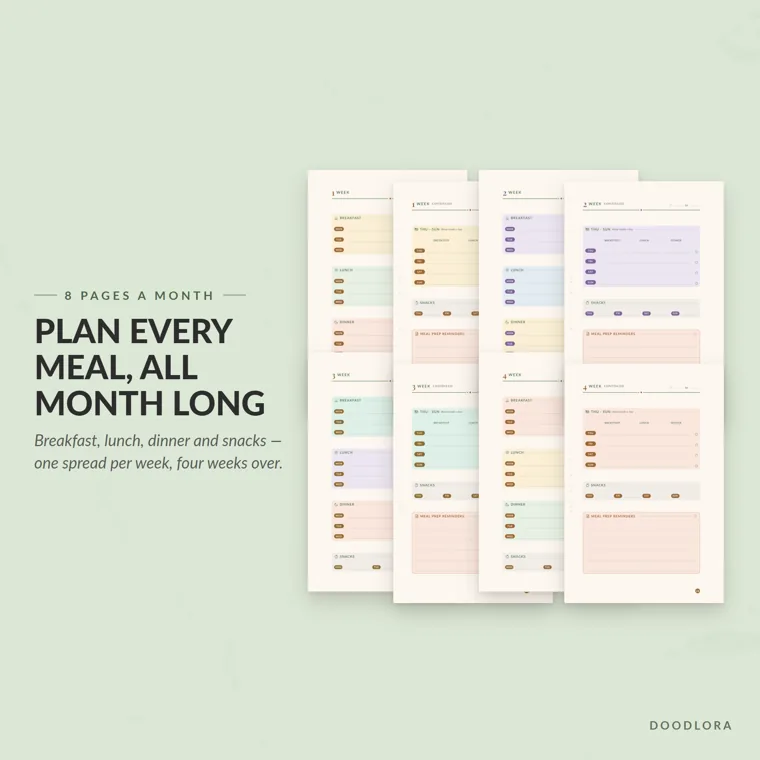
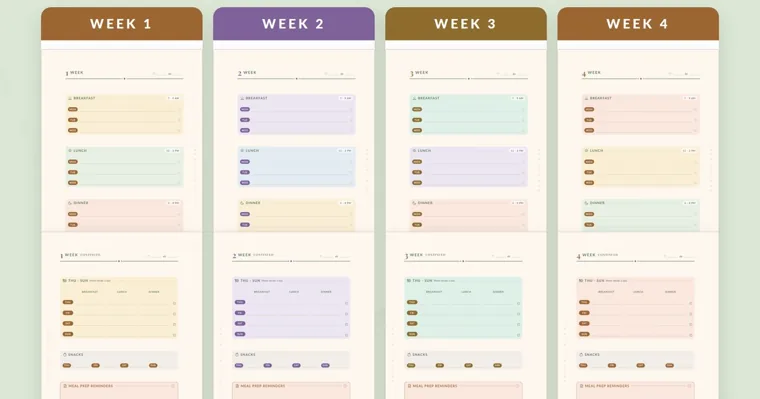
In our planner, a week’s meal plan runs over two pages. Monday to Wednesday get breakfast, lunch, dinner and snack rows, and Thursday to Sunday sit in a table with three meals a day, plus a box for meal prep reminders. If you only plan dinners, fill the dinner rows and leave the rest blank.
Step 4: Write the grocery list from the plan
Go through the plan one meal at a time and write down every ingredient, including the small ones: oil, garlic, a can of tomatoes, the tortillas. Then check each item against what you already have and cross off what’s in the house.
Write amounts, not just names. “Chicken thighs, 2 lb” keeps you from buying one pack when the recipe needs two. If two meals use the same ingredient, add the amounts together on one line.
Group the list by store section so you walk the store once:
- Produce
- Meat and seafood
- Dairy and eggs
- Bread, pasta and rice
- Canned goods, sauces and spices
- Frozen
Anything you can only get at a second store goes at the bottom on its own. If that store isn’t on your route this week, swap the meal rather than make an extra trip.
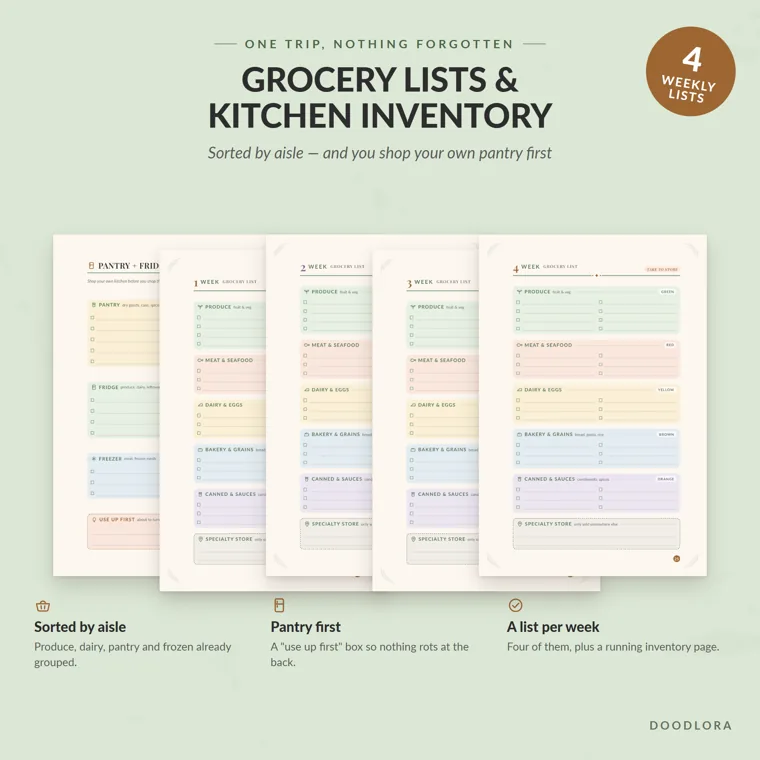
The grocery list page in our planner uses the same idea: produce, meat and seafood, dairy and eggs, bakery and grains, canned goods and sauces, and a separate box for a specialty store. A pantry and fridge page at the front of the month has boxes for the pantry, fridge and freezer, plus a “use up first” box.
Step 5: Plan your leftovers on purpose
Leftovers are part of the plan, not what’s left after it. Cooking a double batch on Sunday and eating it again on Tuesday saves a whole cooking night. The catch is timing, so it helps to know the federal guidelines.
The USDA Food Safety and Inspection Service says leftovers should be refrigerated within 2 hours of cooking. Perishable food left at room temperature for more than 2 hours should be thrown away, or after 1 hour if the temperature is over 90°F. To cool food quickly, the USDA advises dividing large amounts, like a big pot of soup, into shallow containers.
In the fridge, leftovers keep 3 to 4 days. In the freezer, the USDA says leftovers can be kept 3 to 4 months. They stay safe longer than that, but they lose moisture and flavor. When you reheat them, bring them to 165°F on a food thermometer, and bring sauces, soups and gravies to a rolling boil.
That 3 to 4 day window decides where the leftovers night goes. Here’s how it plays out:
- Cook on Sunday, eat leftovers Tuesday or Wednesday. Thursday is already day four, so anything still in the fridge then should be eaten that night or frozen.
- Freeze half on day one. If a pot of chili makes six servings and you’ll only eat two again this week, freeze the rest the day you cook it, in single-meal portions.
- Write the date on the container. “Chili, Sun” on masking tape ends the “how old is this?” guessing.
Holiday cooking stretches this the most. After Thanksgiving dinner, the turkey, the stuffing and the gravy all start the same 3 to 4 day clock. Plan two simple leftover meals for the next two days, and freeze the rest in portions that same night instead of waiting until Sunday.
Step 6: Meal prep for beginners, once or twice a week
Meal planning is deciding what to eat. Meal prep is doing some of the cooking work ahead of time. You don’t need one to do the other, but a short prep session makes the busy nights much easier.
For a beginner, prep doesn’t mean cooking seven finished dinners on Sunday. Start with the jobs that slow you down on a weeknight:
- Wash and chop vegetables for the first three dinners.
- Cook a pot of rice, pasta or another grain.
- Marinate a protein so it’s ready to cook.
- Make one sauce or dressing.
- Portion snacks or lunches into containers.
An hour or two is enough to start. Set the time aside on your calendar, just like a dinner.
Because of the 3 to 4 day fridge window, one big Sunday session won’t keep food good all week. Split it in two: a main prep on Sunday for Monday to Wednesday, and a shorter one on Wednesday night for Thursday through Sunday. You can also batch cook on Sunday and freeze the servings for Thursday and later.
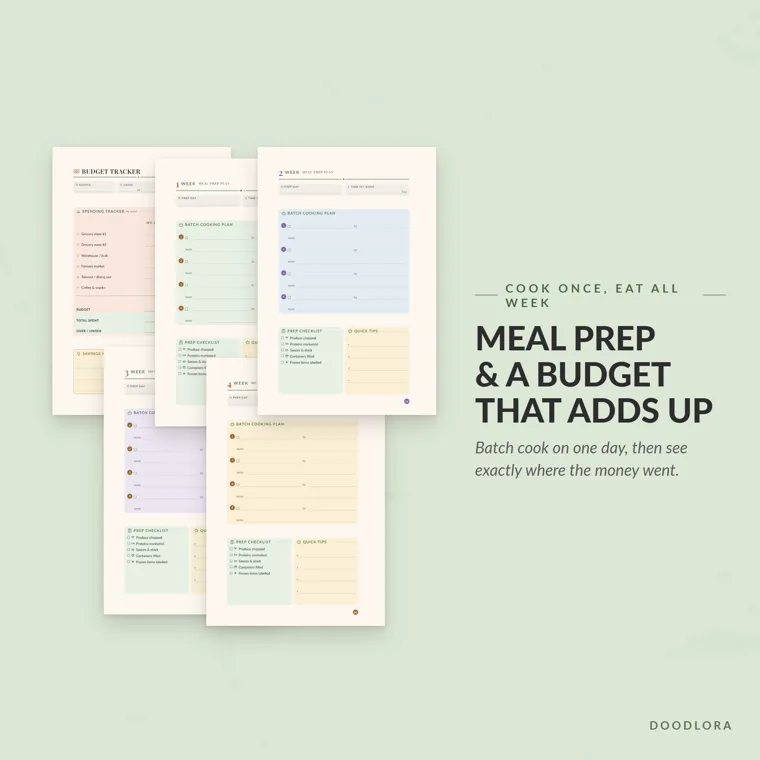
The meal prep page in our planner has a prep day, the hours set aside, four batch cooking lines and a prep checklist: produce chopped, proteins marinated, sauces and stock, containers filled and frozen items labeled. On the same page, there’s a box for quick tips you’ve picked up.
Step 7: Set up two backup meals for busy nights
Every plan meets a night it doesn’t survive. A late meeting runs over, a kid gets sick, or the chicken you planned to cook is still frozen solid. Decide now what happens then.
Pick two backup meals you can make from the pantry and freezer in about 15 minutes, and keep their ingredients in the house at all times. Some common ones:
- Pasta with a jar of sauce and a frozen vegetable.
- Scrambled eggs or an omelet with toast.
- A frozen portion of soup or chili from an earlier week.
- Quesadillas with canned beans and cheese.
When you use a backup, don’t throw out the planned meal. Move it to the next open night. If its ingredients won’t last that long, freeze them, or cook them the next day and save the backup for another week. Replace whatever you used on the next grocery trip.
What to do when meal planning doesn’t stick
Most people quit meal planning for one of a handful of reasons. Each one has a fix that doesn’t mean starting over.
The plan was too ambitious. If half the meals didn’t get cooked, plan fewer next week. Three dinners you actually make beat six you don’t. Add one more only after two weeks in a row go as planned.
Nobody wanted what you planned. Ask each person for one dinner they’d like this week, and write their name next to it. Keep a short note of everyone’s allergies and dislikes on the first page of your planner. A meal that gets refused is a meal you cooked for nothing.
You forgot to plan. Tie planning to something you already do, like the evening before your grocery trip. If the day slips by, repeat last week’s plan exactly. Repeating a plan still counts as planning, and it takes five minutes.
Food kept going bad. Shop your fridge before you write the list, buy produce for the first half of the week only, and freeze leftovers on day one. A “use it first” shelf in the fridge helps too.
It started to feel like a chore. Keep the meals that went well and drop the ones that didn’t. After a month, your rotation is basically your plan, and the weekly job becomes picking from it.
If you like seeing progress, keep score once the month is over. The monthly review page in our planner asks for the days you cooked at home, takeout meals, new recipes tried, total food spend, your best dish and your biggest flop. That’s enough to see whether the plan saved you anything. To decide what the grocery number should be in the first place, start with how to make a budget and give food its own line.
Printing a meal planner
Plain paper works fine for meal planning, but a printed planner saves you redrawing the days every week. If you print one at home, use these settings:
- Print at 100% or “Actual size,” not “Fit to page.”
- Print double-sided and flip on the long edge so the backs come out the right way up.
- Use 120 to 150 gsm (32 to 40 lb) paper if you’re using markers, so the ink doesn’t show through.
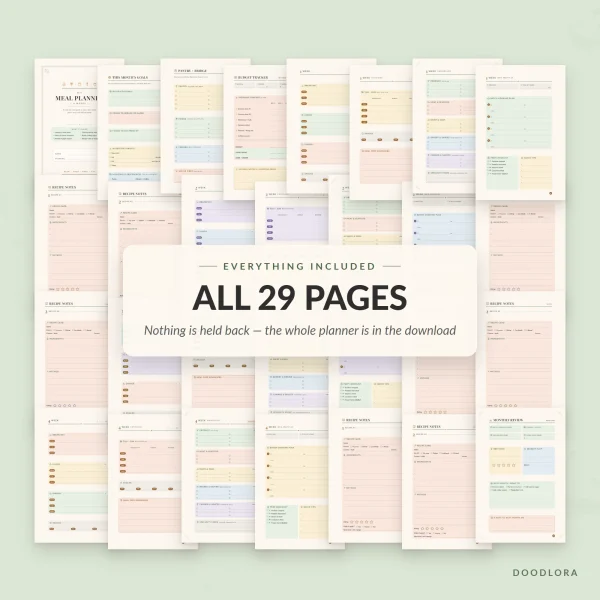
Our printable meal planner has 29 pages for four weeks. Three pages at the front cover the whole month: goals, the pantry and fridge check, and a budget tracker. Each week then gets the same six pages: two for the meal plan, a grocery list, a meal prep plan and two recipe note pages. The month ends with a review page. The download includes US Letter, A4 and a 6 x 9 in version for a print shop, plus a sheet of two blank recipe cards.
Meal planning sticks better when it sits inside a weekly routine you already keep. How to use a planner sets up a weekly review, and the meal plan can become one line of it.
Frequently asked questions
How many meals should a beginner plan each week?
Start with four or five dinners for a seven-night week, and leave the other nights for leftovers or eating out. Keep breakfast and lunch to a few repeat options until dinners feel easy.
What’s the difference between meal planning and meal prep?
Meal planning is deciding what you’ll eat and writing the grocery list. Meal prep is doing cooking work ahead, such as chopping vegetables, cooking grains or batch cooking a dish. You can plan without prepping, but prep makes busy nights faster.
How long do leftovers last in the fridge?
The USDA says leftovers can be kept in the refrigerator for 3 to 4 days or frozen for 3 to 4 months. Refrigerate them within 2 hours of cooking.
How long does meal planning take?
The first week can take 30 to 45 minutes, since you’re building your meal list and checking your kitchen from scratch. Once you have a rotation, a weekly plan and list often take 15 to 20 minutes. These are our planning estimates, not measured times.
Printables from this article
Related articles
Printable Planners
Budget Categories: Fixed, Variable and Easy-to-Miss Costs
Budget categories for singles, families and irregular earners, with what goes in each one, first-month estimates and the yearly costs that slip through.
Printable Planners
How to Use a Planner: Daily Plan, Weekly Review & Ideas
A step-by-step way to set up a paper or printable planner, use it for a few minutes a day, review each week and get back on track after skipped days.
Printable Planners
Wedding Planning Checklist: Timeline and Day-Of Checklist
A wedding checklist laid out by month, from the first budget talk to the thank-you notes, with who handles each job and the step that tends to slip at every stage.